
Creating product photos for ecommerce can become repetitive, especially when you need to fit stringent marketplace guidelines, such as Amazon. But if you have some creative freedom, why not add something special to make your shots stand out?
Smoke and fog fog in photography can add dramatic and moody effects, bringing intrigue to product shots for things like jewelry, kitchenware, food, electronics, and footwear. You can even use fog and smoke to bring an atmospheric edge to shots of models advertising clothing, makeup, or anything else.
Harnessing these elements may seem challenging at first, but there are a few ways you can create foggy scenes with a mix of specialty products and post-processing methods.
Let’s break this down into the two main phases of a shoot:
- During the shoot: play around with real-life physical effects
- After the shoot: how to edit smoke photos and add fog, smoke, and mist
Create a fog effect during the photoshoot
1. Dry ice
If you’ve ever wondered about what’s behind the spectacle of smoky dishes or cocktails in a restaurant, dry ice is likely the secret ingredient. It’s relatively inexpensive, widely distributed, and predictable regarding longevity. It also creates a thick, photo-worthy fog.

Keep in mind, dry ice can burn your skin just like frostbite if you’re not careful. It can cause instant injury, so always use protective gloves when handling dry ice.
One more note: Because dry ice is frozen carbon dioxide, you need to be in a well-ventilated area. This prevents gas buildup that could cause suffocation. In a restaurant or bar, exposure to it is brief, but for product shoots, extended time around dry ice fog means you need to take precautions.
You can find dry ice at party suppliers, ice distributors, and many grocery stores.
Here are some tips and ideas for using dry ice in your product photos:
- Set up a few test shots without the dry ice so you know what background, lighting, and product styling you want to use.
- Plan to buy the dry ice a few hours before your shoot. If you ordered it online, set up your scene and be ready to shoot soon after it arrives.
- Store your dry ice in an insulated cooler while leaving the lid slightly open for ventilation. Airtight containers and home freezers can cause it to build up and explore, so make sure you store it with precautions. Don’t forget to use protective gloves.
- Dial in your exposure and white balance. Dry ice disappears quickly, so get as close to perfect as possible before you add it to your shot.
- Use props. Depending on your product and composition, you can get a large bowl with hot water and add chunks of dry ice to it. The high temperature will activate dry ice to produce the thick smoke effect.

2. Colorful smoke bombs
Smoke bombs have become popular accents for gender reveals and weddings. But they can also infuse color and drama into model editorials or car and motorcycle product shots.

Think about the product you’re promoting and pick smoke bombs in colors that bring eye-catching contrast, or go for a complementary color scheme that suits your brand. There’s plenty of room for creativity.

When planning your shoot, aim for large, well-ventilated or outdoor areas, ideally with some natural protection from high winds. Think of large warehouses or other structural buildings, woodland, and empty tunnels. You can also get great photos in a natural clearing like a desert or on the beach if there are no heavy winds.
Amazon and Etsy sell smoke bombs, as do specialty shops that sell fireworks and flares. It’s a good idea to get a few extra smoke bombs in case of wind or if you want to experiment with different movements.
To get the most out of smoke bombs for your product shots:
- Check for any local permissions or guidelines you may need to comply with.
- Ensure your shoot location has good ventilation, or check the weather forecast and wind direction if you’re shooting outdoors.
- Run through the plan with your models so they hold the smoke bombs away from their faces and know the smoke bomb will get warm after pulling its pin.
- Set up your shots prior to shooting. Shooting with a narrow aperture, like f/8 or f/11, will get your subject and smoke in focus.
- Switch to manual focus and continuous shooting mode—this will help you avoid the camera struggling to focus, especially if the smoke travels around your subject.
- As soon as your model pulls the pin, start shooting! You’ll have around a minute, depending on your smoke bomb, to get your shots.
- When the smoke bomb gets too hot, ensure your model drops it on the ground. Alternatively, arrange a spot for the model to place the smoke bomb after pulling the pin.
- Don’t forget to pick up any smoke bombs and dispose of them properly.
Remember: No two shots will be the same because wind direction and speed, as well as the movement of your models, will change the intensity and shape of colorful clouds.
3. Fog machine
If you want simple and subtle fog effect for your product shots, a fog machine might be what you need. You can pick from small, portable fog machines that fit in your hand, or heavy-duty ones with lots of features. There are options for every budget.
Fog machines create a realistic fog that resembles smoke, but the downside is the initial investment. You’ll also need to purchase additional fluid to top it up. If you’re crafty, you can even make a DIY one. However, once you have the machine and the fluid, you’ll be making fog for a long time to come.

Photo by Anete Lusina
Much like smoke, you’ll notice this fog rises, so it might disperse pretty quickly. For a successful shoot with your fog machine, first set up your scene and composition. Get your lighting, white balance, and exposure pretty close to correct.
For the fog to show in the photo, make sure your background is slightly darker, like in the example below. With just a small fog machine, you can soon create cozy, warm scenes even if the food or drink has gone cold.

Depending on the type of fog look you’re going for, you may only have a short window for shooting, so get your setup ready before turning on the fog machine.
4. Water, a fish tank, and evaporated milk
This fog method involves an unusual mix of products, but the end result can be magazine-worthy. Borrowed from the film industry, this unique smoke method creates vivid, cloud-effect shapes. The downside? It requires quite a bit of preparation and shooting space.
You can use it for solid products that do well underwater, like glass or plastic containers for food, drink, or beauty products. Follow this tutorial to set it up.
Put these items on your shopping list:
- Fish tank: You’ll need to fill it with water and submerge your product inside.
- Substance to inject: The tutorial suggests using evaporated milk, but other options include paint or ink.
- Syringe: A 100ml syringe will have a nozzle that’s just the right size to inject the substance into the tank.
- Food coloring: If you want to add color to the “clouds,” you can mix food coloring with the evaporated milk.
- Hot glue gun: To avoid your products moving or tipping over in the water, you can hot glue them to the base of your fish tank and later remove them with a swab of isopropanol.
- Camera trigger: Necessary to fire your camera’s lights while letting you use one hand to hold the syringe and inject the substance.
5. Canned fog
If you only need a subtle fog effect, you can get a can of fog. It’s as simple as grabbing an aerosol can and spraying it in the room you’re shooting. The spray can releases a fine mist of particles into the air, creating a hazy or steamy effect that lasts quite some time.
It’s a quick, safe, and simple way to add a cinematic and ethereal feel to your photos, whether you’re photographing models or products. The best part is it’s compact, so there’s no lengthy preparation. Indoors, you’ll have more time to work with the fog before it disappears, but you can use it outdoors, too—just make sure you stock up with a few cans.
Light is your friend when working with fog in a can. Whether you use windows or artificial light, fog in a can will diffuse the light, making it softer and flattering. Contrasting the background will help it show more prominently in photos, but it’s not a must—you can still add layers of atmosphere to most backgrounds.
Add fog to your photos after the shoot
- Add a fog effect in Photoshop
- Use a Brush in Lightroom
- Download smoke effect overlays
- Use a simple mobile app
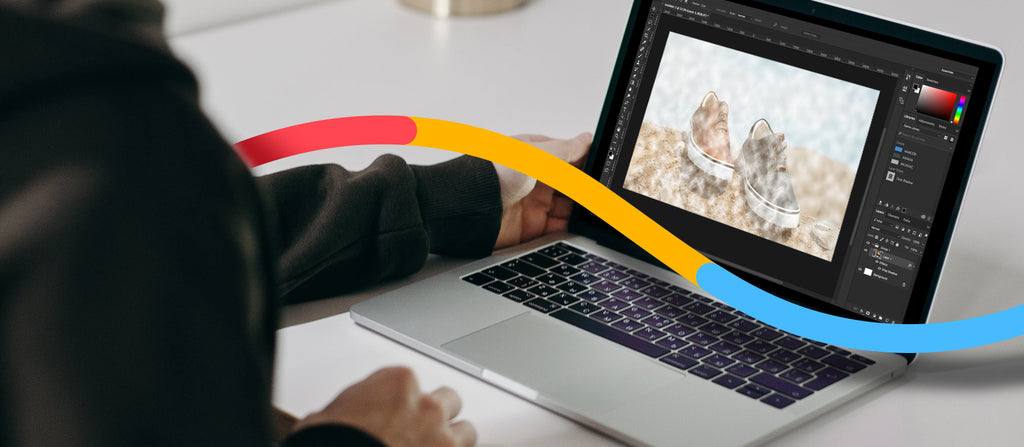
6. Add a fog effect in Photoshop
There are a few different approaches to how to add fog to a photo in Photoshop, but this is probably the quickest way to add cloudy puffs of fog to your image because it employs a filter already in Photoshop.
First, complete your usual photo edits. When you’re done with white balance, exposure, contrast, and other adjustments and creative edits, create a new layer in Photoshop and move that layer to sit on top of other layers in your image.
To create a new layer in Photoshop, go to Layer > New > Layer… from the dropdown menu at the top of the application window.

You can name the layer “Fog” if you like—this makes it easier to see which layer you’re working on.

Next, change the foreground color to white and your background color to black in your Toolbar.

With the Fog layer selected, go to Filter > Render Clouds. Your layer will appear as a cloud pattern all over.

Next, go to your Layers panel and look for the small dropdown menu that controls the Blending Mode (it will say “Normal”). Make sure your Fog layer is still selected. Then, from the dropdown menu, choose Screen. This way, only the white portion of the rendered clouds will be visible in your image.

In the next few steps, we’ll use the blur functions to make the clouds more diffused in certain portions of the photo. Use the Elliptical Marquee Tool in the Toolbar to draw a broad ellipse around the object in your photo that is the source of the fog you're creating. In this example photo, steam would be coming from the coffee cup, so we’ll draw a marquee around the cup.
Next, choose Select > Inverse or type SHIFT+CTRL+I (SHIFT+COMMAND+I on a Mac) to select the inverse.
Once you have the inverse created, choose Select > Modify > Feather… from the dropdown menu at the top of the application window.

In the pop-up window, choose a large number, such as 200, to indicate the feather radius.
With the Fog layer still selected, choose Filter > Blur > Gaussian Blur… from the dropdown menu and set the blur radius to somewhere between 20 and 45.

Next, distort the fog effect to make it look as if steam is wafting from the mug. With the Fog layer still selected, choose Edit > Transform > Warp from the dropdown menu at the top of the application window.
Using your cursor, drag portions of the warp field to create a wafting effect around the source of the fog or steam. This also helps to introduce randomness into the fog pattern.

Finally, you need to remove most of the visible Fog layer. In this case, you just want a bit of steam to waft out of the mug.
Create a layer mask in the Fog layer by clicking the Layer Mask icon at the bottom of the Layers panel (it looks like a black rectangle with a gray circle inside of it). A Layer Mask will appear within your Fog layer.

This next step requires you to use your artistic skill and judgment. Choose the Brush tool and select a soft round brush (your brush’s hardness should be set to 0%). Change the foreground color to white, then paint over and around your subject to mask the portions of your image where you don’t want the fog effects to show.
In the example image, this means we’ll be “painting” a mask over almost all of the image except the areas just around the top and sides of the mug.

Want to add more? Create a new Layer. Then, select the Brush tool and choose a spatter brush from the Brushes panel.
In the new layer, paint in areas where you wish to see more fog, steam, or smoke. Then, apply a blur to the layer by choosing Filter > Blur > Gaussian Blur…
If you want to learn how to create your own custom fog brush or add light rays, take a look at this tutorial.
7. Use a Brush in Lightroom
If you want a simple foggy look, you can use Lightroom without using advanced Photoshop techniques.
First, open your image in Lightroom, click on the Masking panel, and select Brush.

Adjust your brush size using the [ and ] keys and paint over the parts of your image you want to cover in fog. Click O to see which parts of your photo you’ve already covered, and use the Brush panel to adjust its size, feather, flow, and density.

Then, scroll down in the panel to your right to find the Dehaze slider and move it to the left. The image areas you covered with the brush will appear softer and lighter.

You can also add several layers by clicking Create New Mask in the Masks panel and selecting Brush again. Doing so gives you the precision to paint over specific parts of the photo you may want to adjust using not just the Dehaze slider but also others like Brightness and Clarity.
8. Download smoke effect overlays
Similar to using brushes in Photoshop, you can download free and paid smoke and fog effect overlays. You can find them by searching on Google, Etsy, stock websites, and marketplaces like Creative Market.
Apply them on a separate layer over your photo and experiment with different blending methods and opacity levels. Then, fine tune using layer masks for extra precision. You’ll find most creators sell bundles of different overlays, so you’ll have plenty of different ones to choose from.
9. Use a mobile app for simple smoke edits
If you’ve captured a great image with your smartphone and you want to add a little mystery, but you don’t want to import it into Photoshop, you can use an app. Check out the following:
- Lens Distortions (Android and iOS)
- Smoke effect Photo Editor (Android)
- Pixelied (browser-based)
Tips and tricks for adding smoke and fog to product photos
Now that you know a couple of methods to create fog, here are a few general tips to remember no matter which tutorials or methods you choose.
Here are some DOs:
- Exercise caution when working with any smoke or fog devices, especially indoors.
- Test your photoshoot idea ahead of time to make sure your smoke method will not damage products and will work with your photoshoot background.
- Select a contrasting background. Black or other darker backdrops will show off your fog the best.
- Use directional light—light the edges, light from above, whatever it takes to create the mood you want to achieve.
- Edit after the shoot so you can increase color saturation and smoke intensity to your liking.
- Shoot in RAW, if possible, so you get the most image data available for post-production.
- Check your images as you go. If autofocus isn’t getting the job done, switch to manual and pick the perfect point to focus on, such as the subject’s eyes or a central point of a product.
- Have a tripod handy if you need a precise manual focus set on products.
- Shoot tethered or check the back of the camera screen as you go. Just like with focus, see if you’re happy with the results. And if you’re not, then be prepared to change up your exposure, aperture, or shutter speed. You may need to add exposure compensation to create a more dramatic fog effect.
And here are some DON’Ts:
- Use a white or light background. The fog likely won’t show up against it. If you need a white background, you can always send it to our professional editors to do it for you.
- Use on-camera flash. The fog will reflect your flash, and you won’t get the end result you want.
- Rely on the colors you get straight out of the camera. Fog tends to neutralize color and make everything less vibrant unless you use colorful smoke bombs.
- Depend on autofocus. With fog in the picture, your camera might not choose the correct focal point. No one wants blurry, out-of-focus products.
- Rely on your exposure meter, either. Fog can trick your camera and create disappointing results.
Why create a fog or smoke effect for product photos?
You may wonder why pick such a temperamental visual for your product shots. After all, you can’t exactly capture or contain it. Within seconds, it will disappear before your eyes.
But when you see the result, you may get convinced it’s worth giving it a shot. Consider the below photo by Noughty, showcasing the brand’s premium non-alcoholic wine. Now picture the same two bottles on a simple wooden tabletop. It wouldn’t give the same level of drama, mood, and vibrancy without the soft pastel clouds.

Fog can also add a mystical quality and a storytelling element to your images. If you’re shooting something like crystal balls or healing gems, this can be an obvious fit—like in the example below. But even if your subject is less than magical, fog can still lend a dreamy or moody quality.

Additionally, the products you photograph are 3D, but the photos themselves are 2D. Fog can give your flat, distorted composition much-needed depth and dimension, similar to shadows.
Below are just a few ideas where a fog effect can add visual interest to your product photos:
- Elevate luxury products shot on simple backgrounds, such as fragrances, makeup, watches, jewelry, and drinks
- Add atmosphere or color to outdoor and indoor model shots
- Create a cozy feel for hot food and drink photos
- Add drama to car and motorbike photoshoots
Fog, mist, smoke: what’s the difference?
From an atmospheric perspective, fog, mist, and smoke are different. Mist is tiny water droplets suspended in the air. It's usually light and mostly transparent and evaporates quickly.
Fog is also composed of tiny water droplets, but it’s denser and heavier, so the “clouds” of fog last longer. Smoke is a collection of small, solid particulates emitted when something burns, like in the product lifestyle shot below.

From a photographic perspective, they’re different, too. Mist doesn’t give quite the effect that fog does, and it’s harder to recreate it in the studio.
Fog tends to stay low and disperse horizontally, evaporating at the edges. Smoke, on the other hand, travels upward from its source—it’s more difficult to wrap around a subject because of this. You can use smoke in photos, but because of how it travels, it’s less predictable than fog.
There are a few ways you can add fog to your images. Choose the right one for your situation or play around and test them all!
Add fog and let your photos come alive
Fog and smoke effects can elevate even the simplest product photos—you can create ethereal, moody, and eye-catching product shots that stand out against the rest. In the world of ecommerce, that’s a bonus.
Don’t be afraid to experiment with different fog techniques until you find the right atmosphere for your product. And if you need a hand editing them to perfection, our skilled retouchers are ready to help.

Polish up your product shots with pro retouching from 79¢ per image
Learn moreHow to add fog to a photo FAQs
How do you add foggy effects to photos?
You can add fog effects to photos by using dry ice, fog machines, smoke bombs, or photo editing apps like Photoshop and Lens Distortions. Each method creates a unique fog look, so you can get creative with combining some of the techniques.
How do you add fake fog in Photoshop?
Photoshop lets you add fake fog using different methods. You can apply fog overlays and adjust blending mode and opacity. You can also use the Clouds filter to create a fog pattern, then distort and mask it. Or customize brushes to paint in unique fog effects.
How do you add fog to a photo in Lightroom?
To add fog to a photo in Lightroom, use the Adjustment Brush to paint over areas where you want to add fog. Then, move the Dehaze slider to the left and adjust it to your liking. Try also decreasing the Texture or Clarity slider to soften the fog.
How do you make fog effect?
You can make a fog effect in photos using dry ice, fog machines, smoke bombs, aerosol fog spray, or editing apps like Photoshop and Lightroom. Using overlays and custom brushes, you can add a realistic-looking fog effect to your photos.
How do I make an image look hazy in Photoshop?
To make an image look hazy in Photoshop, add a Curves adjustment layer and lower the midpoint while raising the outer points. Then, apply Gaussian Blur, set blending to Soft Light, and reduce opacity. You can also download and add haze overlays to blend them with your photo.


