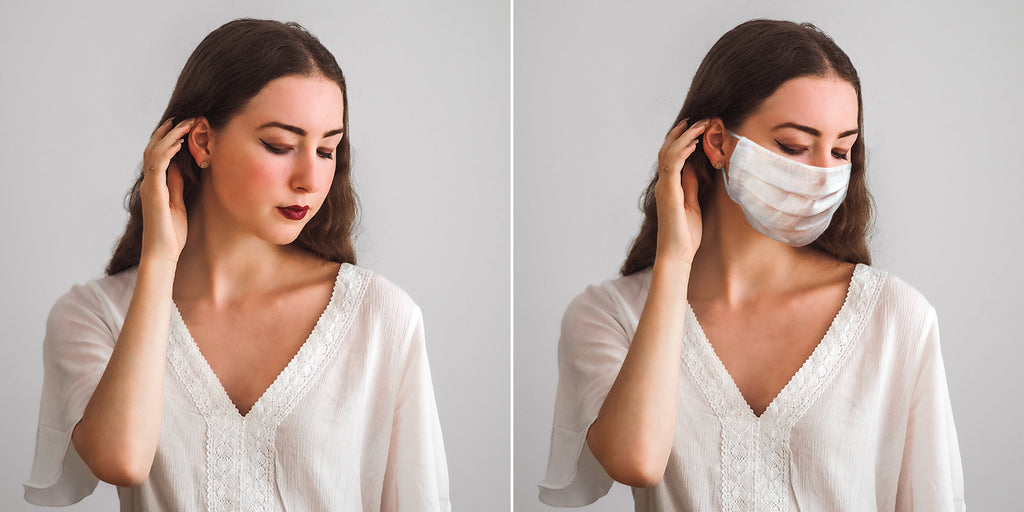
More and more brands are choosing to have models wear masks in their lifestyle and product photography. Rather than re-shooting all of your images (which is costly, time-consuming, and potentially dangerous in this pandemic environment), you can modify your existing images digitally. In this tutorial, we’ll show you how to put a mask on a face in Photoshop.
Step 1: Choose an image of a face mask
To add a realistic face mask to your photos, you’ll need a high-quality image of a face mask. The face mask photo needs to be shot head on — no side views or three-quarter views — and photographed as it would appear on a face in real life.
If shooting your own face mask photo, you can use a mannequin. If you can’t shoot your own, license an image of a face mask online. We found this great image on Unsplash:

Photo by Denis Jung on Unsplash
Thankfully, masks come in all shapes and colors, so you can begin with an image of a white mask and then adjust the color to match the model’s clothes, your product, and other elements in the frame.
If you’re here to learn how to use Photoshop to add a medical mask on a face, simply follow these instructions but use a medical-grade mask image instead.
Pro tip: Regardless of whether you’re using the image on print or the web, it’s important to use a high-quality face mask image. Get the highest resolution available so it won’t look blurry when you add the face mask to your other photos.
Step 2: Cut out the face mask from the photo
Select the Pen Tool from the Toolbar that sits by default at the left-hand side of your Photoshop application window.

Ensure the Pen Tool’s settings at the top of the application window are set to Path, and the Path Operations are set to Exclude Overlapping Shapes.

Using the Pen Tool, draw a path around the face mask, but don’t draw around the mask’s straps. If you need a little help using the pen tool, you can check out our detailed Pen Tool tutorial.

Note: As you draw the path around the mask, you’ll create a Work Path in your Paths panel.
Once you’ve created a path around the perimeter of the face mask, remember to close the path. Then save the path in the Paths panel by double clicking on the Work Path and choosing Save Path. You can rename the path here too.

In your Paths panel, with your new path selected, Click on the Selection icon at the bottom of the panel to create a selection of the face mask.

Now, your face mask should be selected.
Copy the face mask selection by typing CTRL+C (COMMAND+C on a Mac), or by choosing Edit > Copy from the menu at the top of the application window.

Step 3: Paste the face mask onto model and adjust the mask
Open the image that you want to add the face mask to. Paste the face mask into the image by typing CTRL+V (COMMAND+V on a Mac) or by selecting Edit > Paste from the drop-down menu at the top of the application window.
Before you position the mask, make sure it’s large enough to cover the model’s face without needing to be resized. You can always make the mask smaller, but if you have to enlarge the mask to make it work, it can look blurry or pixelated and ruin your realistic effect. If the mask is smaller than the model’s face, you should reduce the size of the model’s photo instead of enlarge the image of the mask.

Once the face mask is placed in the photo, select the layer that contains the face mask and rename it Face Mask.
WIth the layer still selected, use the Move tool to position the mask over the model’s face. Then choose Edit > Transform > Scale to reduce the size of the mask to match the size of the model’s face. Hold the SHIFT key while dragging the edges of the mask with your cursor to resize the mask proportionately.

Once you’ve resized the mask, choose Edit > Transform > Warp to adjust the edges of the mask to fit the angle and shape of the model’s face.

The Warp function is super versatile. You’re not limited to adjusting just the edges of the image. With your cursor, grab the area of the mask that should appear over the model’s nose, and move it to the correct location.

After the nose area is correctly in place, use the handles on the sides of the mask to adjust the rest of the mask and mold it to the model’s face.

Step 4: Add straps to the face mask
Create a new layer typing SHIFT+CTRL+N (or SHIFT+COMMAND+N on a Mac) or by choosing Layer > New > Layer from the drop-down menu at the top of the application window.
Name the new layer “Straps.”

Choose your Brush Tool from the Toolbar at the left of the screen. Then, in the Options bar at the top of the application window, click on the number indicating the brush size. Here, you’ll want to adjust the Hardness to 100%.

The type of brush selected needs to be a round brush, but it can be soft or hard. The size of the brush depends on the size of your image. If you hover your cursor over the model’s face, you’ll see a circle indicating the brush’s circumference. The brush should be about the same width as the face strap you want to create.
(If you don’t see a circle when you hover your cursor over the image, make sure you have the brush tool selected and CAPS LOCK is off.)
In your Toolbar, double-click on the foreground color to bring up the Color Picker window. Choose the color white, or type “FFFFFF” in the field next to the “#.”

Click OK.
With your Straps layer selected, using the Brush tool, carefully draw any edges of the mask’s straps that would be visible on the model.

If you want the straps to appear from behind the mask, move the “Straps” layer to just underneath the Face Mask layer.
Once the straps are drawn, use the Eraser tool to refine the areas where the mask meets the model’s ears or hair.

You can use the same Options for the Eraser Tool as you did for the Brush Tool to adjust the size and hardness of your Eraser.
Step 5: Add shading to the face mask and straps
The last and final step to add a face mask to a photo in this online tutorial is to add realistic shading to your mask so that it matches seamlessly with your original photo.
Even though the mask we are using is white, the lighting of the face mask is a blueish white, whereas the lighting of the model is more yellow. We can adjust for this slight difference using the Color Balance window.
With your Face Mask layer selected, choose Image > Adjustments > Color Balance… from the dropdown menu at the top of the application window.

In the Color Balance pop-up window, adjust the sliders for shadows, midtones, and highlights until the color of the mask matches the light color of your model photo.

Using Color Balance takes a bit of trial and error so feel free to play with the toggles until you like what you see. However, keep the adjustments subtle if you don’t want to completely change the color of the face mask.
Once you’re satisfied with the Color Balance settings, click OK.
Next, select the Burn Tool from the Toolbar.
Just like you adjusted the size and hardness of the Brush Tool and the Eraser Tool, you can adjust the size and hardness of the Burn Tool in the Options bar at the top of the application window. The size of the tool depends on the size of your image. You’ll want to set the Hardness to 0%.
With the Burn Tool, you can select whether you want to darken areas of the image that are light (highlights), midtone, or dark (shadows). Start by selecting Highlights from the Options bar, and set Exposure to 10%.

With your cursor, “paint” over areas of the face mask that would be in shadow if the mask had been photographed on the model. Specifically, you can darken areas under the chin, areas that fall next to visible shadows on the model’s face, and areas that fall next to or under the hairline.

Be careful not to go too dark with the Burn Tool. If you need less drastic changes, lower the Exposure.
If you have areas that you need to lighten rather than darken, you can use the Dodge Tool instead of the Burn Tool. You can adjust the settings of the Dodge Tool just as you did with the Burn Tool.

Move into the Straps layer and, with the Burn Tool, darken areas of the straps that would fall in shadow. Again, look at the original photo of the model for clues and make sure you darken areas of the straps that fall under the ears and next to the hairline.
Not happy with the shadows in your shot? You can learn how to add a natural shadow in Photoshop to fix them in post-processing.
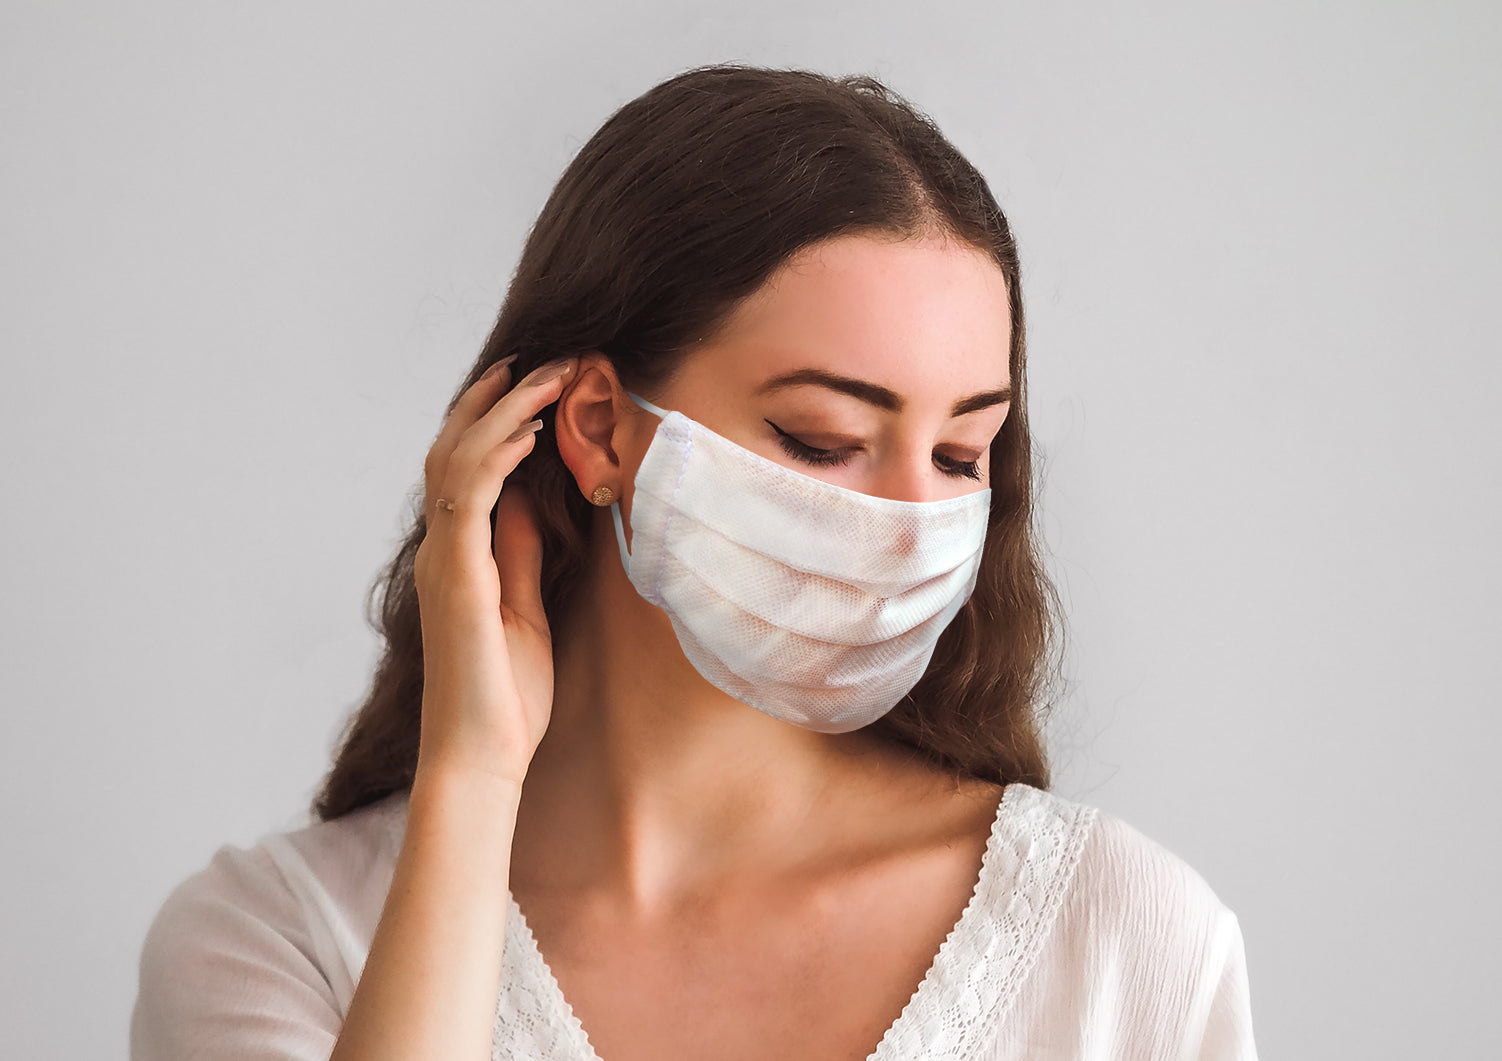
There you have it! You don’t need to reshoot all your product photos to make them pandemic-appropriate. And since you saved your path on your original Face Mask image, you can reuse the same mask on multiple model and product images.