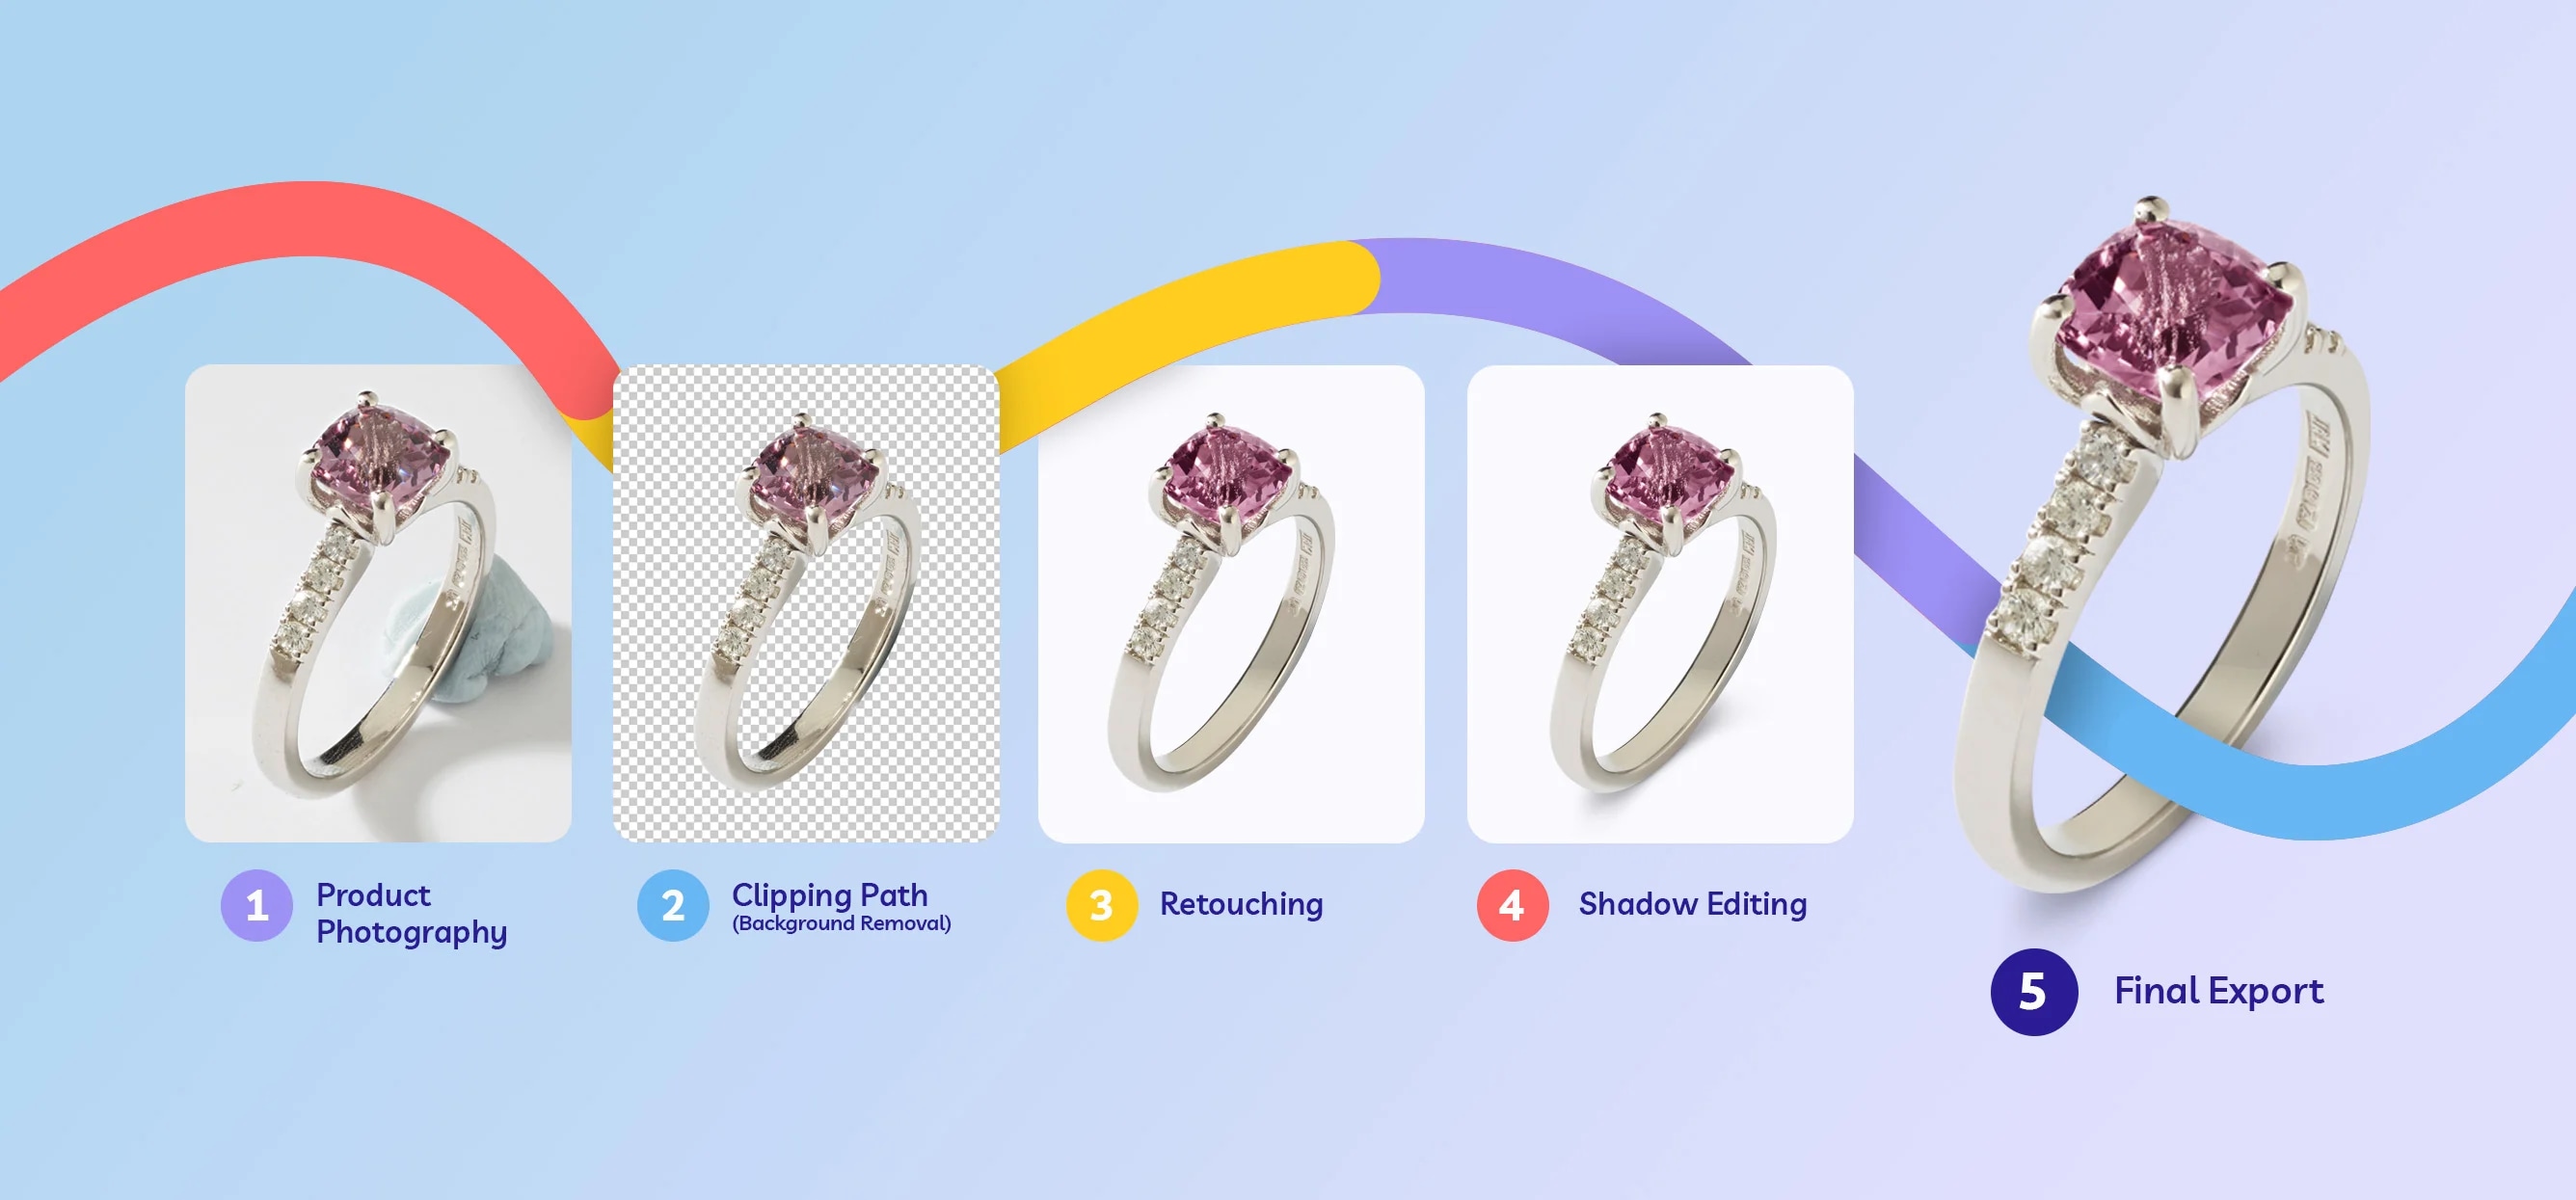


Product Photo Retouching Checklist: What to Fix Before Images Go Live
A practical product photo retouching checklist for ecommerce teams. Learn what to fix before images go live, from dust and scratches to color accuracy, shadows, and export settings.

By
In this article
- What Is Product Photo Retouching?
- Why You Need a Product Retouching Checklist
- 1. Remove Dust, Spots, and Scratches
- 2. Clean Up Wrinkles and Fabric Creases
- 3. Fix Distracting Reflections
- 4. Check Color Accuracy
- 5. Refine Backgrounds and Cut-Out Edges
- 6. Add or Refine Product Shadows
- 7. Check Crop, Alignment, and Sizing
- 8. Review Skin, Hair, and Model Details
- 9. Export in the Right Format
- 10. Compare the Whole Batch Before Upload
- Product Photo Retouching Checklist
- When to Outsource Product Photo Retouching
- Get Product Images Ready Before They Cost You Sales
- Frequently Asked Questions
A product photo can look fine at first glance and still fail when it goes live.
A speck of dust that disappears in the studio preview becomes obvious on a zoomable product page. A small color shift makes a jacket look warmer than it really is. A cut-out with no shadow makes the product feel like it is floating. None of these issues look huge on their own, but together they make an ecommerce image feel unfinished.

That is why product photo retouching is not just about making images look cleaner. It is about making sure every image is accurate, consistent, and ready to sell.
This checklist walks through what to check before product images go live, from dust removal and scratch cleanup to reflection removal, color correction, shadows, crop consistency, and final export.
If you are also comparing service levels and budgets, our guide to photo retouching costs breaks down what different types of retouching typically cost.
What Is Product Photo Retouching?
Product photo retouching is the process of cleaning up and refining product images after a shoot.
It can include removing dust, scratches, wrinkles, reflections, background distractions, color casts, and other imperfections that get in the way of a clear product presentation.
The goal is not to make the product look like something it is not. The goal is to show the product at its best while keeping the final image accurate and believable.
For ecommerce, that balance matters. Shoppers need polished images, but they also need images that match what arrives at their door.
Why You Need a Product Retouching Checklist
When you are editing one hero image, it is easy to zoom in and catch the details.
When you are preparing 50, 500, or 1,000 ecommerce images, it gets harder. Small issues slip through. Edits become inconsistent. One product has a natural shadow, the next has none. One image is slightly warmer than the rest. One cut-out edge is clean, another still has background residue.
A checklist helps prevent that.
It gives photographers, ecommerce teams, and retouchers a shared standard for what “ready to upload” actually means.
For larger catalogues, this kind of consistency becomes even more important. Our guide to scaling ecommerce photo retouching explains how brands can build workflows that hold up across high-volume image production.
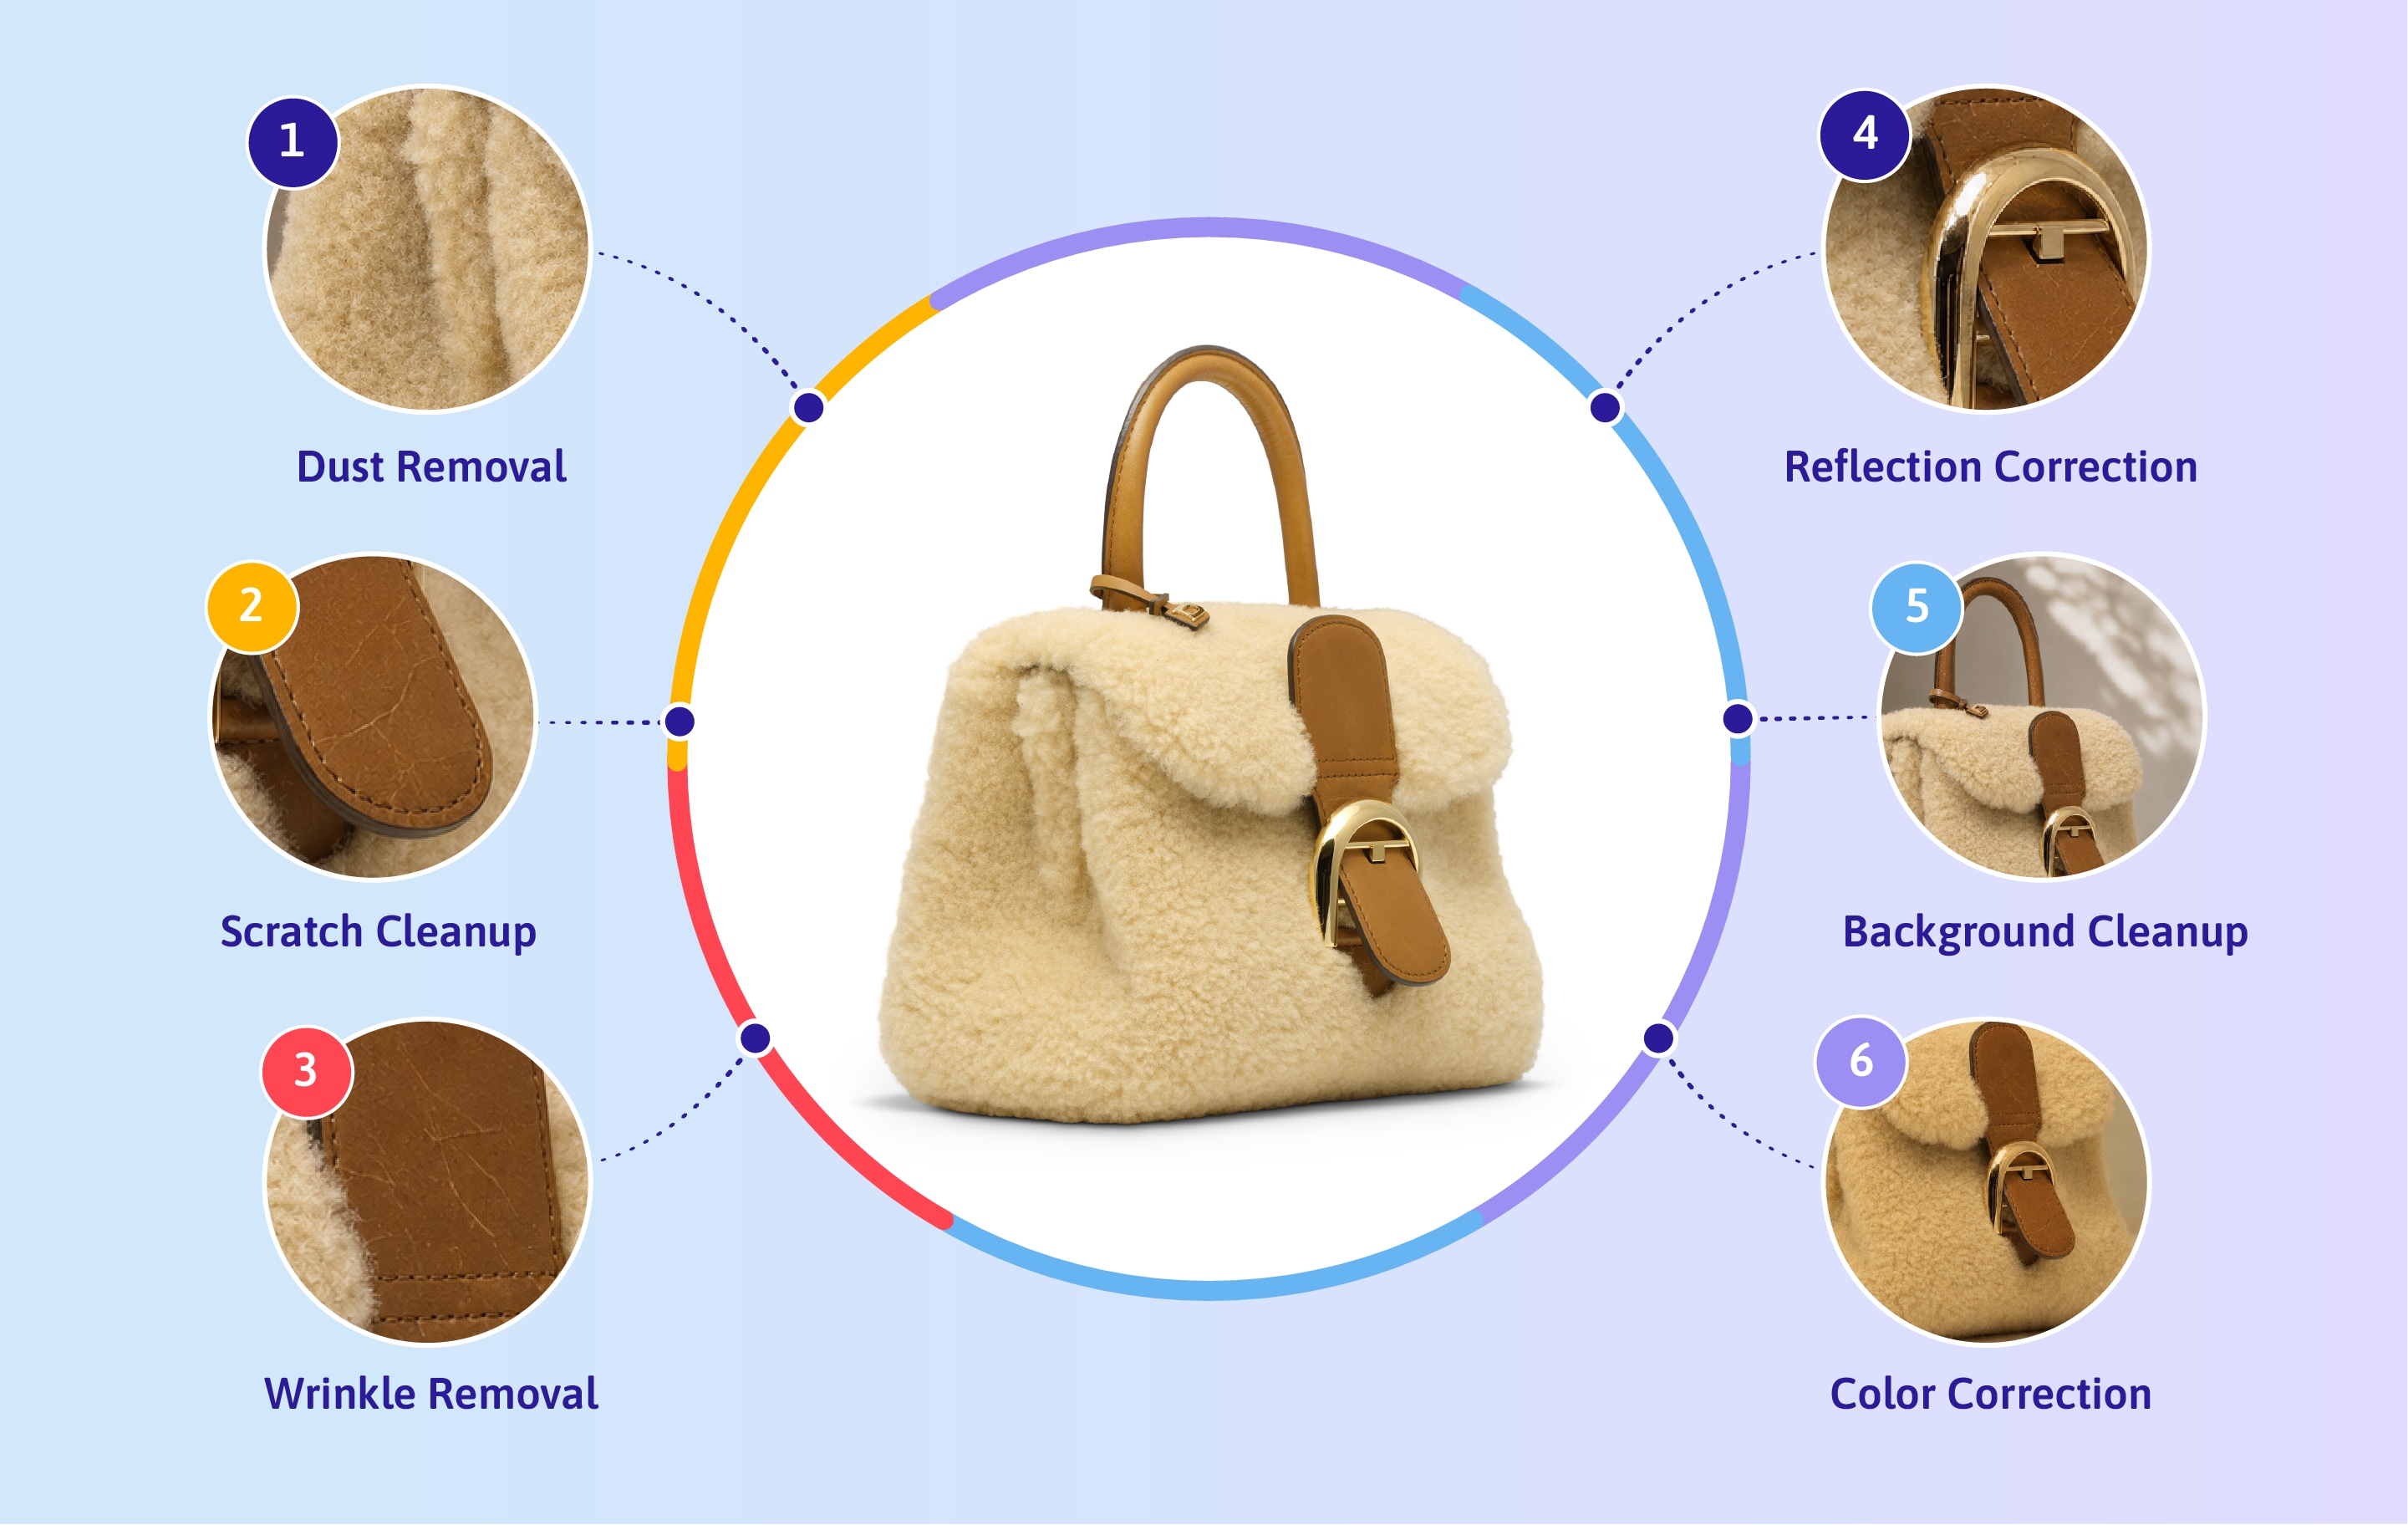
1. Remove Dust, Spots, and Scratches
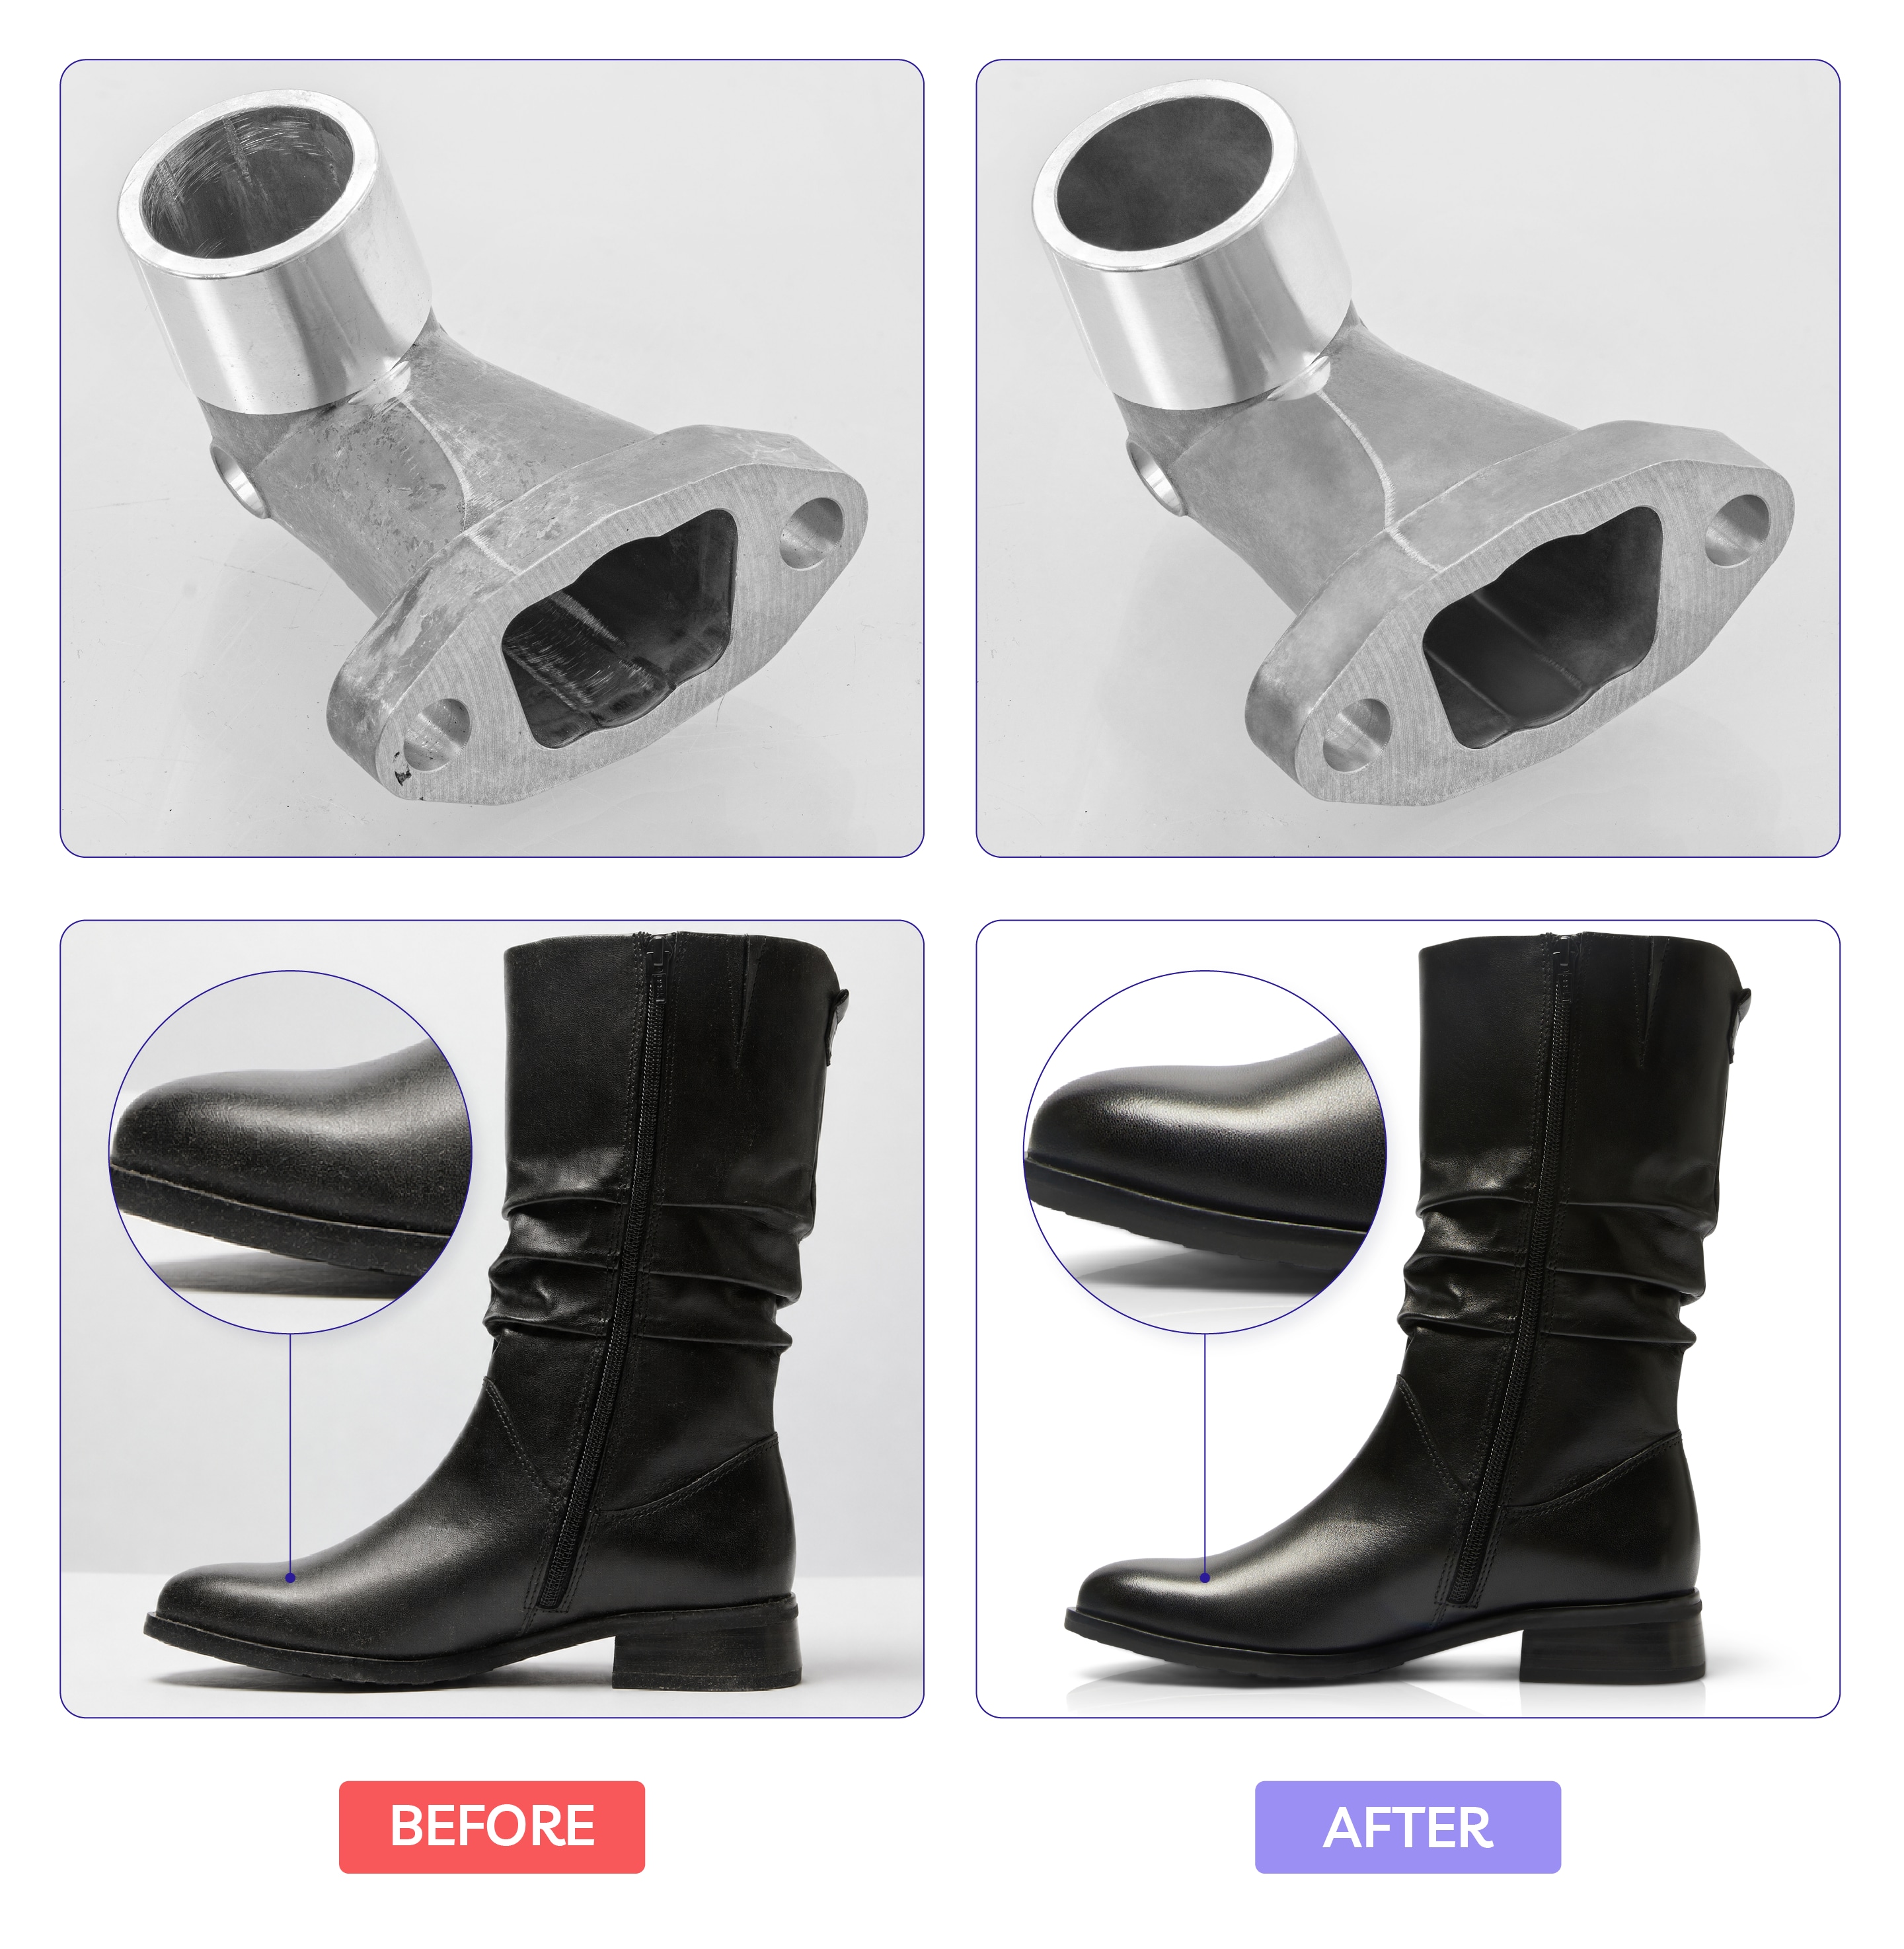
Dust and scratches are some of the most common product photography problems.
They show up on packaging, jewelry, electronics, sunglasses, cosmetics, shoes, and almost anything photographed under bright studio lighting. Even a product that looks clean in person can reveal small marks once photographed at high resolution.
Before an image goes live, check for:
- Surface Dust: Especially on dark or matte surfaces where specks pop.
- Fabric Lint: Distracting fibers on apparel that make clothes look “unwashed.”
- Handling Marks: Scratches, scuffs, or dents caused during transit or setup.
- Fingerprints: Oils on glossy items like jewelry, sunglasses, or electronics.
- Background Specks: Small sensor spots or marks on the “seamless” backdrop.
Why it matters: Simple dust, spot, and scratch removal is one of the most basic forms of product image retouching, but it still matters. Ecommerce shoppers rely on the zoom tool to inspect quality. If they zoom in on a “premium” watch and see a fingerprint or a hairline scratch, the perceived value of the product drops instantly. Clean surfaces signal a brand that cares about the details.
2. Clean Up Wrinkles and Fabric Creases
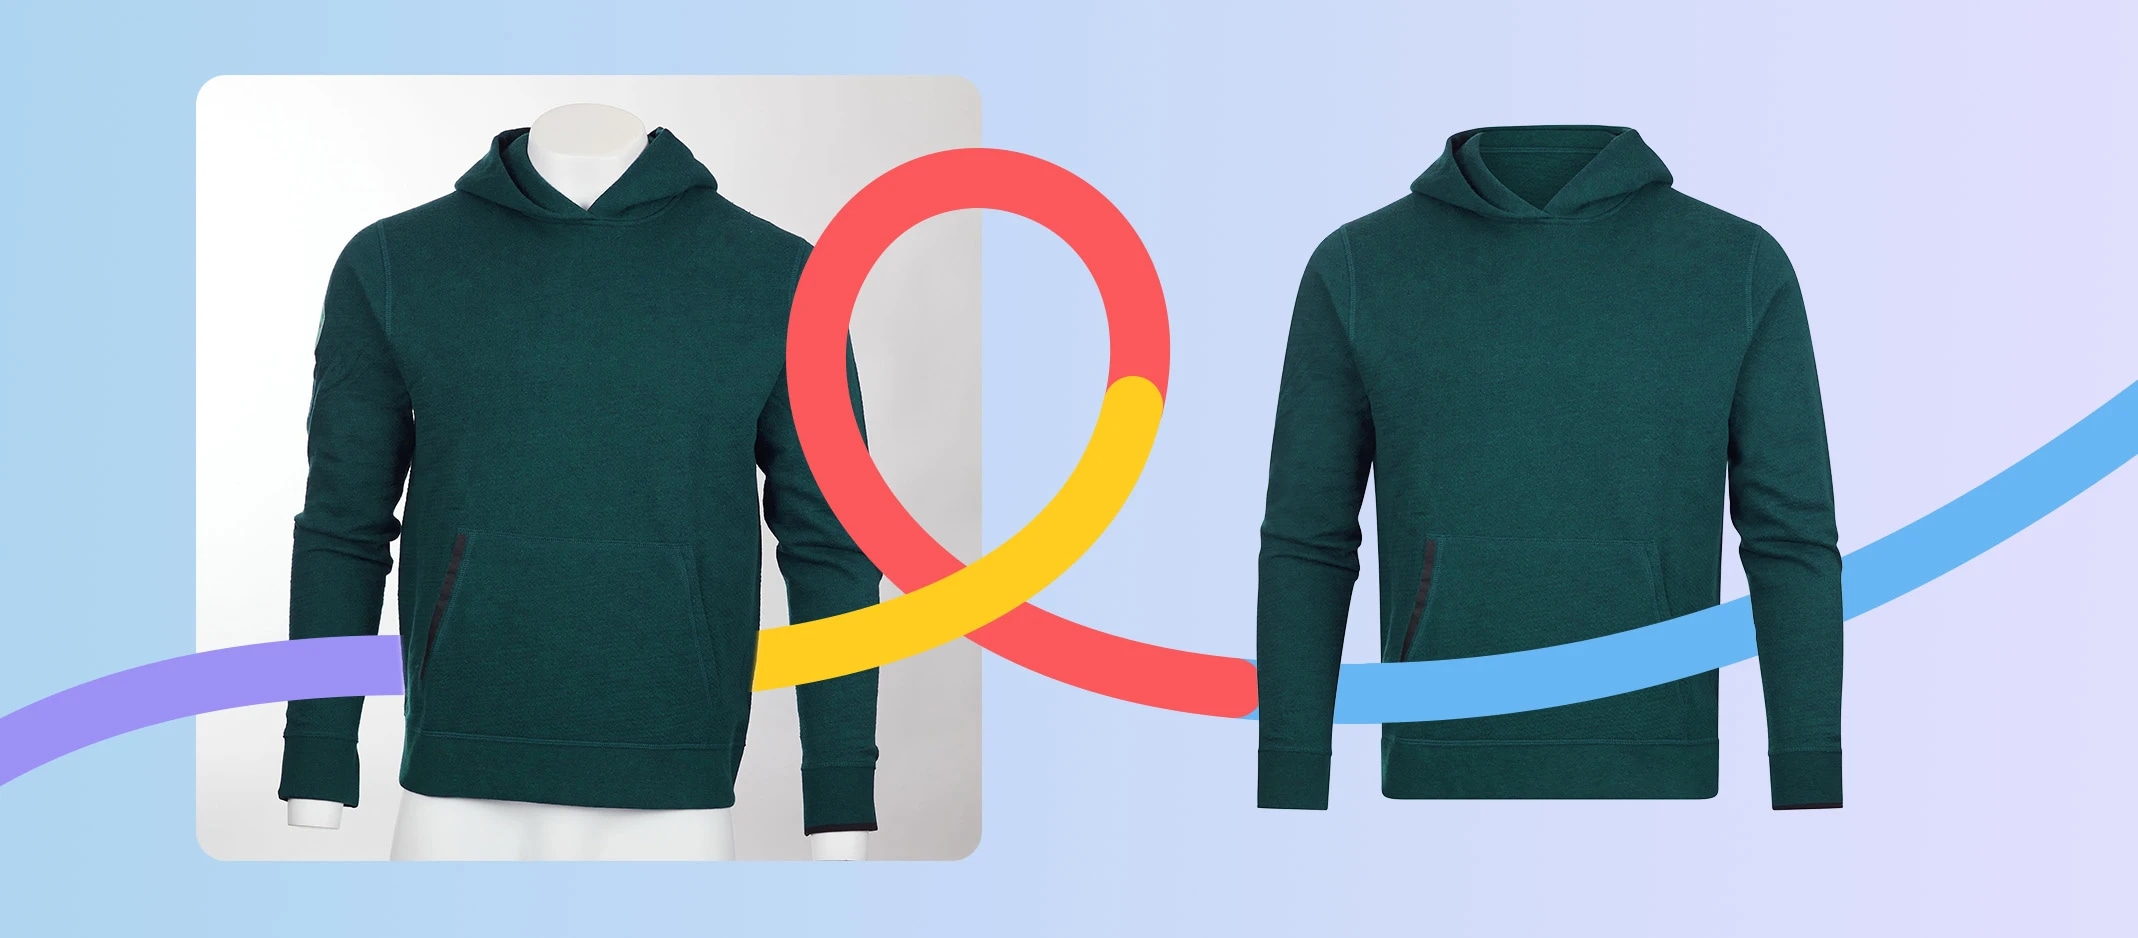
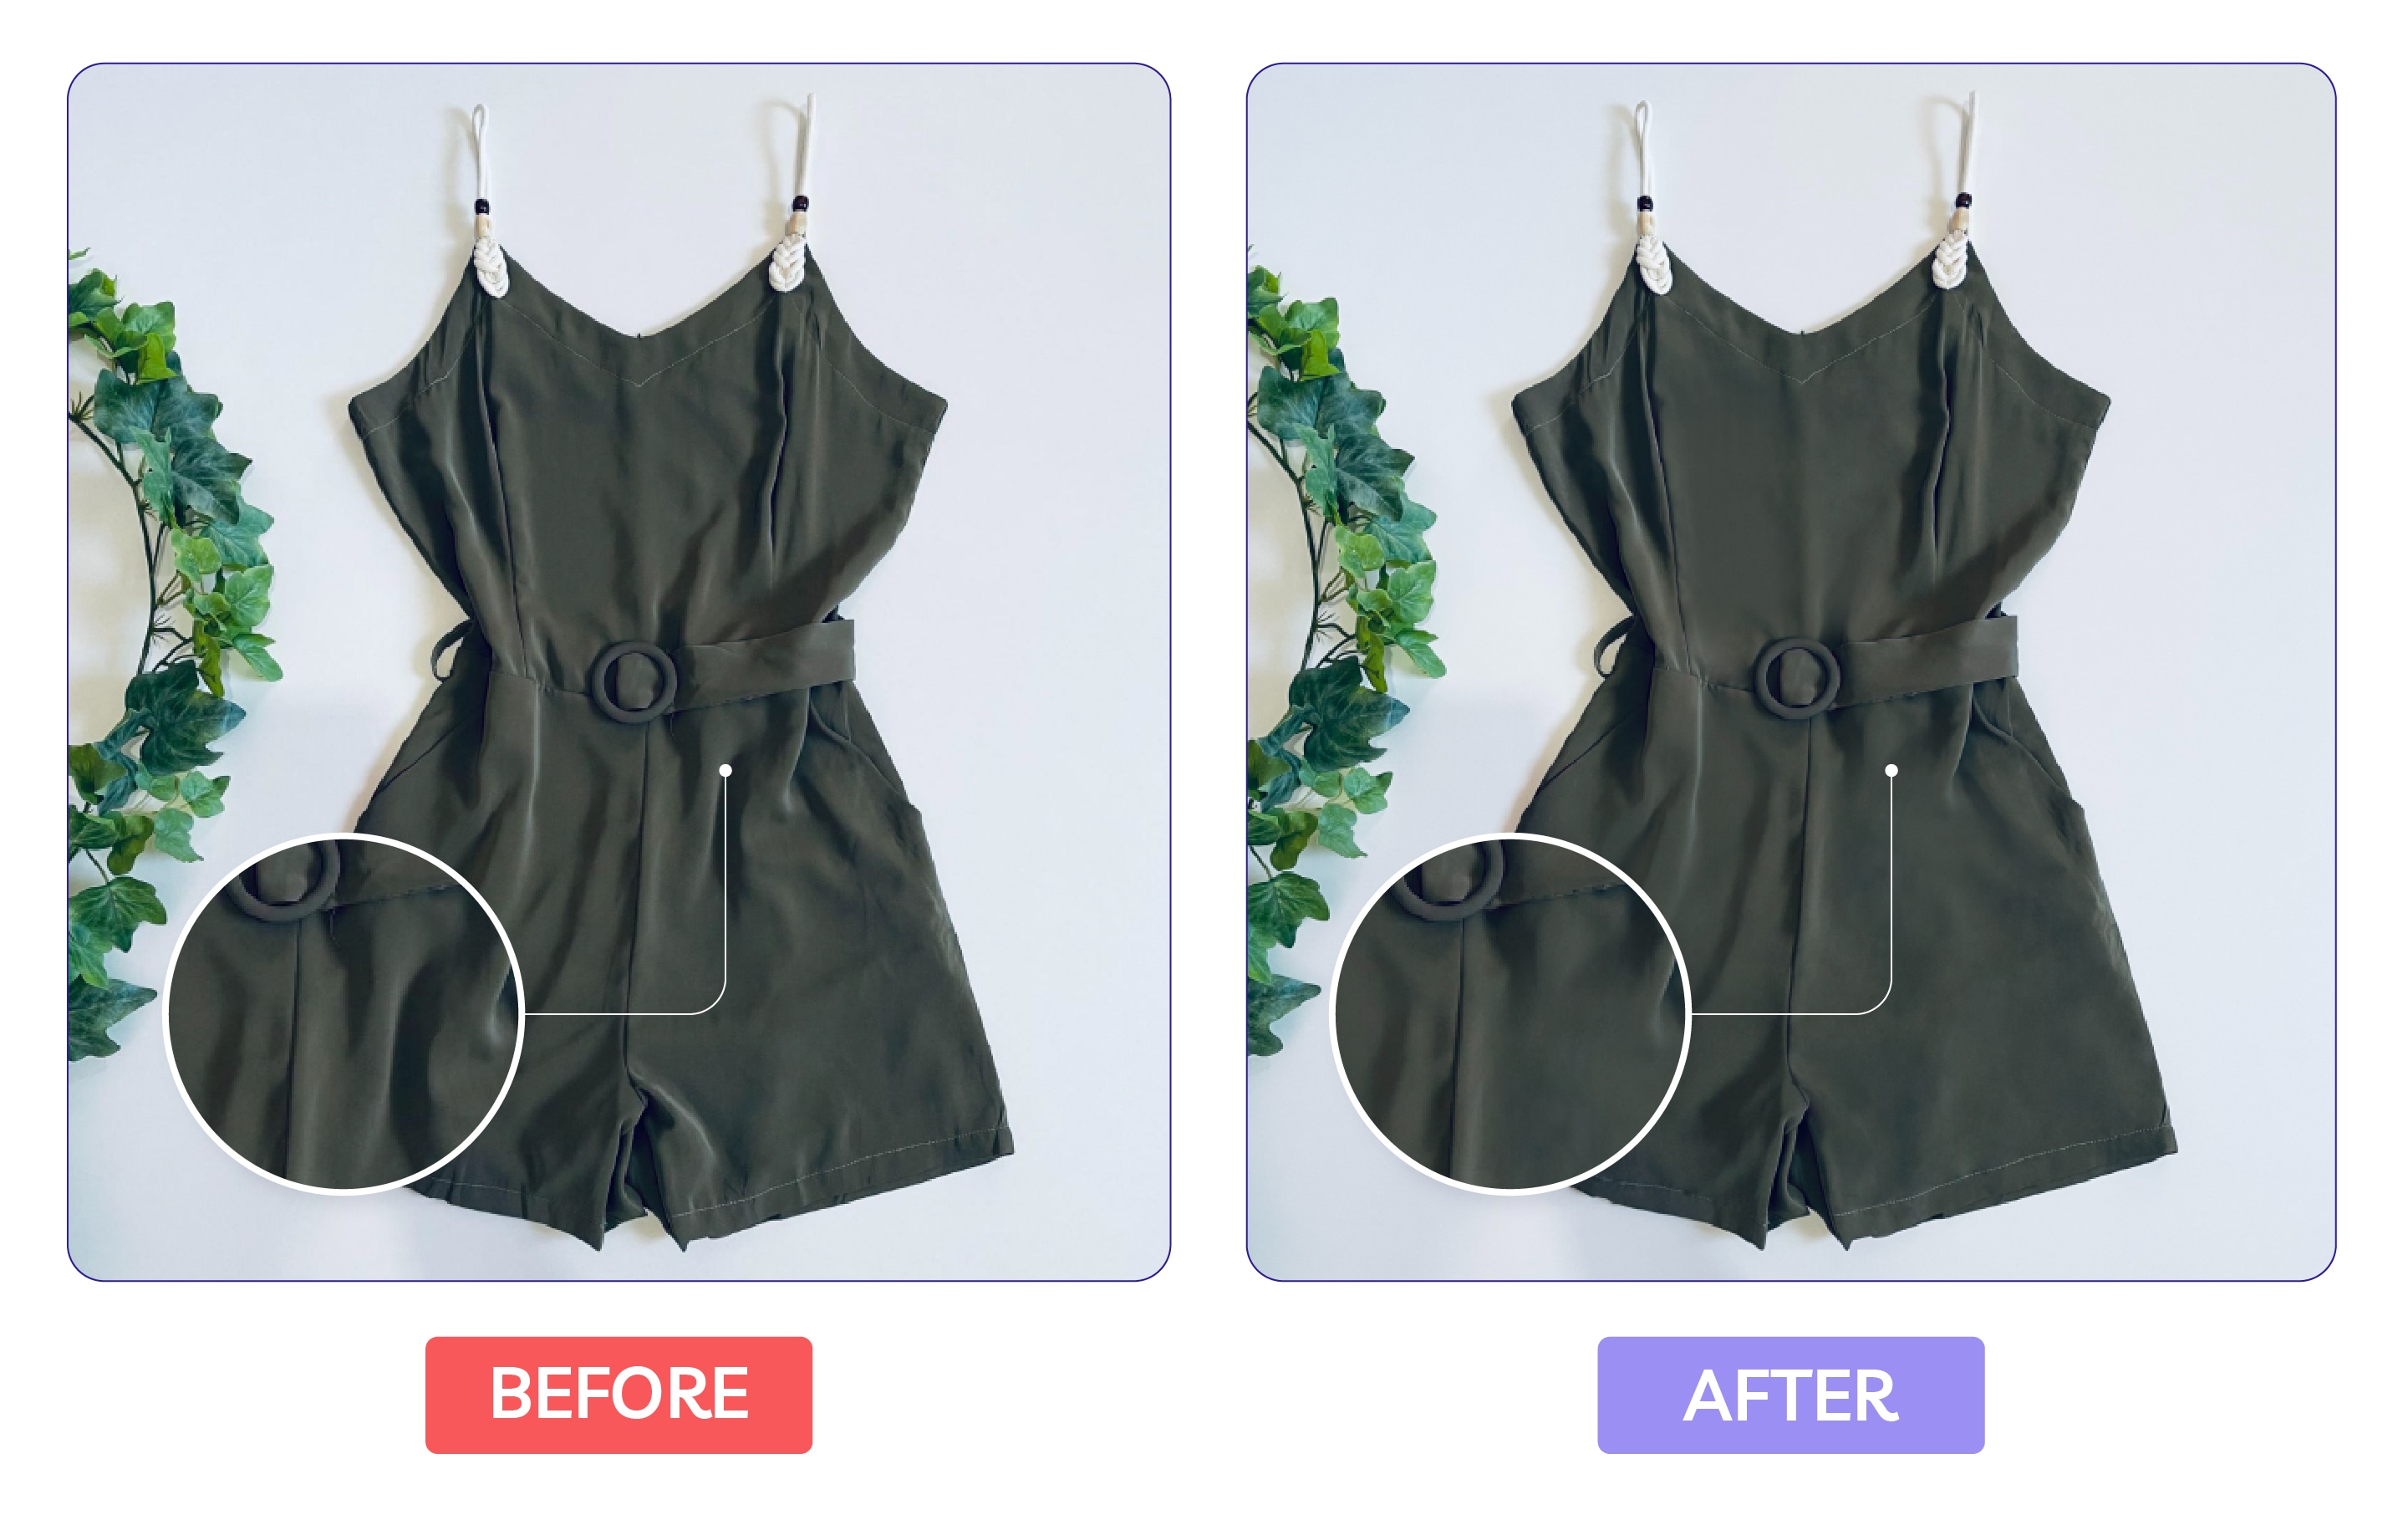
For apparel, fabric retouching is often the difference between a product that looks ordinary and one that feels premium.
Even a perfectly steamed garment will develop distracting creases the moment it is styled on a model, ghost mannequin, or flat lay. Small folds are natural. Deep wrinkles, odd bunching, or uneven hems can pull attention away from the product itself.
Before finalizing, check for:
- Deep Creases: Fold lines from packaging or “motion” wrinkles that distract from the silhouette.
- Uneven Hems: Ensure the bottom edge of the garment creates a clean, balanced line.
- Bunching: Check for awkward pulling around the waistline, armpits, or collars.
- Styling Artifacts: Remove dents or puckering caused by clips, pins, or tape used during the shoot.
- Wavy Seams: Straighten seams that have buckled or look “wobbly” on camera.
Technical Pro Tip: The goal is to remove distractions, not texture. If you smooth out every fold, fabrics like linen, denim, or knitwear can start to look fake. Good apparel retouching keeps the natural drape while making the garment look properly prepared.
3. Fix Distracting Reflections
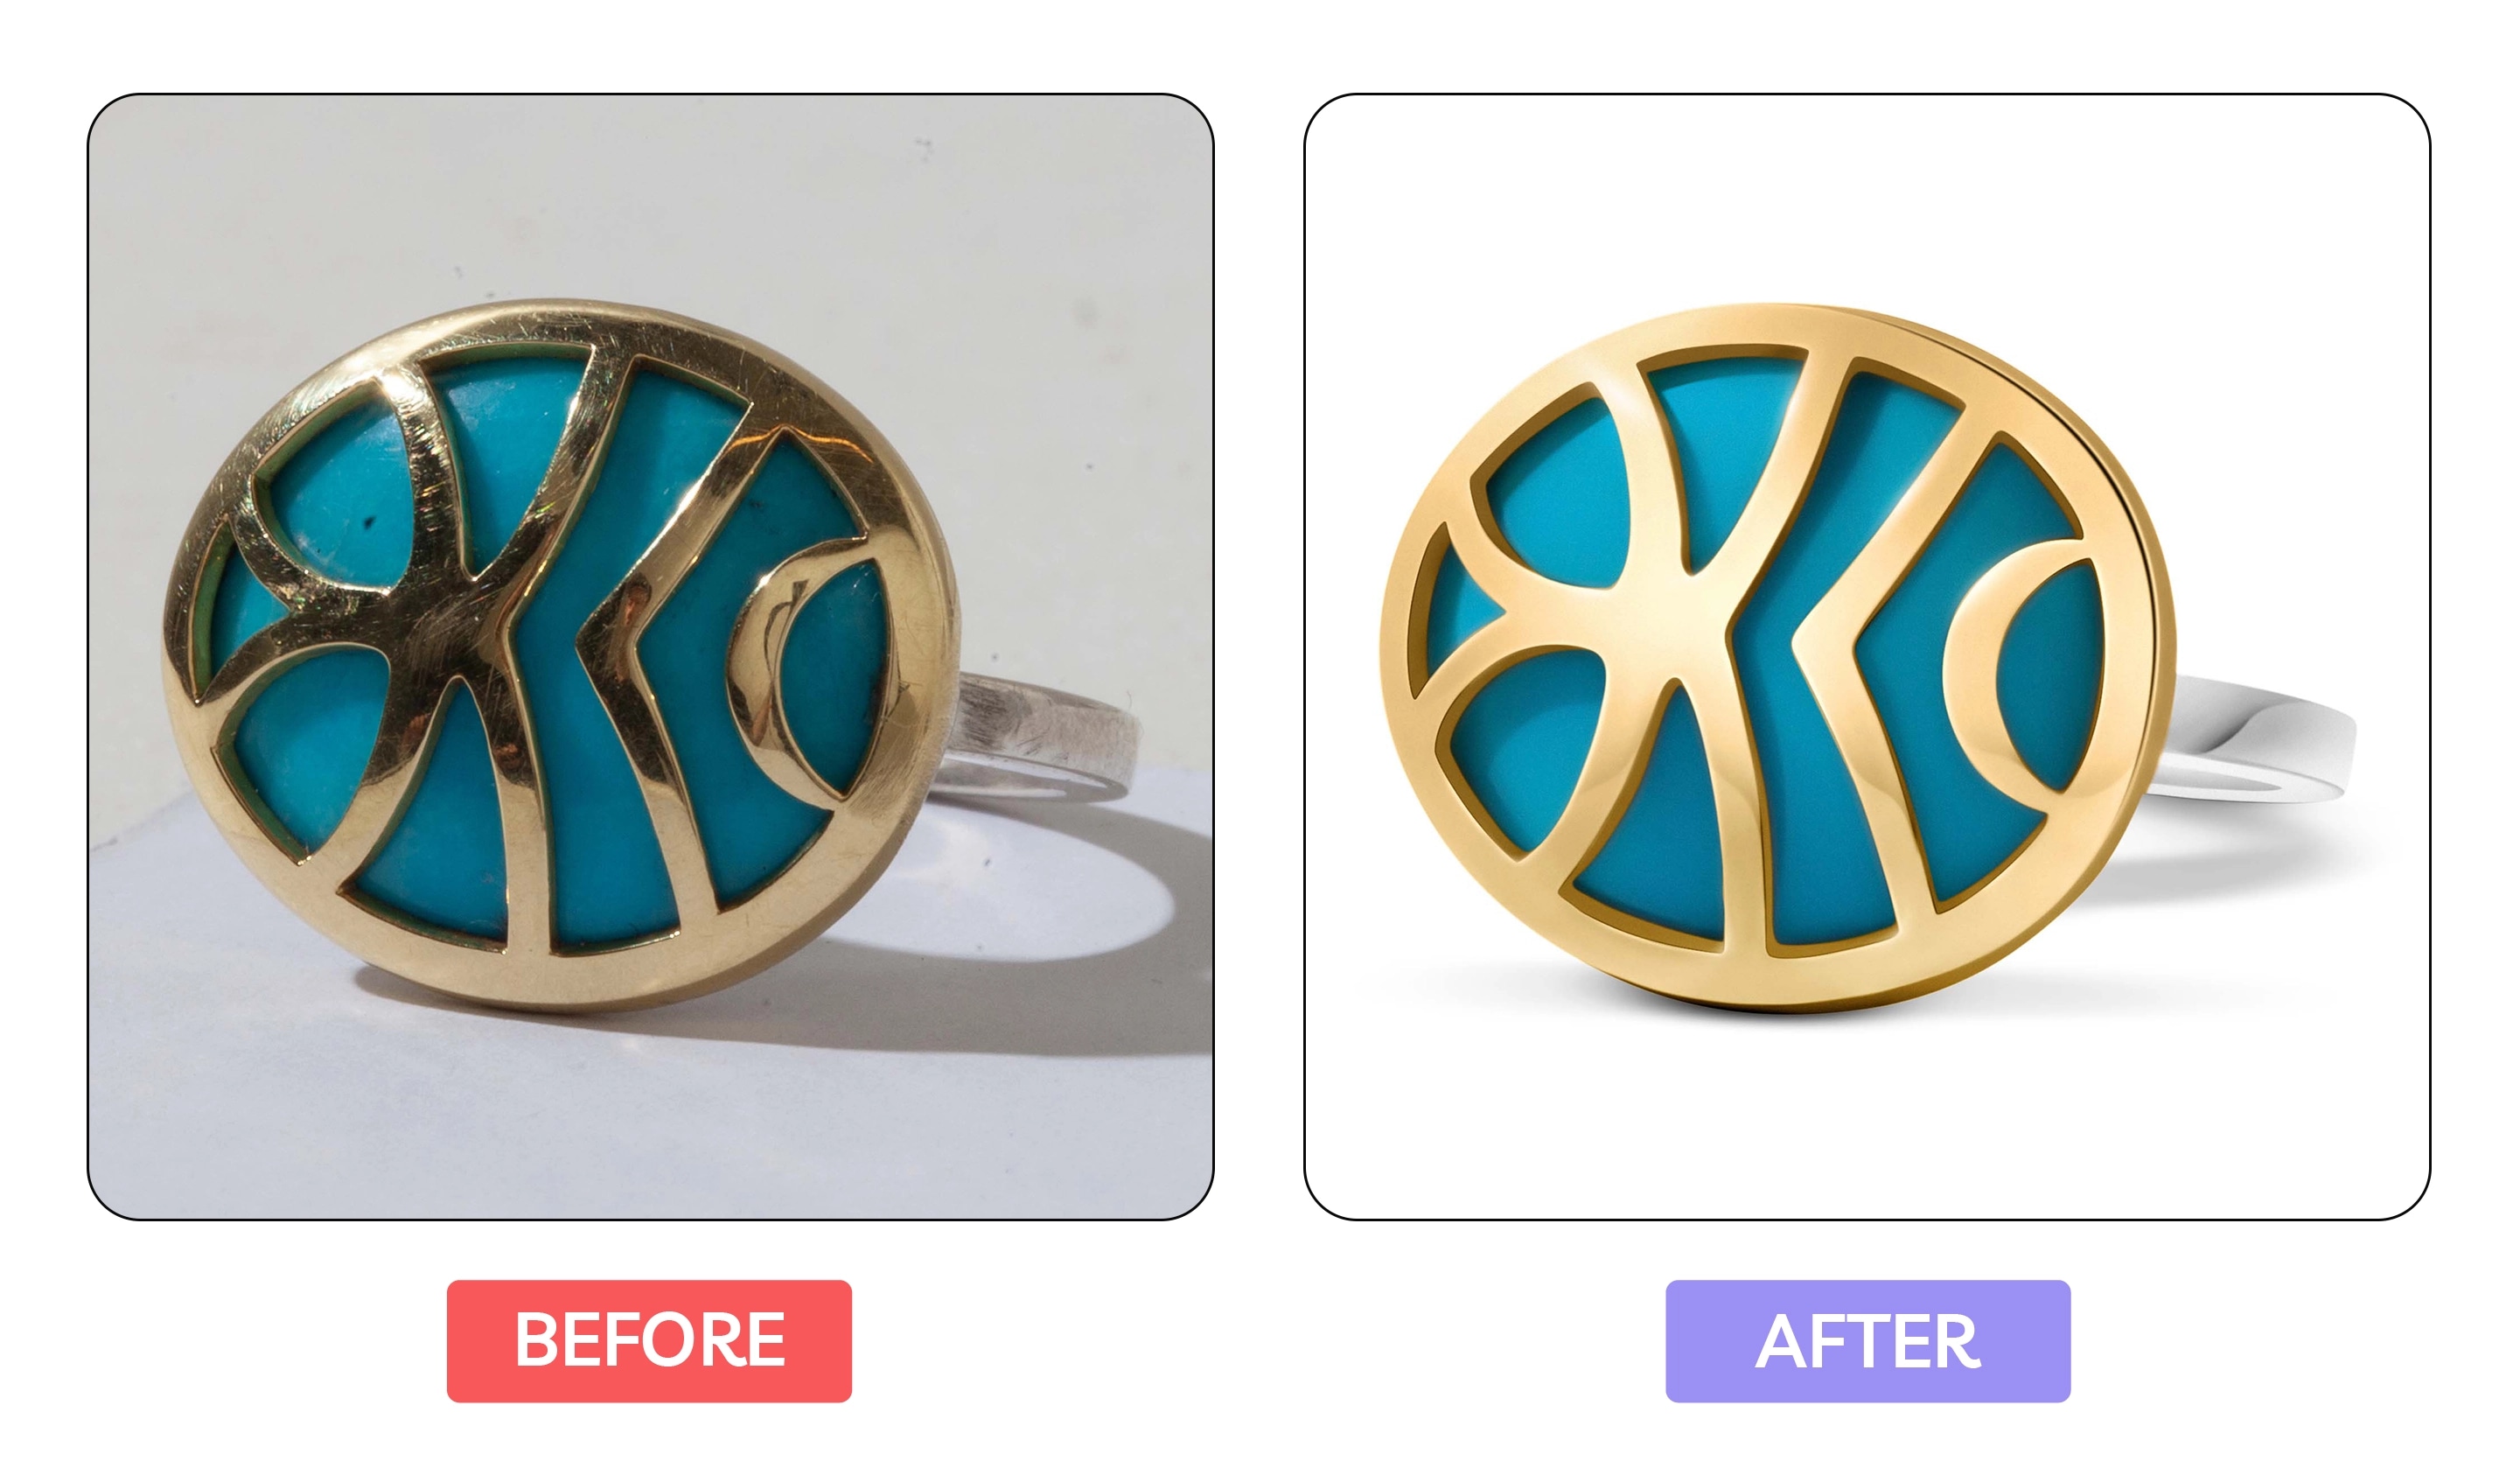
Reflective products are notoriously difficult to photograph and even more challenging to retouch.
Perfume bottles, sunglasses, watches, jewelry, electronics, appliances, and polished packaging all pick up reflections from the studio. Some reflections help the product look dimensional. Others show the camera, lights, photographer, or room.
Before uploading, check for:
- “The Photographer Effect”: Visible reflections of the camera, tripod, or photographer.
- Equipment Clutter: Obvious light stands or softboxes.
- Blown-Out Glare: “Hot spots” where the light is so bright that all texture and detail are lost.
- Muddy Reflections: Dark, “dirty” patches on curved surfaces where the light didn’t reach.
- Inconsistent Shine: Ensure highlights across a product (like a watch face and its strap) feel uniform.
The goal of reflection management is to simplify, not eliminate.
Glass should still look like glass. Metal should still look like metal. Glossy plastic should still have a natural sheen If you remove every highlight, the product can start to look flat or digitally painted.
Good retouching keeps the highlights that define the shape while cleaning up the visual noise around them.
For a more detailed workflow, see our guide to removing reflections and fixing colors in product photos.
4. Check Color Accuracy
Color correction is one of the most important steps in ecommerce product photo editing.
If the color in the image does not match the physical product, shoppers notice. Worse, they may return the item because it does not look the way they expected.
Before an image goes live, check:
- The “Color Shift”: Ensure specific pigments haven’t shifted (e.g., a “true red” moving toward magenta or orange).
- Neutral Whites: Confirm that white products look crisp and neutral, rather than “warm” (yellow) or “cool” (blue).
- Black Detail: “True black” products should never be a flat, featureless blob; they must retain visible texture and depth.
- Consistency Across Variants: If a product comes in five colors, the lighting and “feel” must remain identical across the whole set.
- Skin Tone Integrity: In model shots, ensuring skin looks healthy and natural while the garment color remains accurate.
This matters most for products where color is part of the buying decision: apparel, cosmetics, jewelry, homeware, accessories, and packaging. A red dress should not shift magenta. A cream sofa should not look grey. A gold ring should not look green.
Technical Pro Tip: Use calibrated monitors and work in the sRGB color space for web images. For more exacting work, matching colors to a Pantone reference or a physical sample gives you a stronger point of reference. Accurate color correction helps reduce the risk of “not as described” returns.
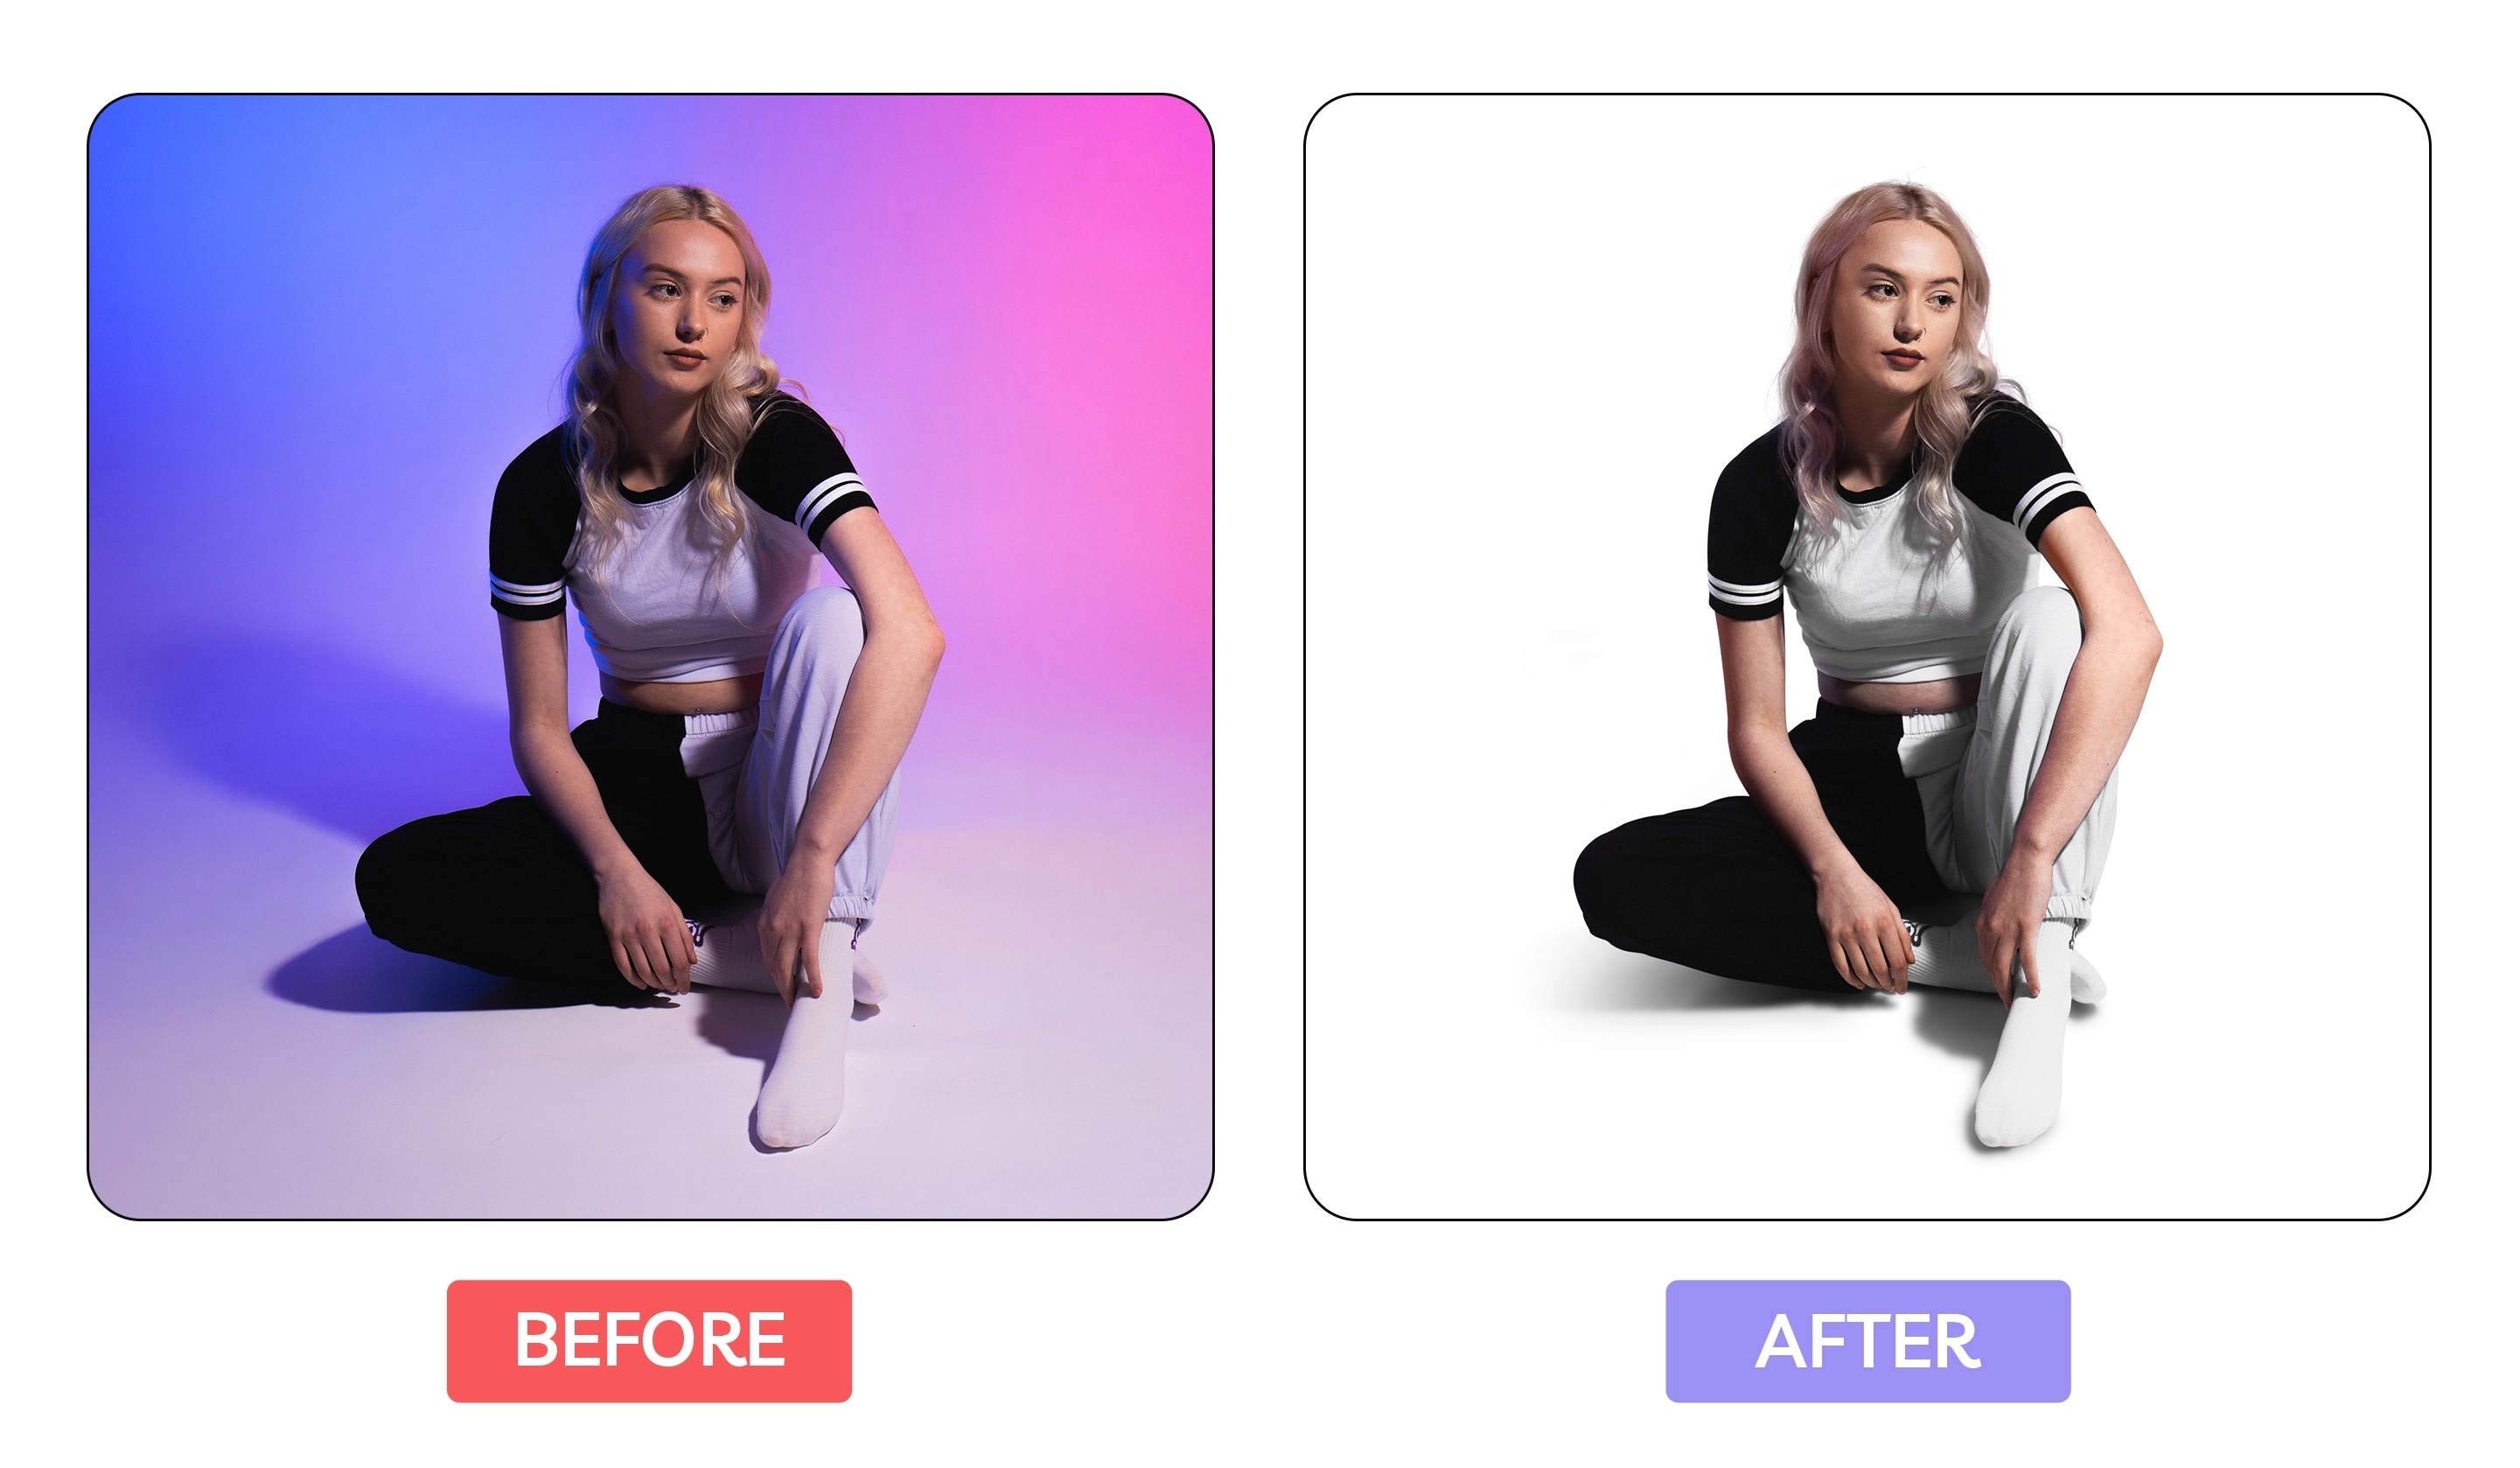
5. Refine Backgrounds and Cut-Out Edges
Background cleanup is one of those essential steps people notice only when it is done badly.
Whether the product sits on a white background, a transparent background, or a lifestyle backdrop, the edges need to feel clean and natural. Otherwise, the whole image can start to look cheap.
Before finalizing, check for:
- Jagged edges: Avoid the “staircase” effect on curved surfaces.
- Background residue: Ensure no remnants of the original backdrop are visible.
- Halos: Watch for thin dark or light lines tracing the product’s silhouette.
- Inconsistent tones: Ensure white backgrounds are a consistent hex code across the whole batch.
- Studio clutter: Remove visible floor marks, scuffs, tape, or light stands.
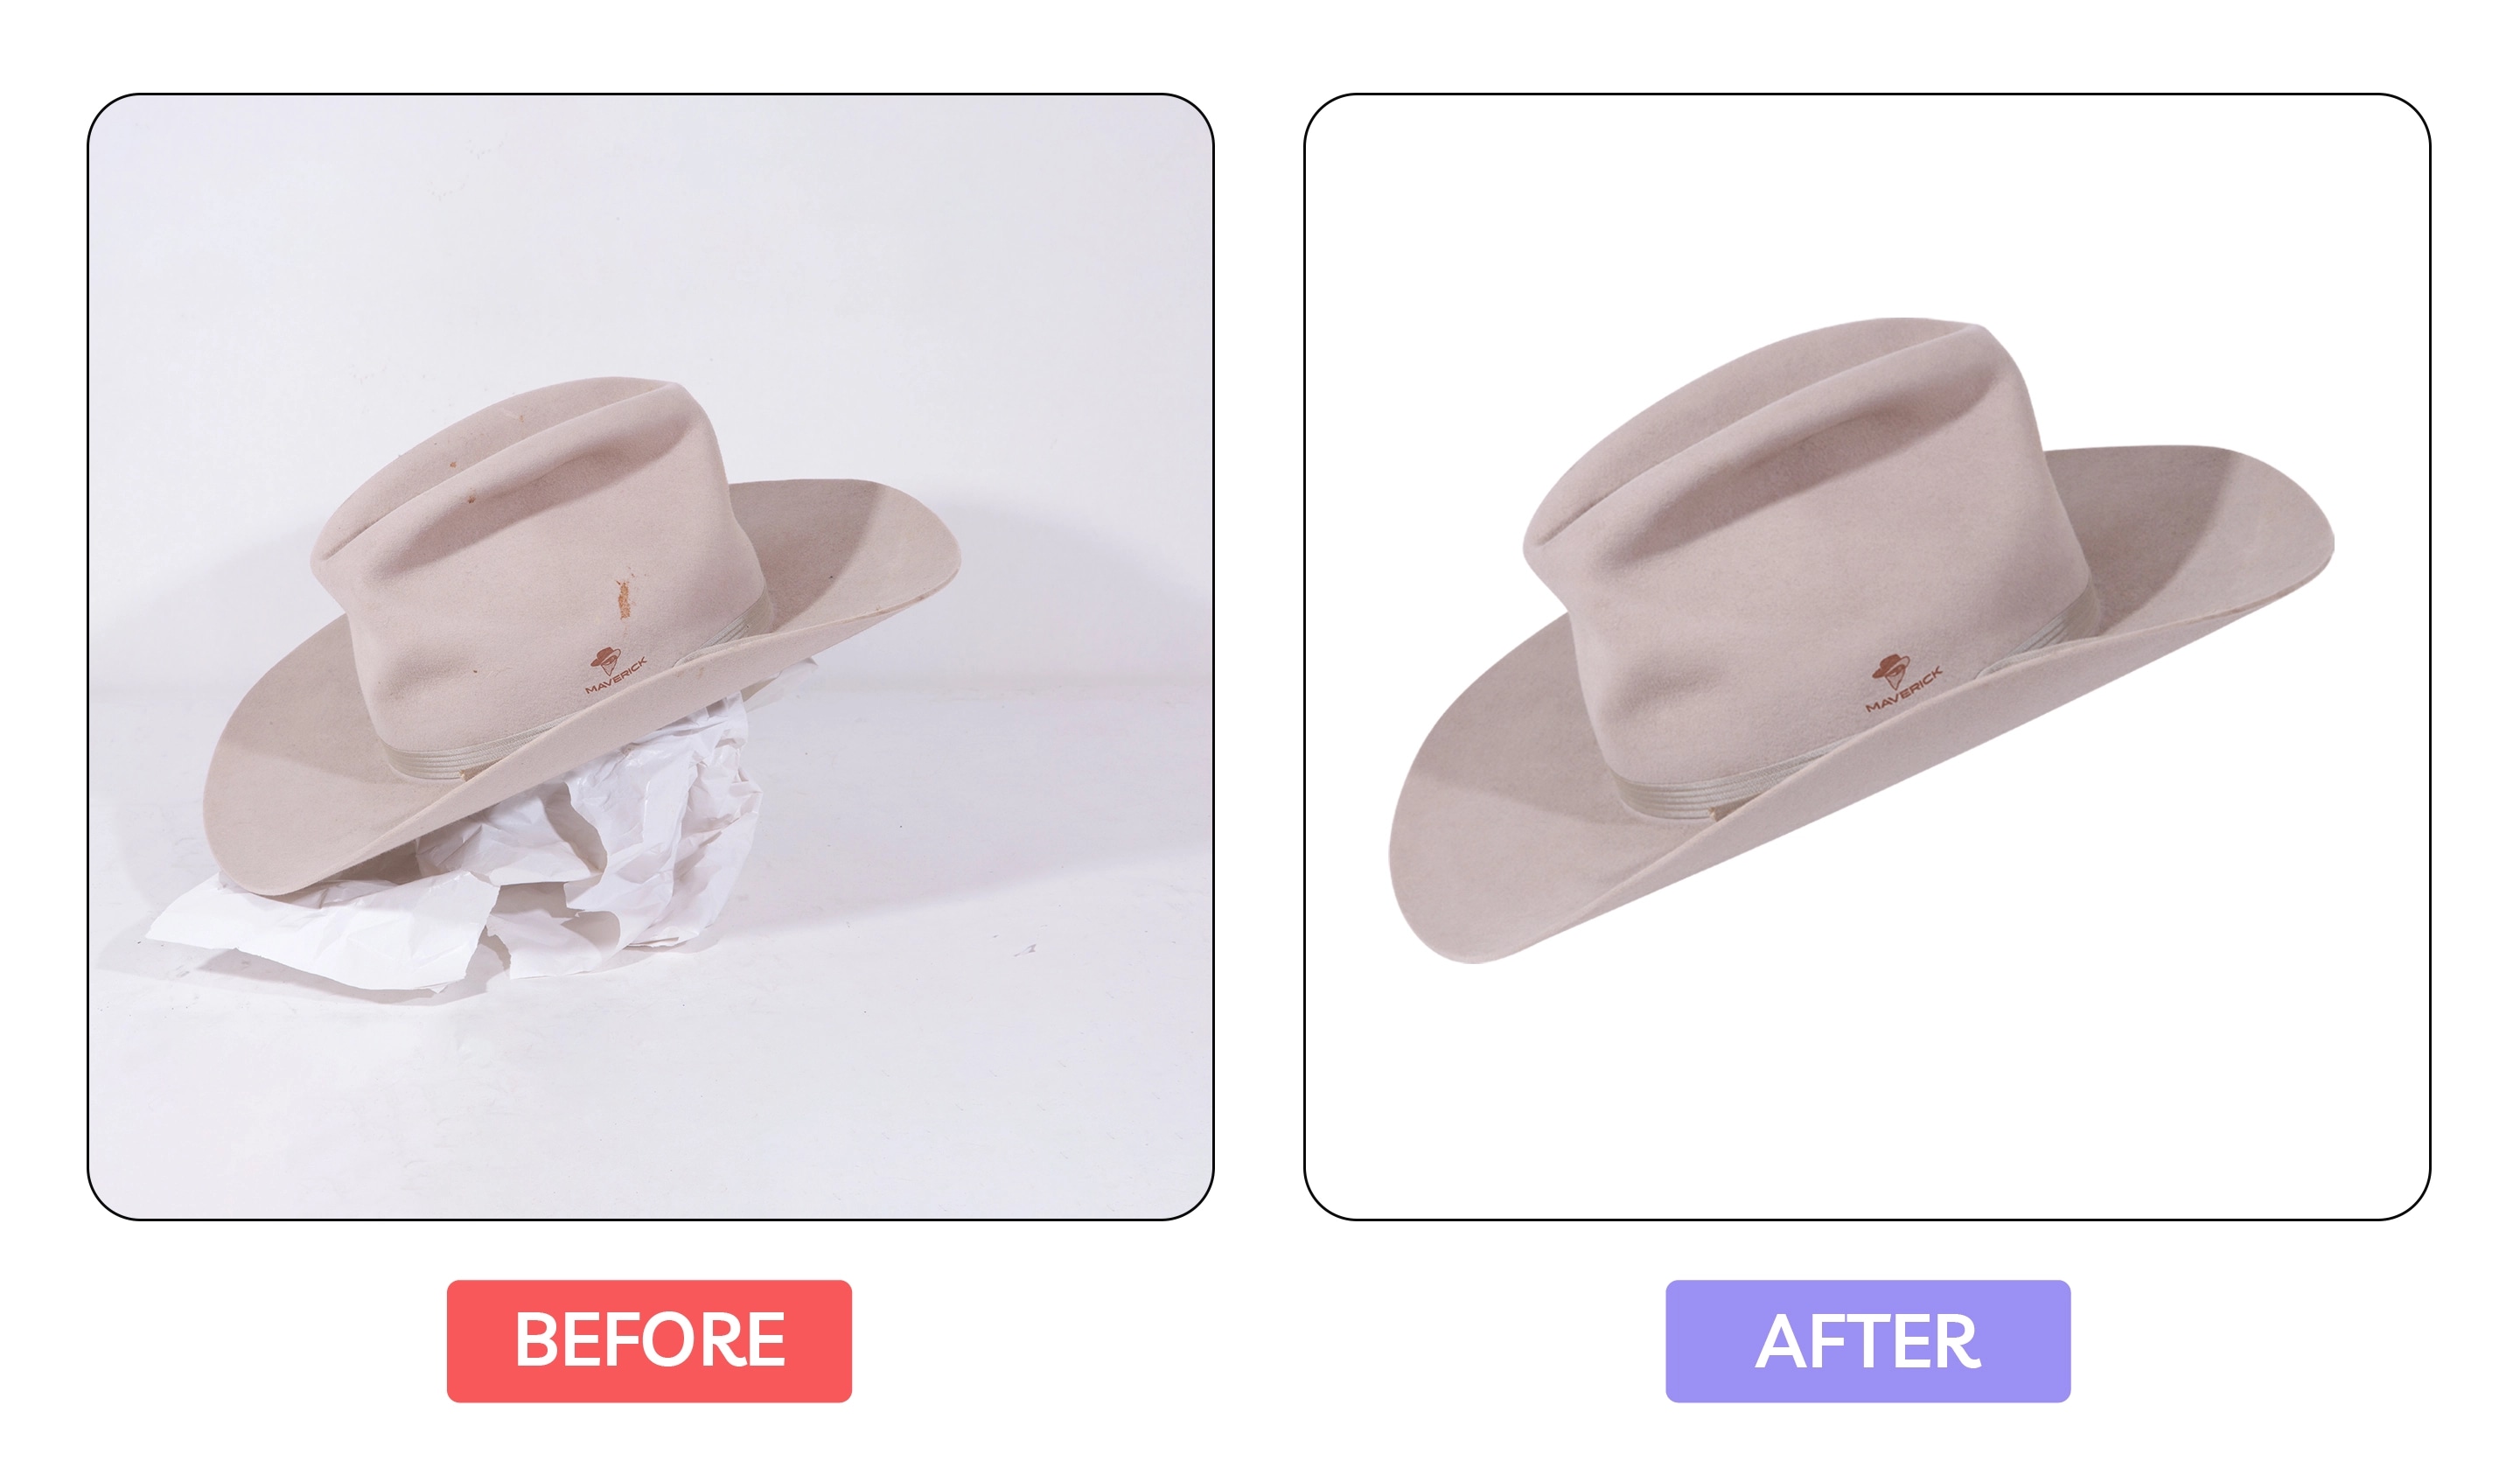
For hard-edged products, a clipping path is usually enough. For more complex textures like hair, fur, or sheer fabric, image masking is often the better choice. The aim is to keep the edges looking natural, so the product feels properly placed rather than cut and pasted.
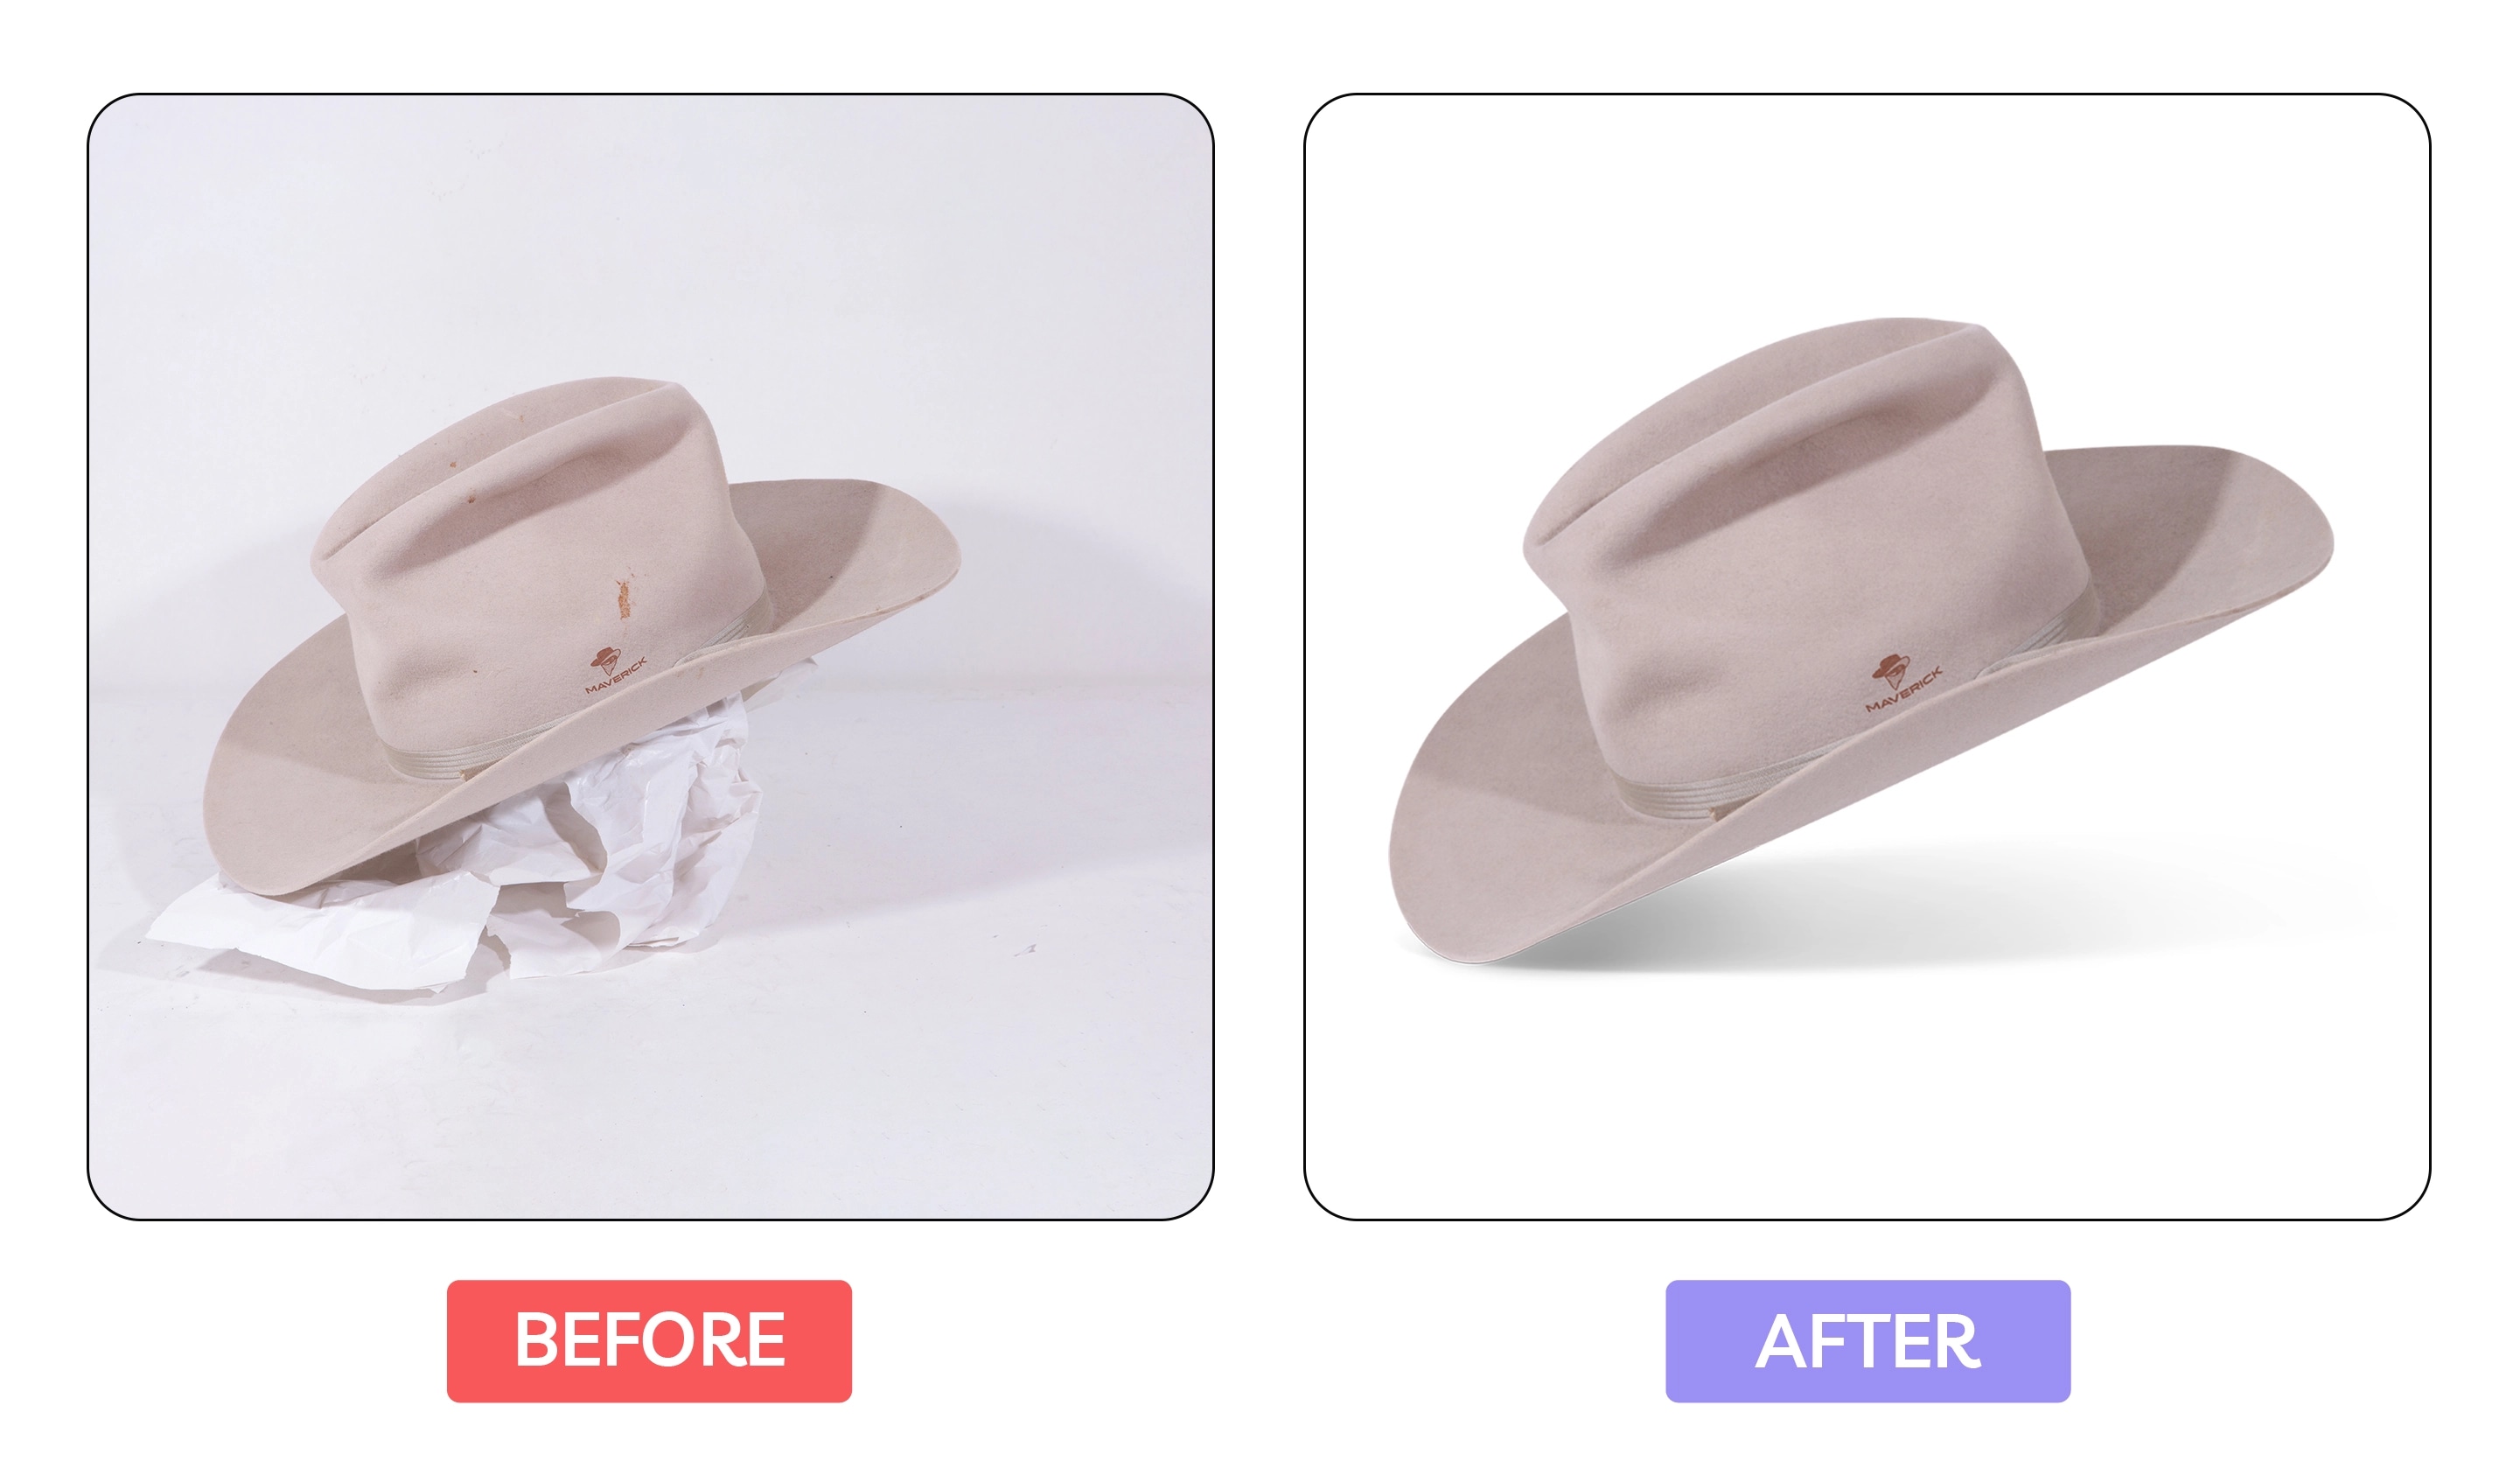
6. Add or Refine Product Shadows
A product without a shadow often looks unfinished.
This is especially true when an item has been cut out and placed on a white or transparent background. Without any grounding, the product can appear to float.
Check whether the image requires:
- Natural Shadows: Cleaning up the original shadow from the shoot so it looks soft and intentional.
- Contact Shadows: The small, dark area directly beneath the product where it touches the surface (essential for “grounding.”)
- Drop Shadows: A soft, offset shadow used to give a sense of elevation or a modern “clean” look.
- Reflection/Mirror Shadows: Often used in luxury jewelry or electronics to add a premium, high-gloss feel.
- Consistency Check: Ensuring the light direction and shadow softness are identical across every image in the batch.
The right shadow depends on the product and the style of the store. Jewelry often works well with reflection shadows. Shoes and accessories may need natural or drop shadows. Small objects often need a subtle contact shadow to feel grounded.
The most common mistake is a product that looks like it is floating. Even in a minimalist image, a subtle contact shadow helps the eye read the product as sitting on a real surface. It is a small detail, but it makes the image feel much more believable.
7. Check Crop, Alignment, and Sizing
Even if every image is individually well-retouched, the catalogue can still look messy if crops and alignment are inconsistent.
This is especially obvious in category grids. One shoe sits higher than the next. One bottle is larger than the others. One handbag is centered, another is slightly off. None of these errors are dramatic alone, but they make the collection feel less professional.
Before uploading, check for:
- Vertical & Horizontal Alignment: Are all products perfectly centered or aligned to the same baseline?
- Proportional Sizing: Does a small wallet look giant compared to a large tote bag in the same grid?
- Canvas Consistency: Ensure the “white space” (padding) around the product is identical for every shot.
- Horizon Alignment: For lifestyle shots, ensure the floor or horizon line doesn’t “jump” between photos.
- Aspect Ratio: Confirm all images are cropped to the exact same dimensions (e.g., 1:1 for Instagram or 4:5 for Shopify).
- Angle Matching: Ensure color variants are shot and cropped at the exact same rotation for a seamless “toggle” experience.
This is where ecommerce photo retouching becomes less about one image and more about the whole shopping experience. A polished product grid builds trust before the customer even clicks.
Technical Pro Tip: Professional retouchers often use guides and templates to place every product in the same visual position. That keeps the grid looking clean and helps customers focus on the products, not the layout.

8. Review Skin, Hair, and Model Details
If your product images include models, the retouching checklist needs to include the person as well as the product.
Before finalizing, check for:
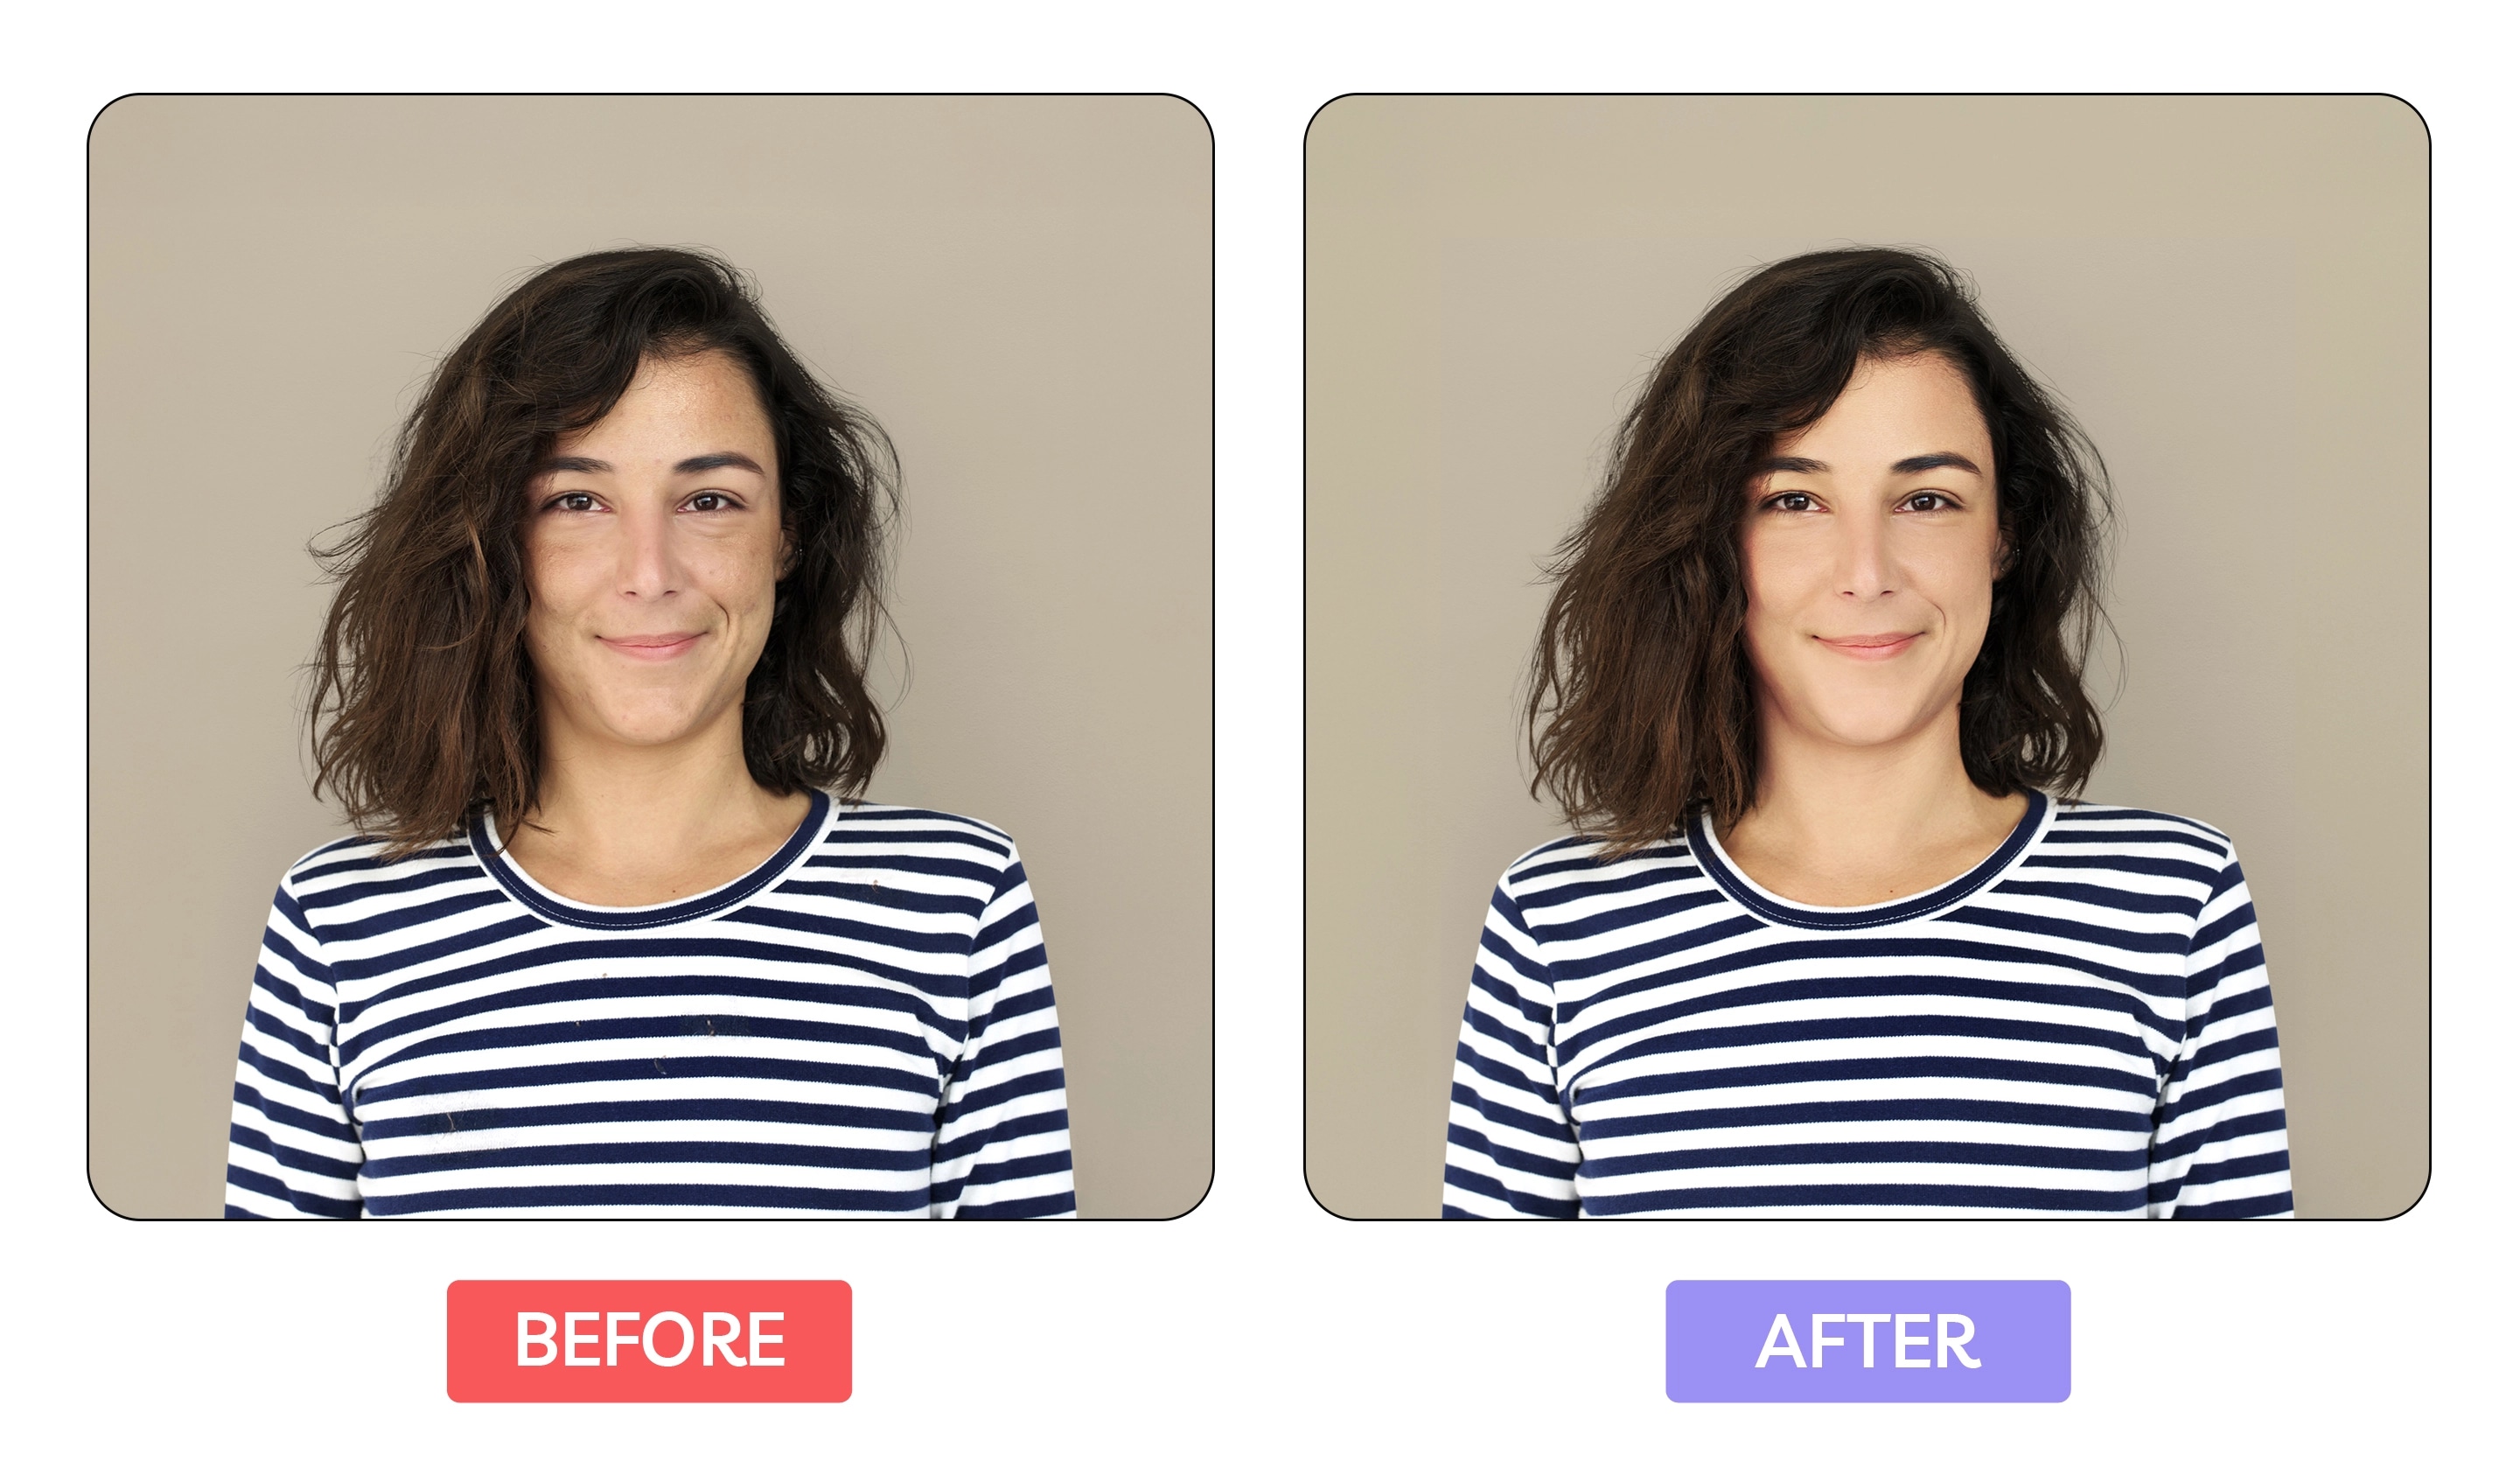
- Temporary Blemishes: Remove things that aren’t permanent (stray marks, small bruises, or redness) while keeping unique features like freckles or moles.
- Stray Hairs: Clean up “flyaways” that cross the face or break the silhouette of the head.
- Skin Tone Balance: Harmonize redness or “blotchy” patches caused by studio heat or cold.
- Manicure & Hands: Check for chipped nail polish or dry skin on hands holding the product.
- Makeup Precision: Fix minor smudges or “fallout” under the eyes.
- The “Natural” Check: Ensure skin still has visible pores and texture. Over-smoothing leads to a “plastic” look that can devalue a premium brand.
The goal is not to make the model look fake. It is to remove distractions so the customer can focus on the product.
This is especially important for beauty, apparel, jewelry, and accessories. Skin should look polished but still real. Hair should look clean but not helmet-like. Fabric should look prepared but not digitally ironed into flatness.

Technical Pro Tip: Frequency separation lets retouchers work on skin tone and texture separately. That makes it easier to reduce redness or minor distractions without losing the natural grain of the skin. In ecommerce, that balance matters. People respond better to images that look polished but still real.
For more detail on this balance, see our guides to beauty retouching and fashion and model retouching.
9. Export in the Right Format
A perfect retouch can still fail if the file is exported incorrectly.
In product photo editing, export settings matter just as much as the retouch itself.
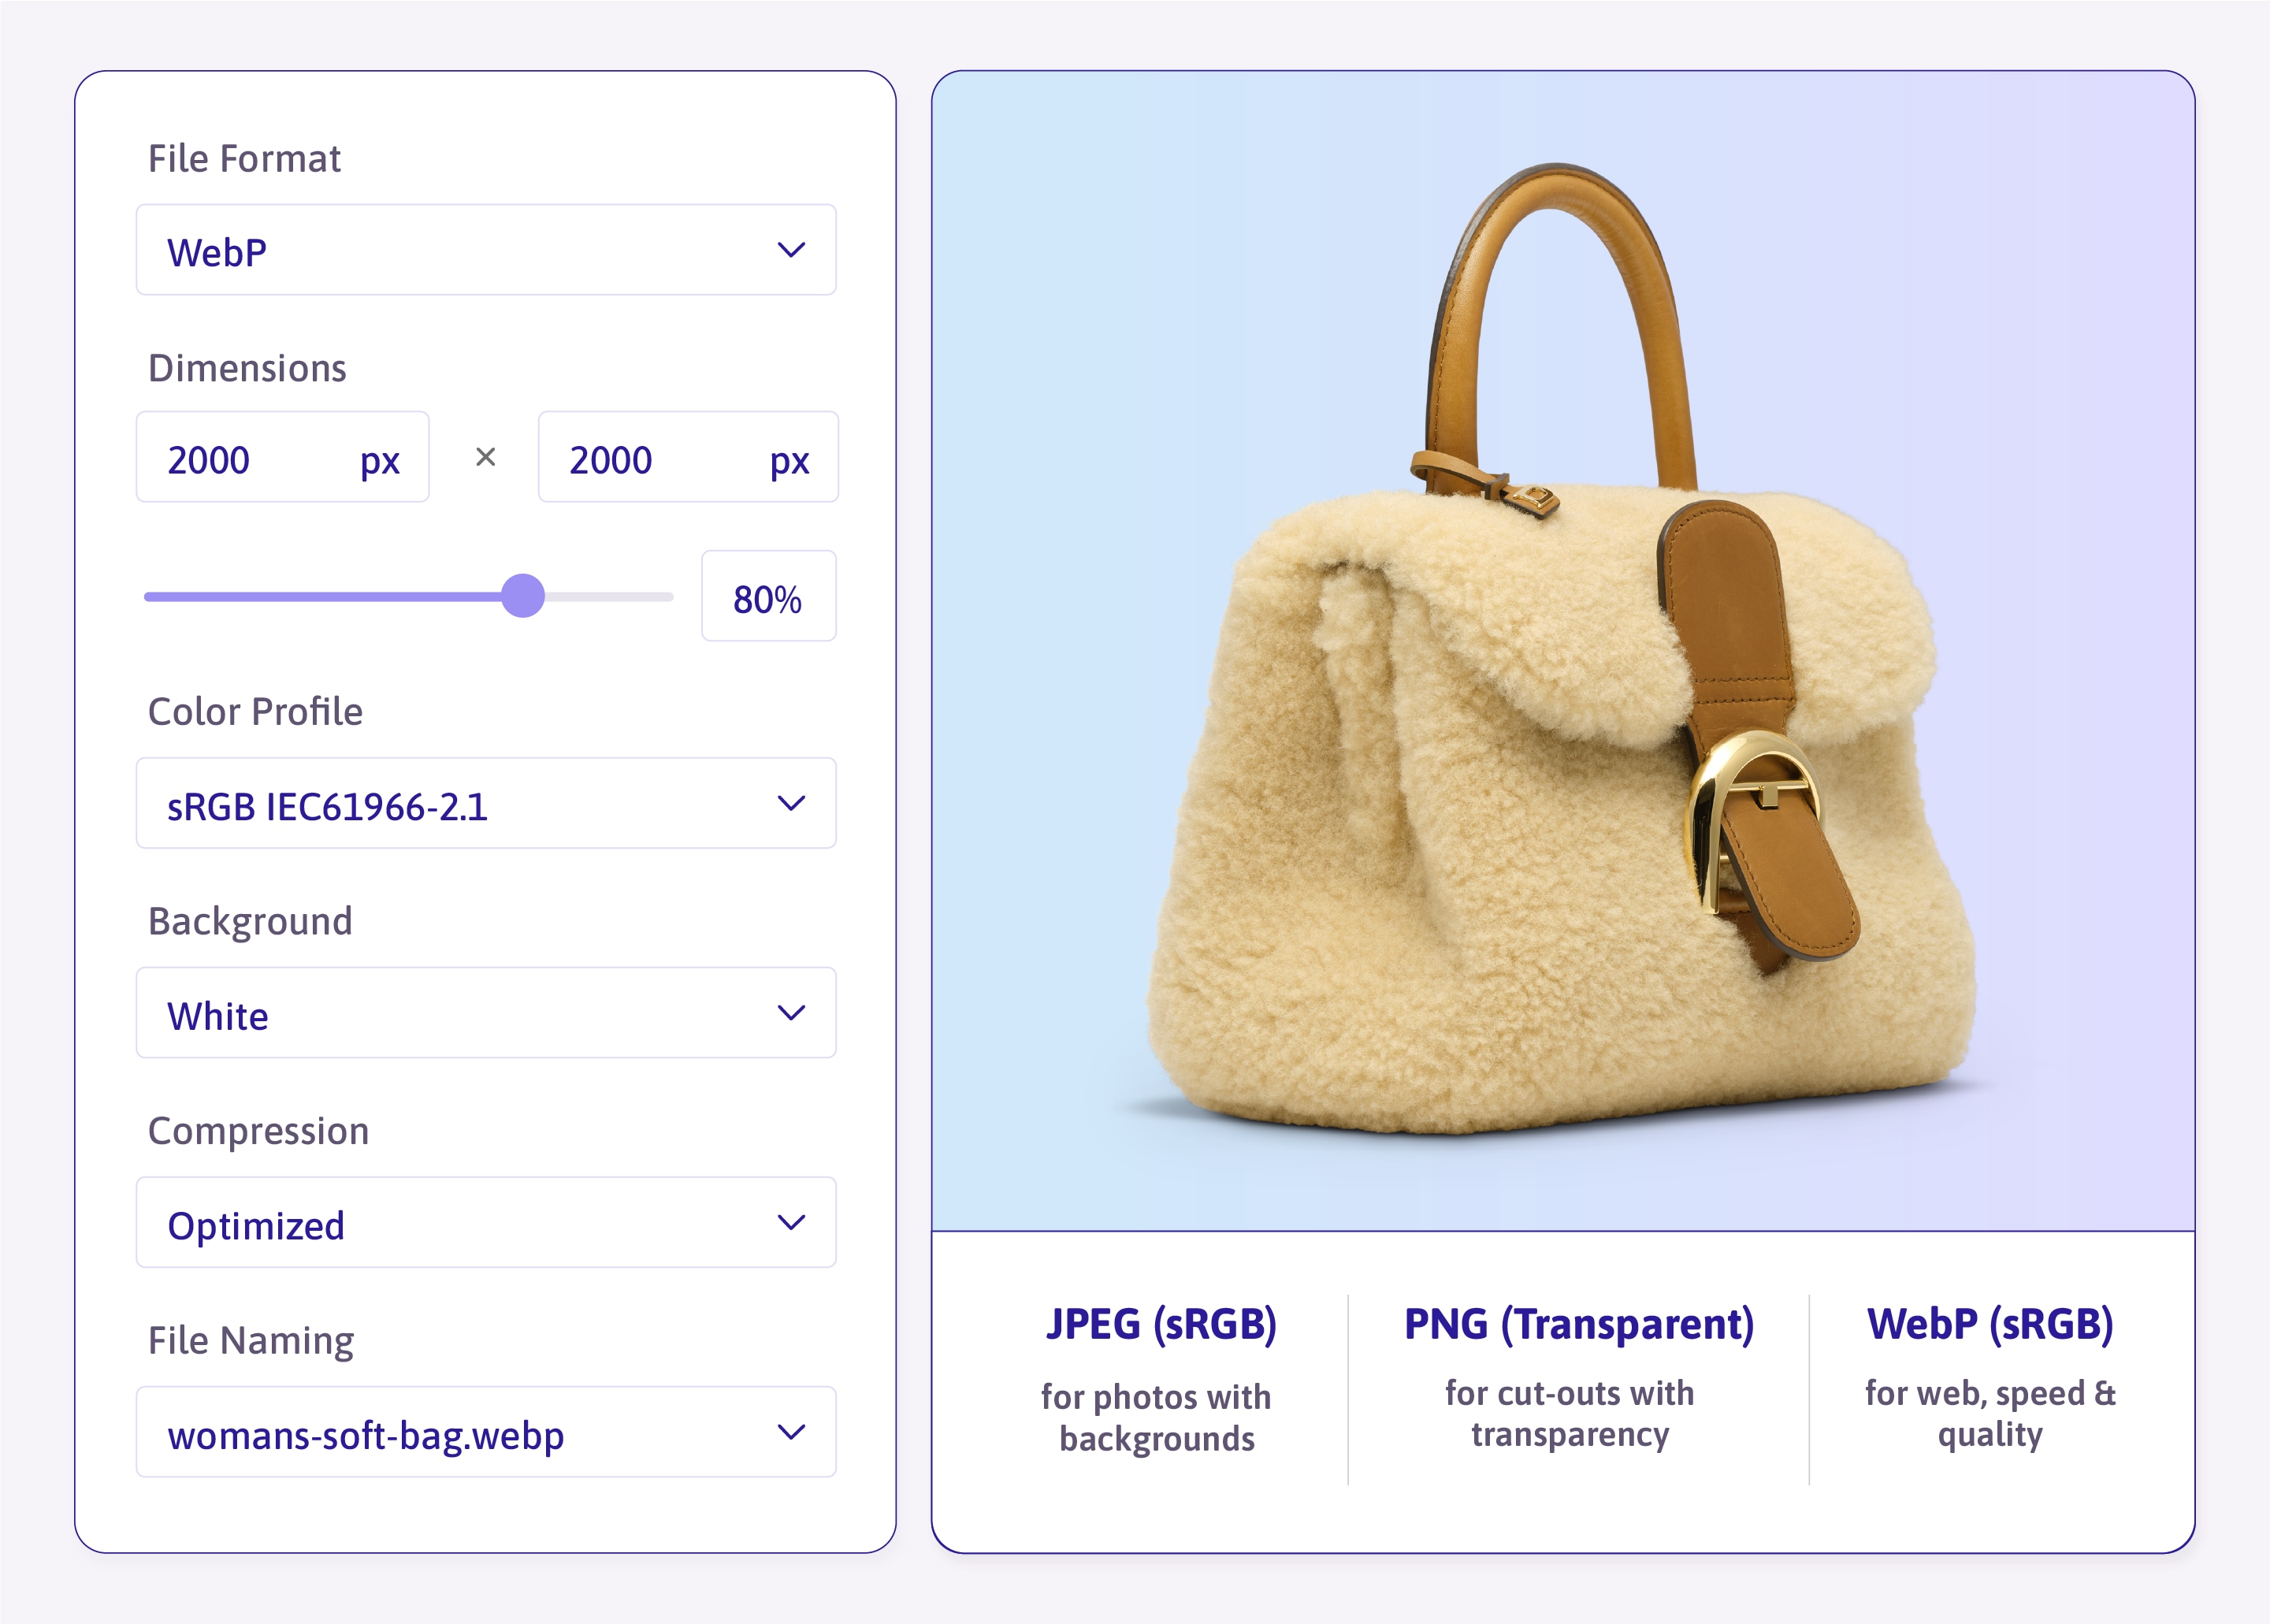
For web and ecommerce, product images usually need to be exported in a format that balances quality and load speed. Transparent-background images may need PNG. Standard product images are often JPEG or WebP, depending on the platform. Files should usually be converted to sRGB for consistent browser display.
Before delivery or upload, check:
- File Format: Are you using WebP or JPEG for speed? Does the PNG have a true transparent background?
- Dimensions & Scaling: Are the images sized exactly to the platform’s “sweet spot” (e.g., 2000px for Shopify zoom)?
- Compression Balance: Is the file size small enough to load instantly without visible “pixelation” or artifacts?
- Color Profile (sRGB): Have the files been converted to sRGB to ensure colors don’t look “muddy” on iPhones or Androids?
- Platform Compliance: Do the images meet specific Amazon, eBay, or Instagram requirements for padding and background color?
- SEO Naming: Are files named descriptively (e.g., mens-leather-watch-brown.jpg) rather than IMG_5432.jpg?
Technical Pro Tip: Site speed matters, and image format plays a big part in that. Modern formats like WebP can help reduce file sizes without a noticeable drop in quality. Before a full launch, test a sample batch on your staging site to make sure zoom, color, and rendering all behave as expected.
10. Compare the Whole Batch Before Upload
The final check should not happen image-by-image. It should happen across the whole batch.
Open the full set together and look for anything that feels inconsistent:
- Temperature Drifts: Does one image look “warmer” (yellow) or “cooler” (blue) than the rest?
- Shadow Weight: Are the shadows consistently soft, or is one noticeably darker or harsher?
- Optical Alignment: Do all products sit on the same “shelf” or horizon line?
- Retouching Intensity: Does one item look “over-processed” compared to the more natural look of the others?
- The “Jump” Test: If you toggle between two color variants, does the product “jump” or shift position on the screen?
This is the step that catches the problems individual image editing can miss. A single retouched image can look good. A full product range needs to look coherent.
Technical Pro Tip: Do a quick mobile scroll test before the images go live. On a smaller screen, inconsistencies in brightness, crop, or alignment often stand out more quickly. A strong ecommerce range is not just a set of clean images. It needs to feel consistent from one product to the next.
Product Photo Retouching Checklist
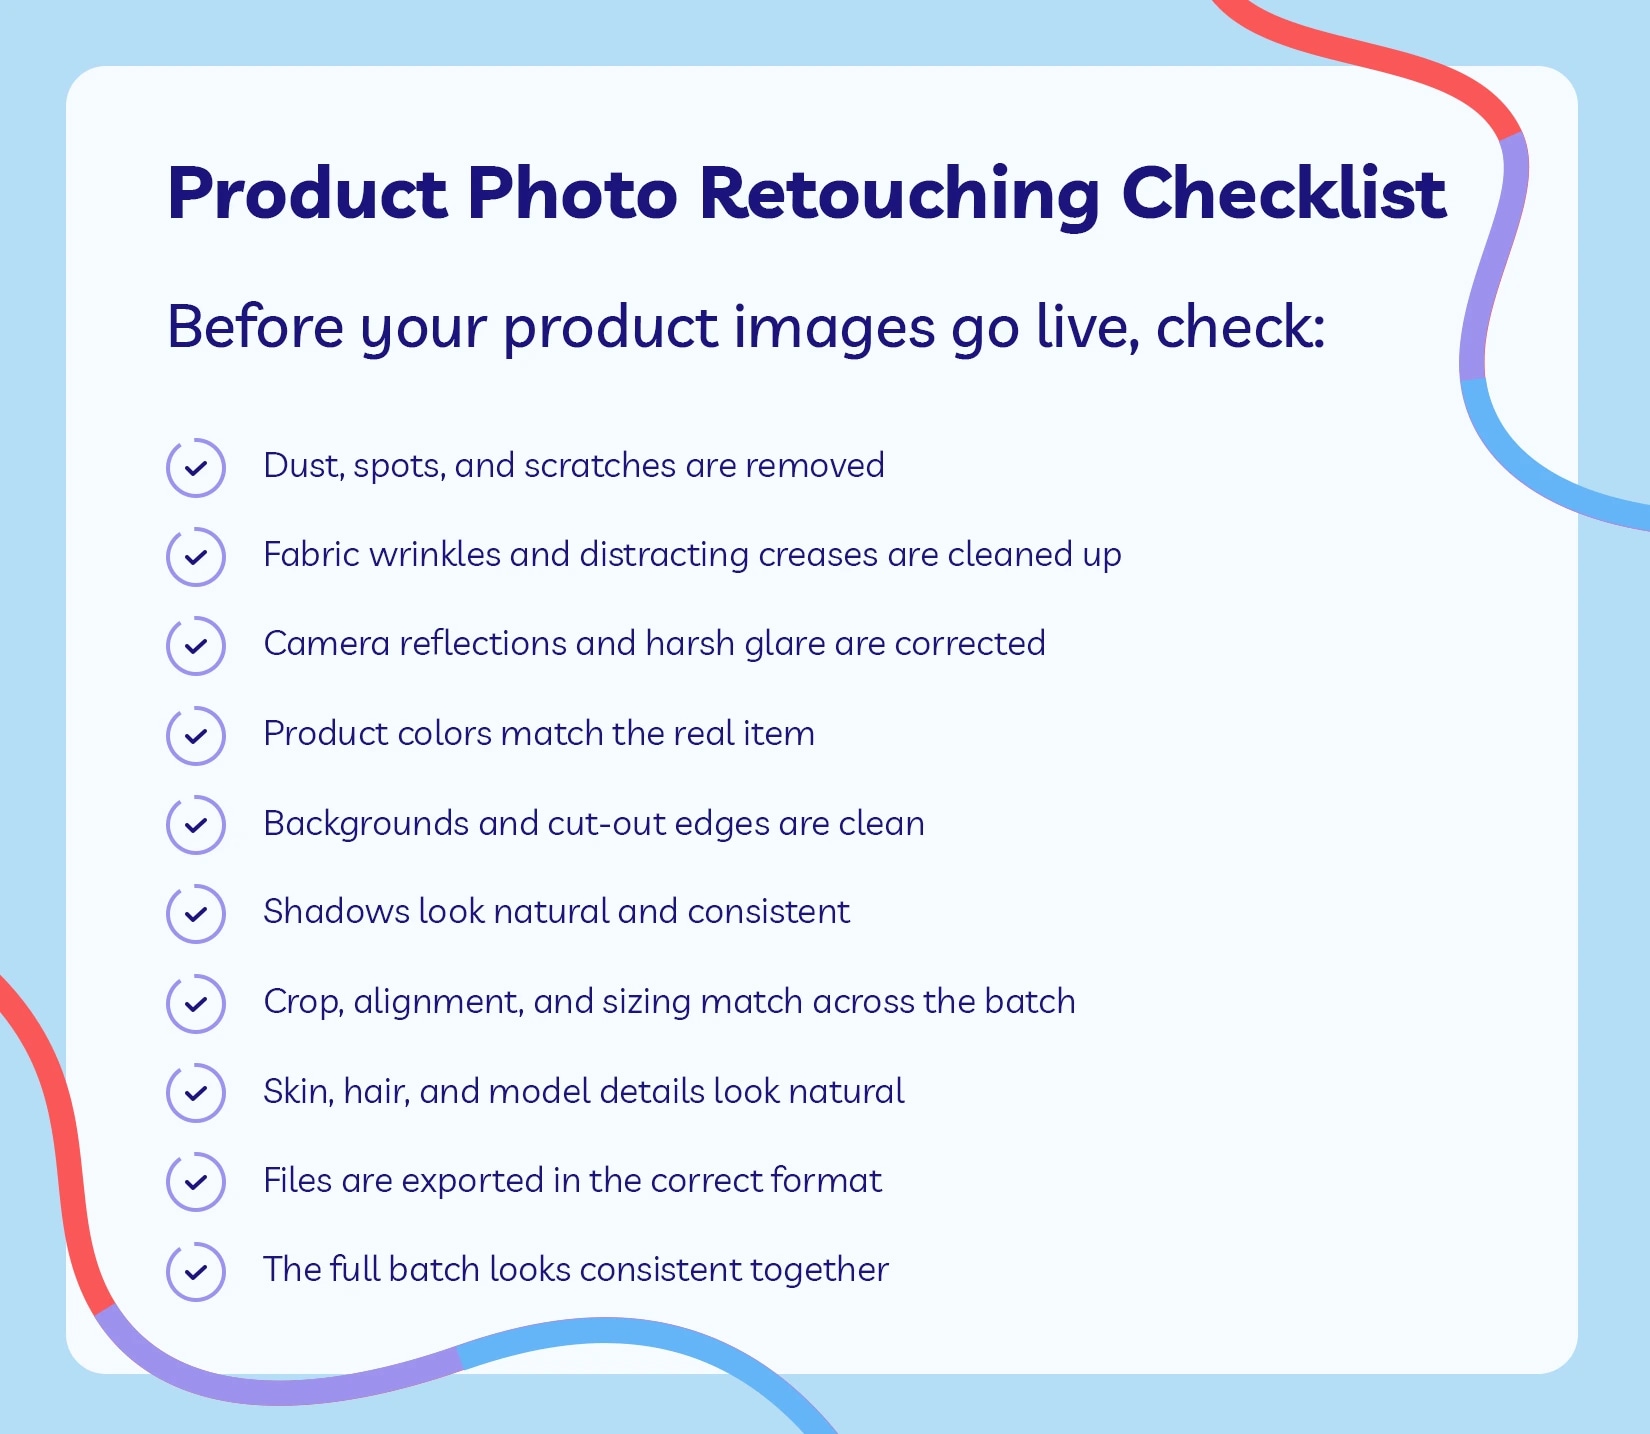
Before your product images go live, check:
- Dust, spots, and scratches are removed
- Fabric wrinkles and distracting creases are cleaned up
- Camera reflections and harsh glare are corrected
- Product colors match the real item
- Backgrounds and cut-out edges are clean
- Shadows look natural and consistent
- Crop, alignment, and sizing match across the batch
- Skin, hair, and model details look natural
- Files are exported in the correct format
- The full batch looks consistent together
When to Outsource Product Photo Retouching
Some product image fixes are simple enough to handle in-house. But once the volume grows, retouching can quickly become a bottleneck.
If your team is spending hours removing dust, fixing wrinkles, correcting color, cleaning backgrounds, or checking consistency across hundreds of files, it may be time to outsource.
Professional photo retouching services help when you need:
- consistent results across large batches
- faster turnaround before a launch
- human review on quality-sensitive edits
- support with complex products like jewelry, apparel, or reflective items
- predictable pricing for recurring image work
For a clearer idea of what different edit types cost, see our guide to photo retouching costs.
Path’s photo retouching services cover everything from simple dust and scratch removal to complex beauty airbrushing, reflection removal, wrinkle cleanup, and ecommerce-ready product retouching.
Get Product Images Ready Before They Cost You Sales
Product photo retouching is not about chasing perfection for its own sake.
It is about removing the details that distract customers, correcting the issues that create doubt, and making sure every image in the batch feels consistent with the rest of your store.
When the retouching is done well, shoppers do not notice the edit. They just see a product that looks clear, accurate, and worth buying.
Need help getting your next batch ready to upload? Path’s retouchers can handle dust removal, scratch cleanup, reflection removal, color correction, background cleanup, shadows, and more, with turnaround from 6 hours.
Frequently Asked Questions
What is product photo retouching?
Product photo retouching is the process of cleaning up and refining product images after a shoot. It can include dust removal, scratch cleanup, wrinkle removal, reflection removal, color correction, background cleanup, shadow creation, and final export preparation.
Why is product photo retouching important for ecommerce?
Product photo retouching helps ecommerce images look clean, accurate, and consistent. It removes distractions, improves presentation, and makes it easier for customers to understand exactly what they are buying.
What should I check before uploading product photos?
Check for dust, scratches, wrinkles, reflections, color accuracy, background issues, shadow consistency, crop alignment, model details, and export settings.
What is the difference between product photo editing and product photo retouching?
Product photo editing usually refers to broader adjustments like cropping, exposure, and color. Product photo retouching is more detailed work, such as removing specific imperfections, cleaning surfaces, refining edges, and correcting product-specific issues.
When should I outsource product photo retouching?
Outsource product photo retouching when image editing starts slowing down launches, creating inconsistent results, or taking your team away from higher-value work. It is especially useful for large batches, reflective products, apparel, jewelry, and recurring ecommerce image production.
Wish you could just hand this over to a pro? Surprise, you can.