


Why Your Background Removal Looks Fake (and How to Fix It)
When background removal goes wrong, products can look jagged, flat, or strangely “pasted on.” This diagnostic guide breaks down the five most common background removal mistakes and the professional background removal techniques used to fix them.

By
In this article
- Background Removal Techniques: The Good, The Bad, and The Ugly
- The Five Most Common Background Removal Fails
- 1. The “Jagged Edge” (Aliasing)
- 2. The “Helmet Hair” (Loss of Fine Detail)
- 3. The “Floating Product” (Lack of Grounding)
- 4. The “Glowing Halo” (Fringe Pixels)
- 5. Mismatched Lighting (The Tone Fail)
- Background Removal Mistakes Summarised
- Why the Human Eye Trumps the Algorithm
- A Quick Diagnostic Checklist
- How To Stop Your Product Images Looking Fake
We’ve all seen it: a stunning product that somehow looks “wrong.”
The background has been removed and instead it’s placed on a crisp background, yet it looks like it’s awkwardly floating in empty space or as if it’s been clumsily cut out with digital scissors.
Welcome to the “Uncanny Valley” of ecommerce product photography.

Background Removal Techniques: The Good, The Bad, and The Ugly
When background removal techniques go wrong, they create a subconscious red flag for customers. If the image feels fake, the product starts to feel unreliable too.
The reality is, while one-click AI tools are perfect for quick fixes like social media memes, they often fall short when it comes to the precision and intent needed for high-end retail photography.
The Five Most Common Background Removal Fails
In this guide, we’re breaking down the five most common background removal mistakes and sharing the professional background removal techniques that can transform a DIY edit into a high-converting visual asset.
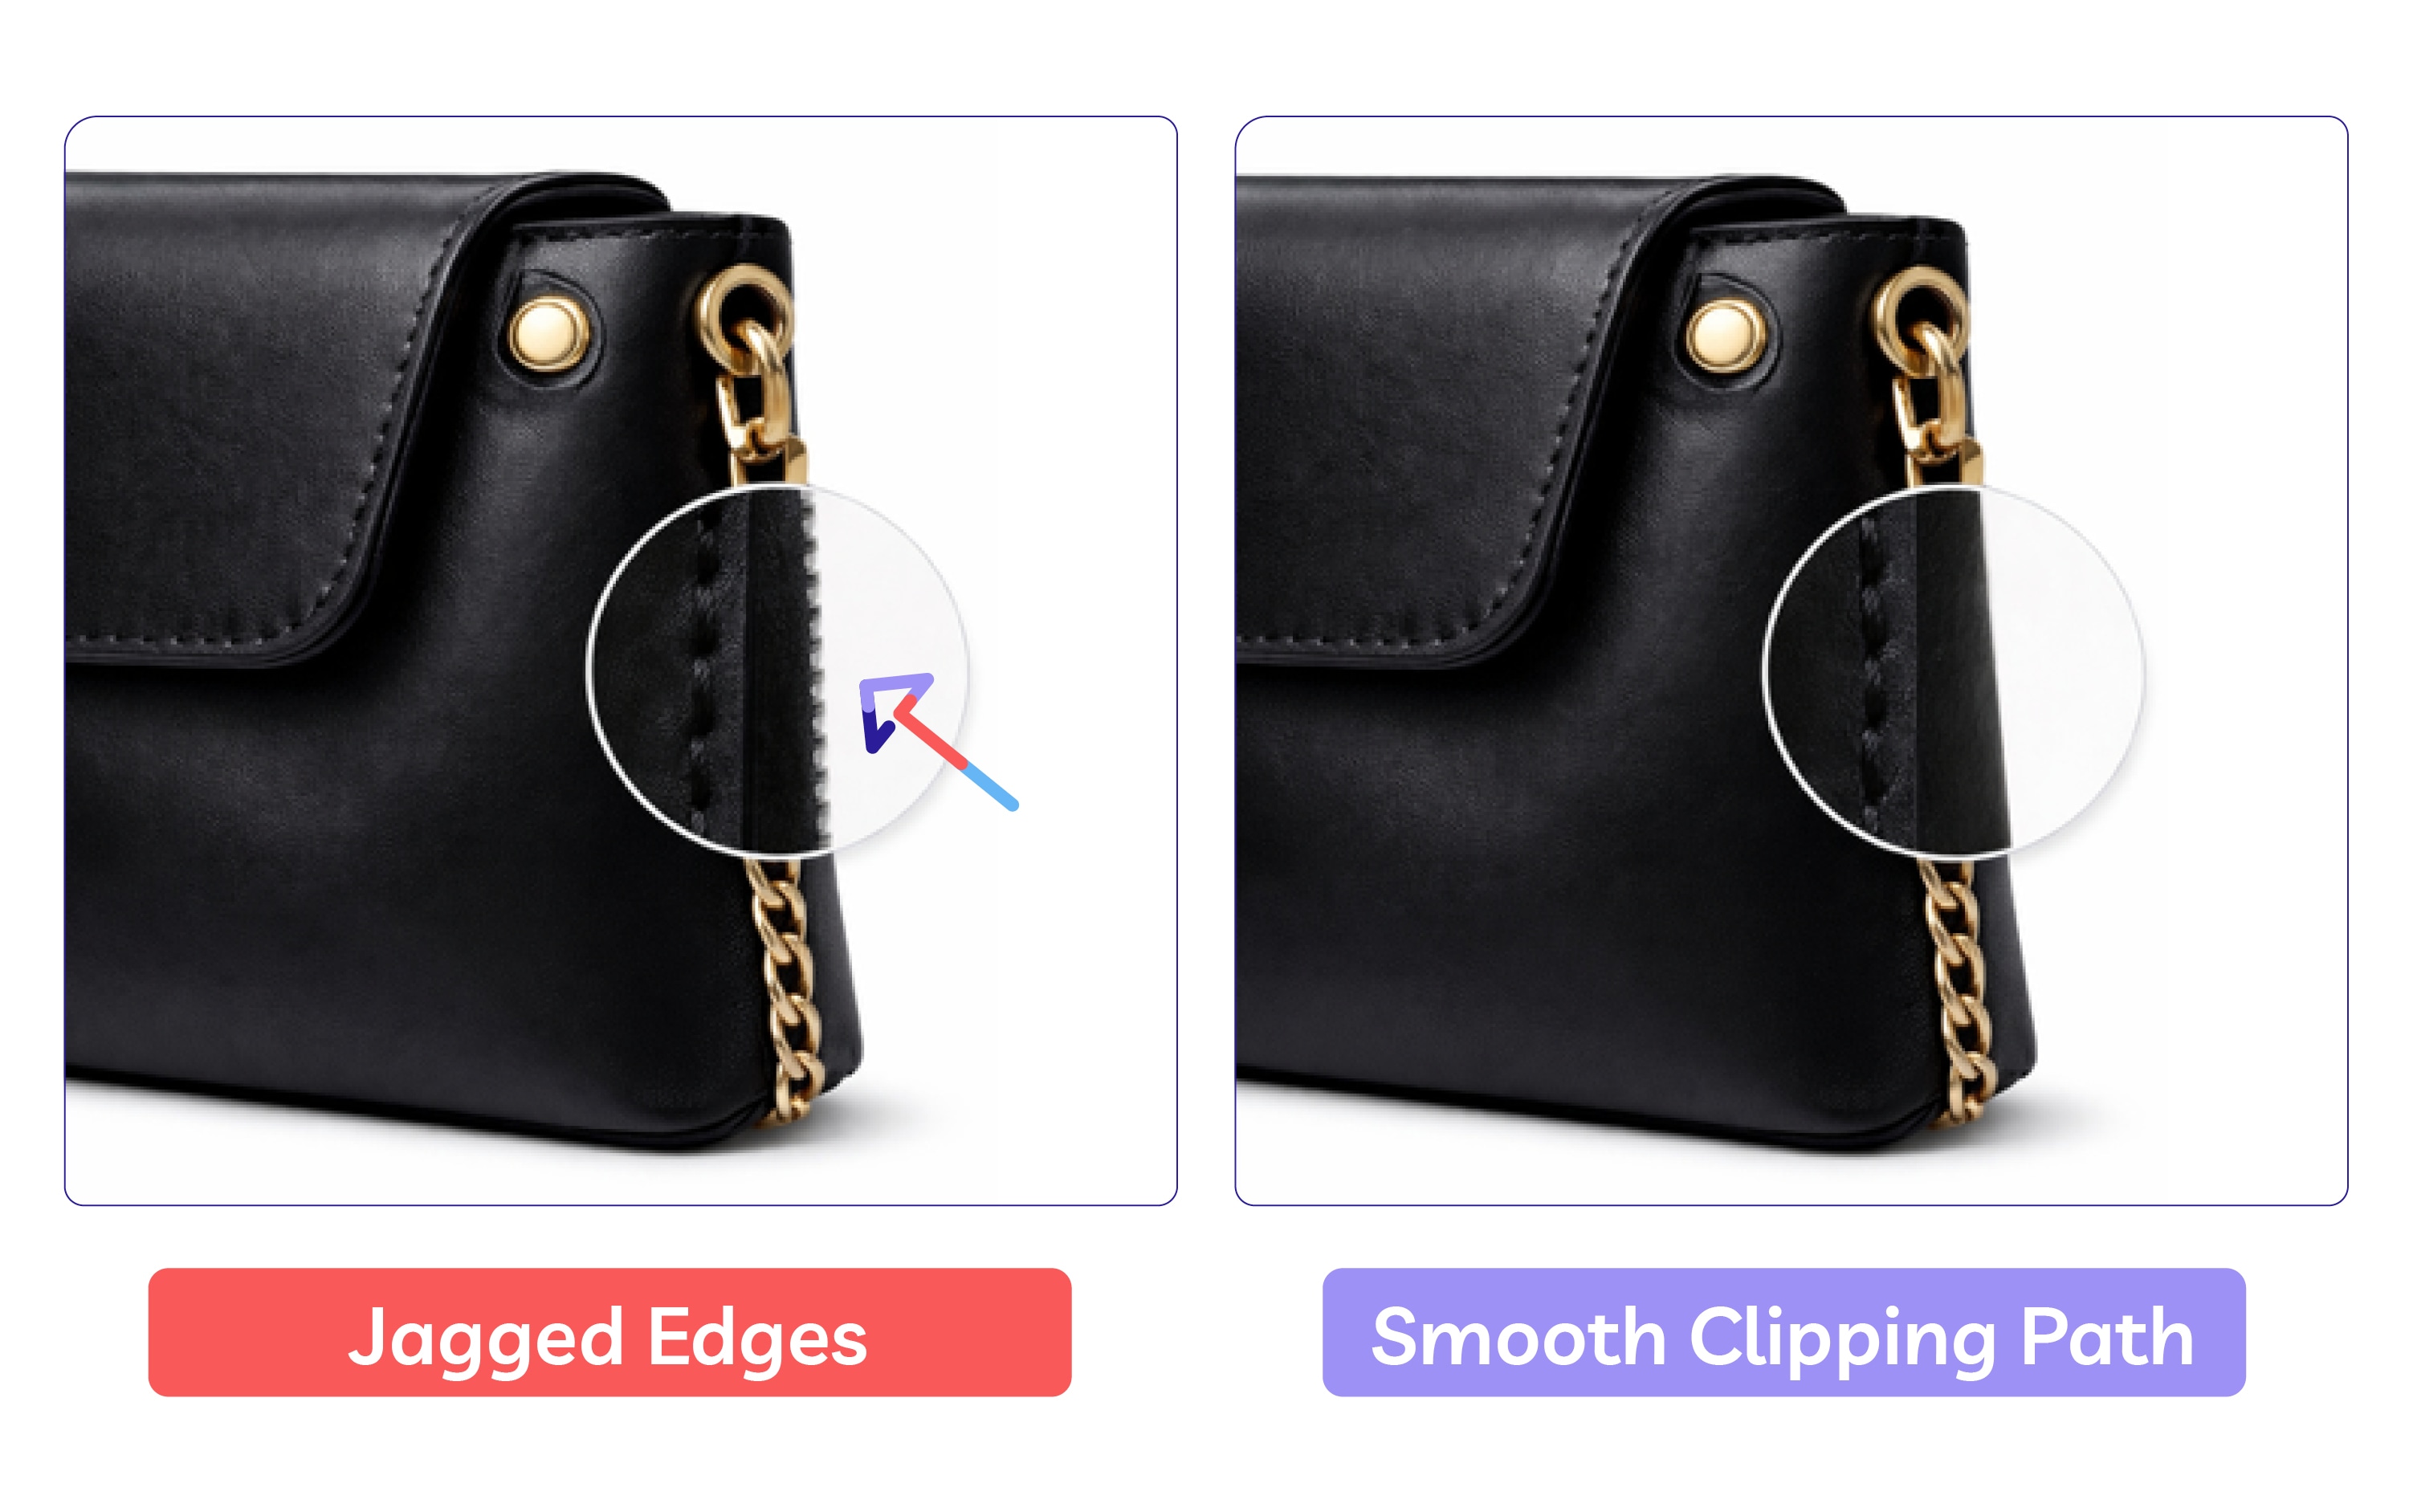
1. The “Jagged Edge” (Aliasing)
The Symptom:
When you zoom in, the edges of your product look pixelated, crunchy, or like a tiny staircase (known as “jaggies”).
The Cause:
This usually happens when using Magic Wand tools or low-quality automated removers. These tools struggle to determine exactly where a subject ends, often failing to “anti-alias” – the process of smoothing pixels as they transition from the product to the background.
The Professional Fix:
- For Hard Edges (Electronics, Shoes, Furniture): Use a Clipping Path Service . These are hand-drawn with the Photoshop Pen Tool. Because they are vector-based, they stay razor-sharp and can be scaled to any size without losing quality.
- For Soft/Organic Edges (Clothing, Hair, Fur): Use Image Masking. Vector paths are too “hard” for textures like faux fur or tassels. Instead, professionals use the Refine Edge Brush or Select and Mask in Photoshop to create a soft, feathered transition that looks natural against a new background.
2. The “Helmet Hair” (Loss of Fine Detail)
The Symptom:
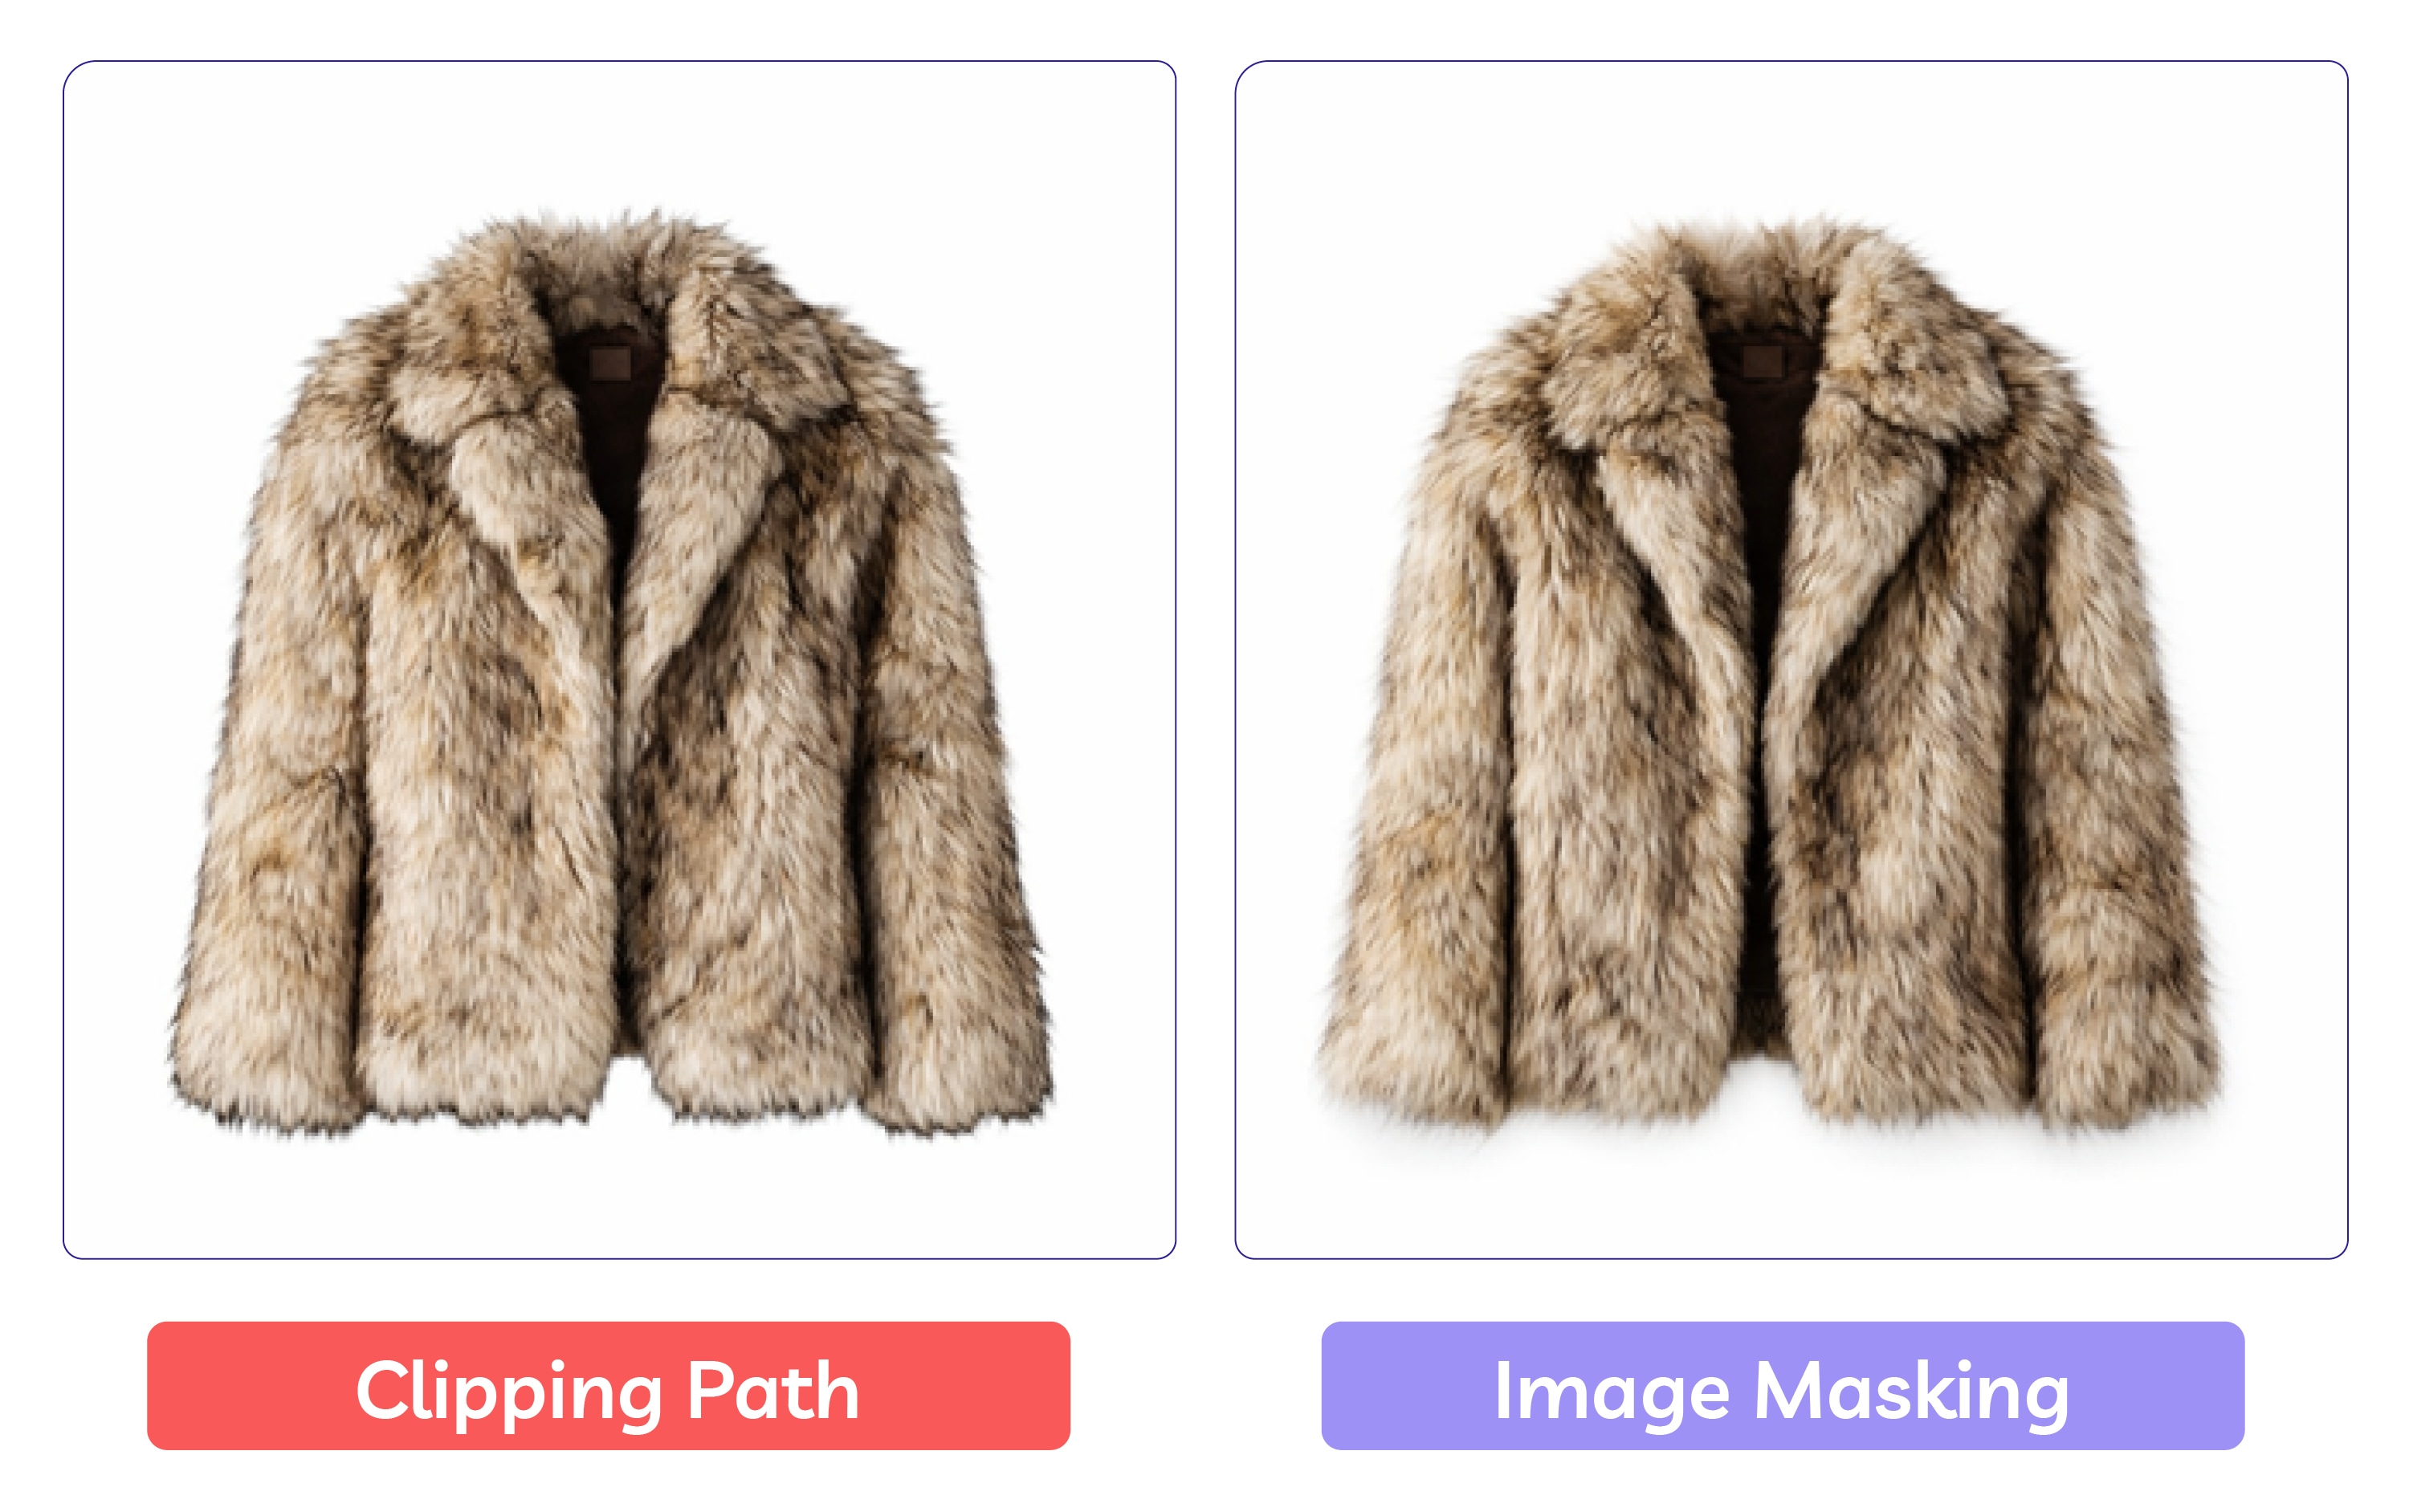
Fur, hair, or fabric tassels look like a solid, chunky block. The “airiness” of the product is gone, and the edges look like they were cut with safety scissors.
The Cause:
This is the result of applying a “hard” clipping path to a “soft” subject. A vector line can’t capture the thousands of individual strands in a faux-fur coat, a tassle on a rug, or a model’s hairstyle.
The Professional Fix:
- The Strategy: This is where the Image Masking vs. Background Removal distinction becomes critical.
- The Tool: Professionals use Layer Masking combined with the Refine Edge Brush or Channel Masking.
- The Result: These techniques use pixel-level brushes and channel manipulation to preserve semi-transparency. This allows the new background to peek through the fine strands, making the transition look 100% natural and preventing that “stuck on” sticker look.
3. The “Floating Product” (Lack of Grounding)
The Symptom:
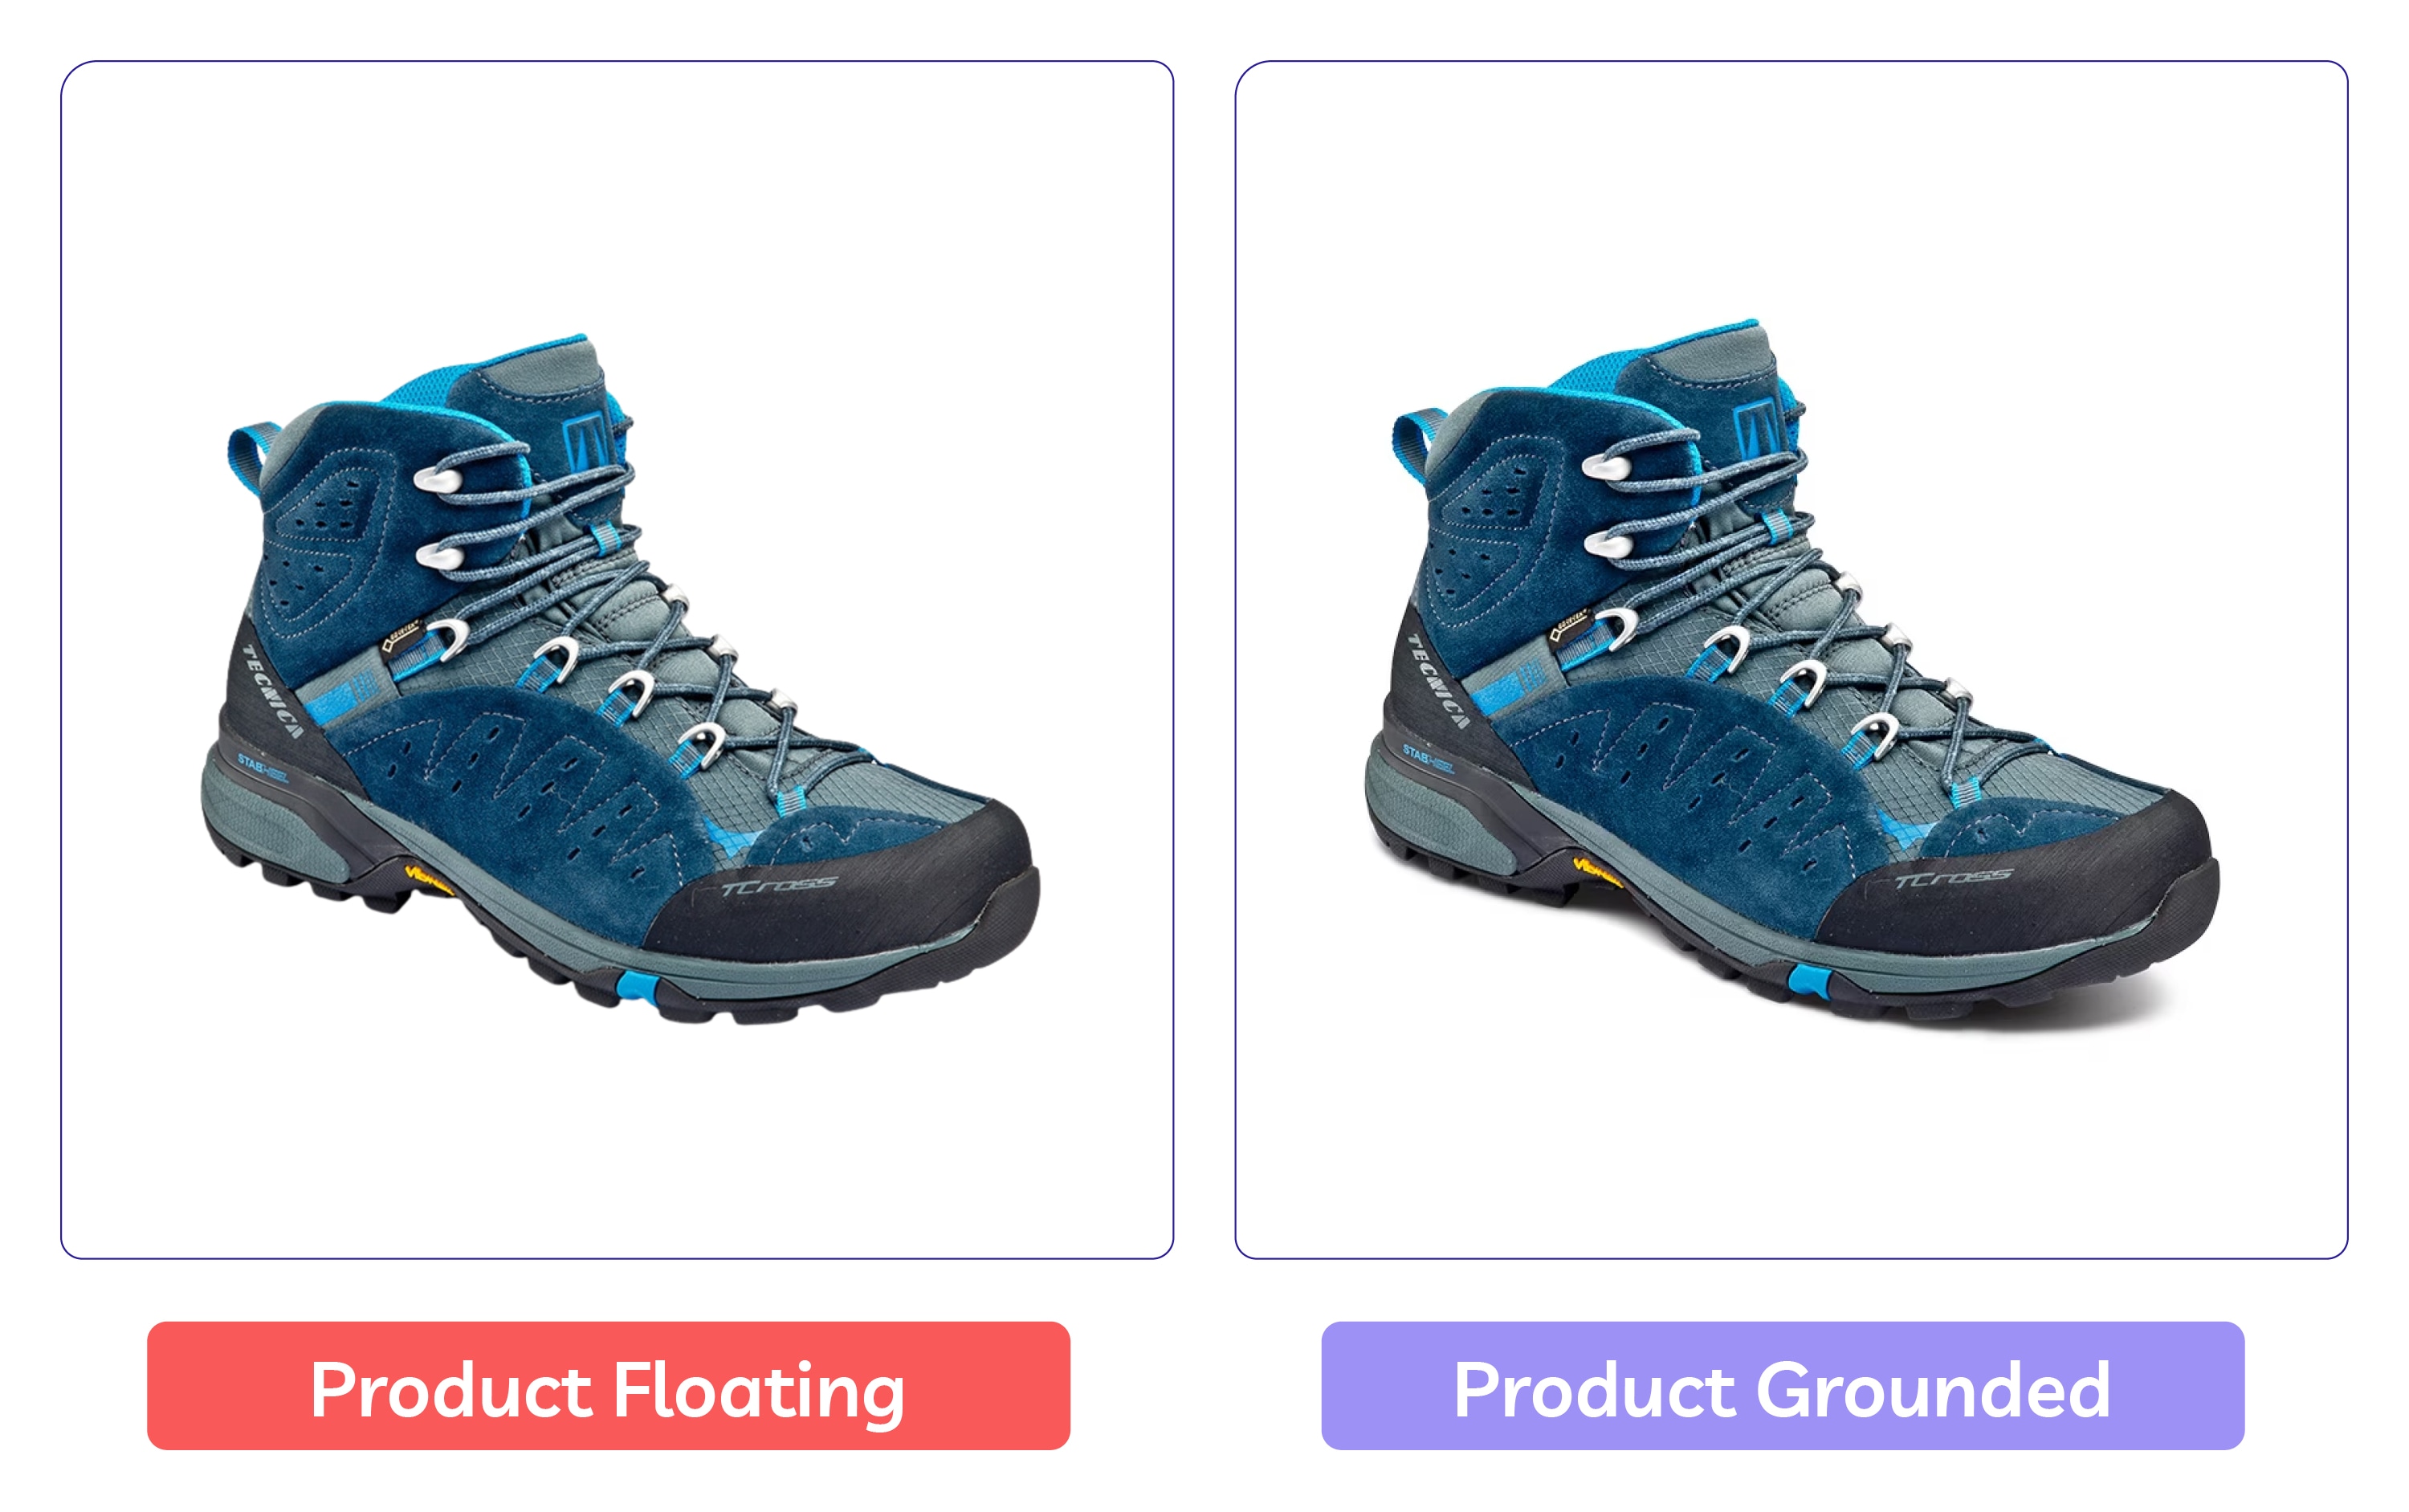
The product has no visual “weight.” It looks like it’s hovering in a white void rather than sitting on a solid surface. This is one of the quickest ways to make an e-commerce photo feel “cheap.”
The Cause:
When you delete a background with a one-click tool, you almost always delete the natural shadows too. Without these, you lose the “contact” that tells the human brain the object is a real, physical item occupying a space.
The Professional Fix:
- The Strategy: You must recreate the “Grounding.” As we discussed in our guide on how to add a background to an image, you need a layered approach.
- The Technique: Combine Contact Shadows (the thin, dark sliver exactly where the product touches the floor) with Cast Shadows (the larger, softer shadow that follows the direction of the light).
- The Result: This dual-shadow approach “anchors” the subject, giving it the depth and realism needed to convert browsers into buyers.
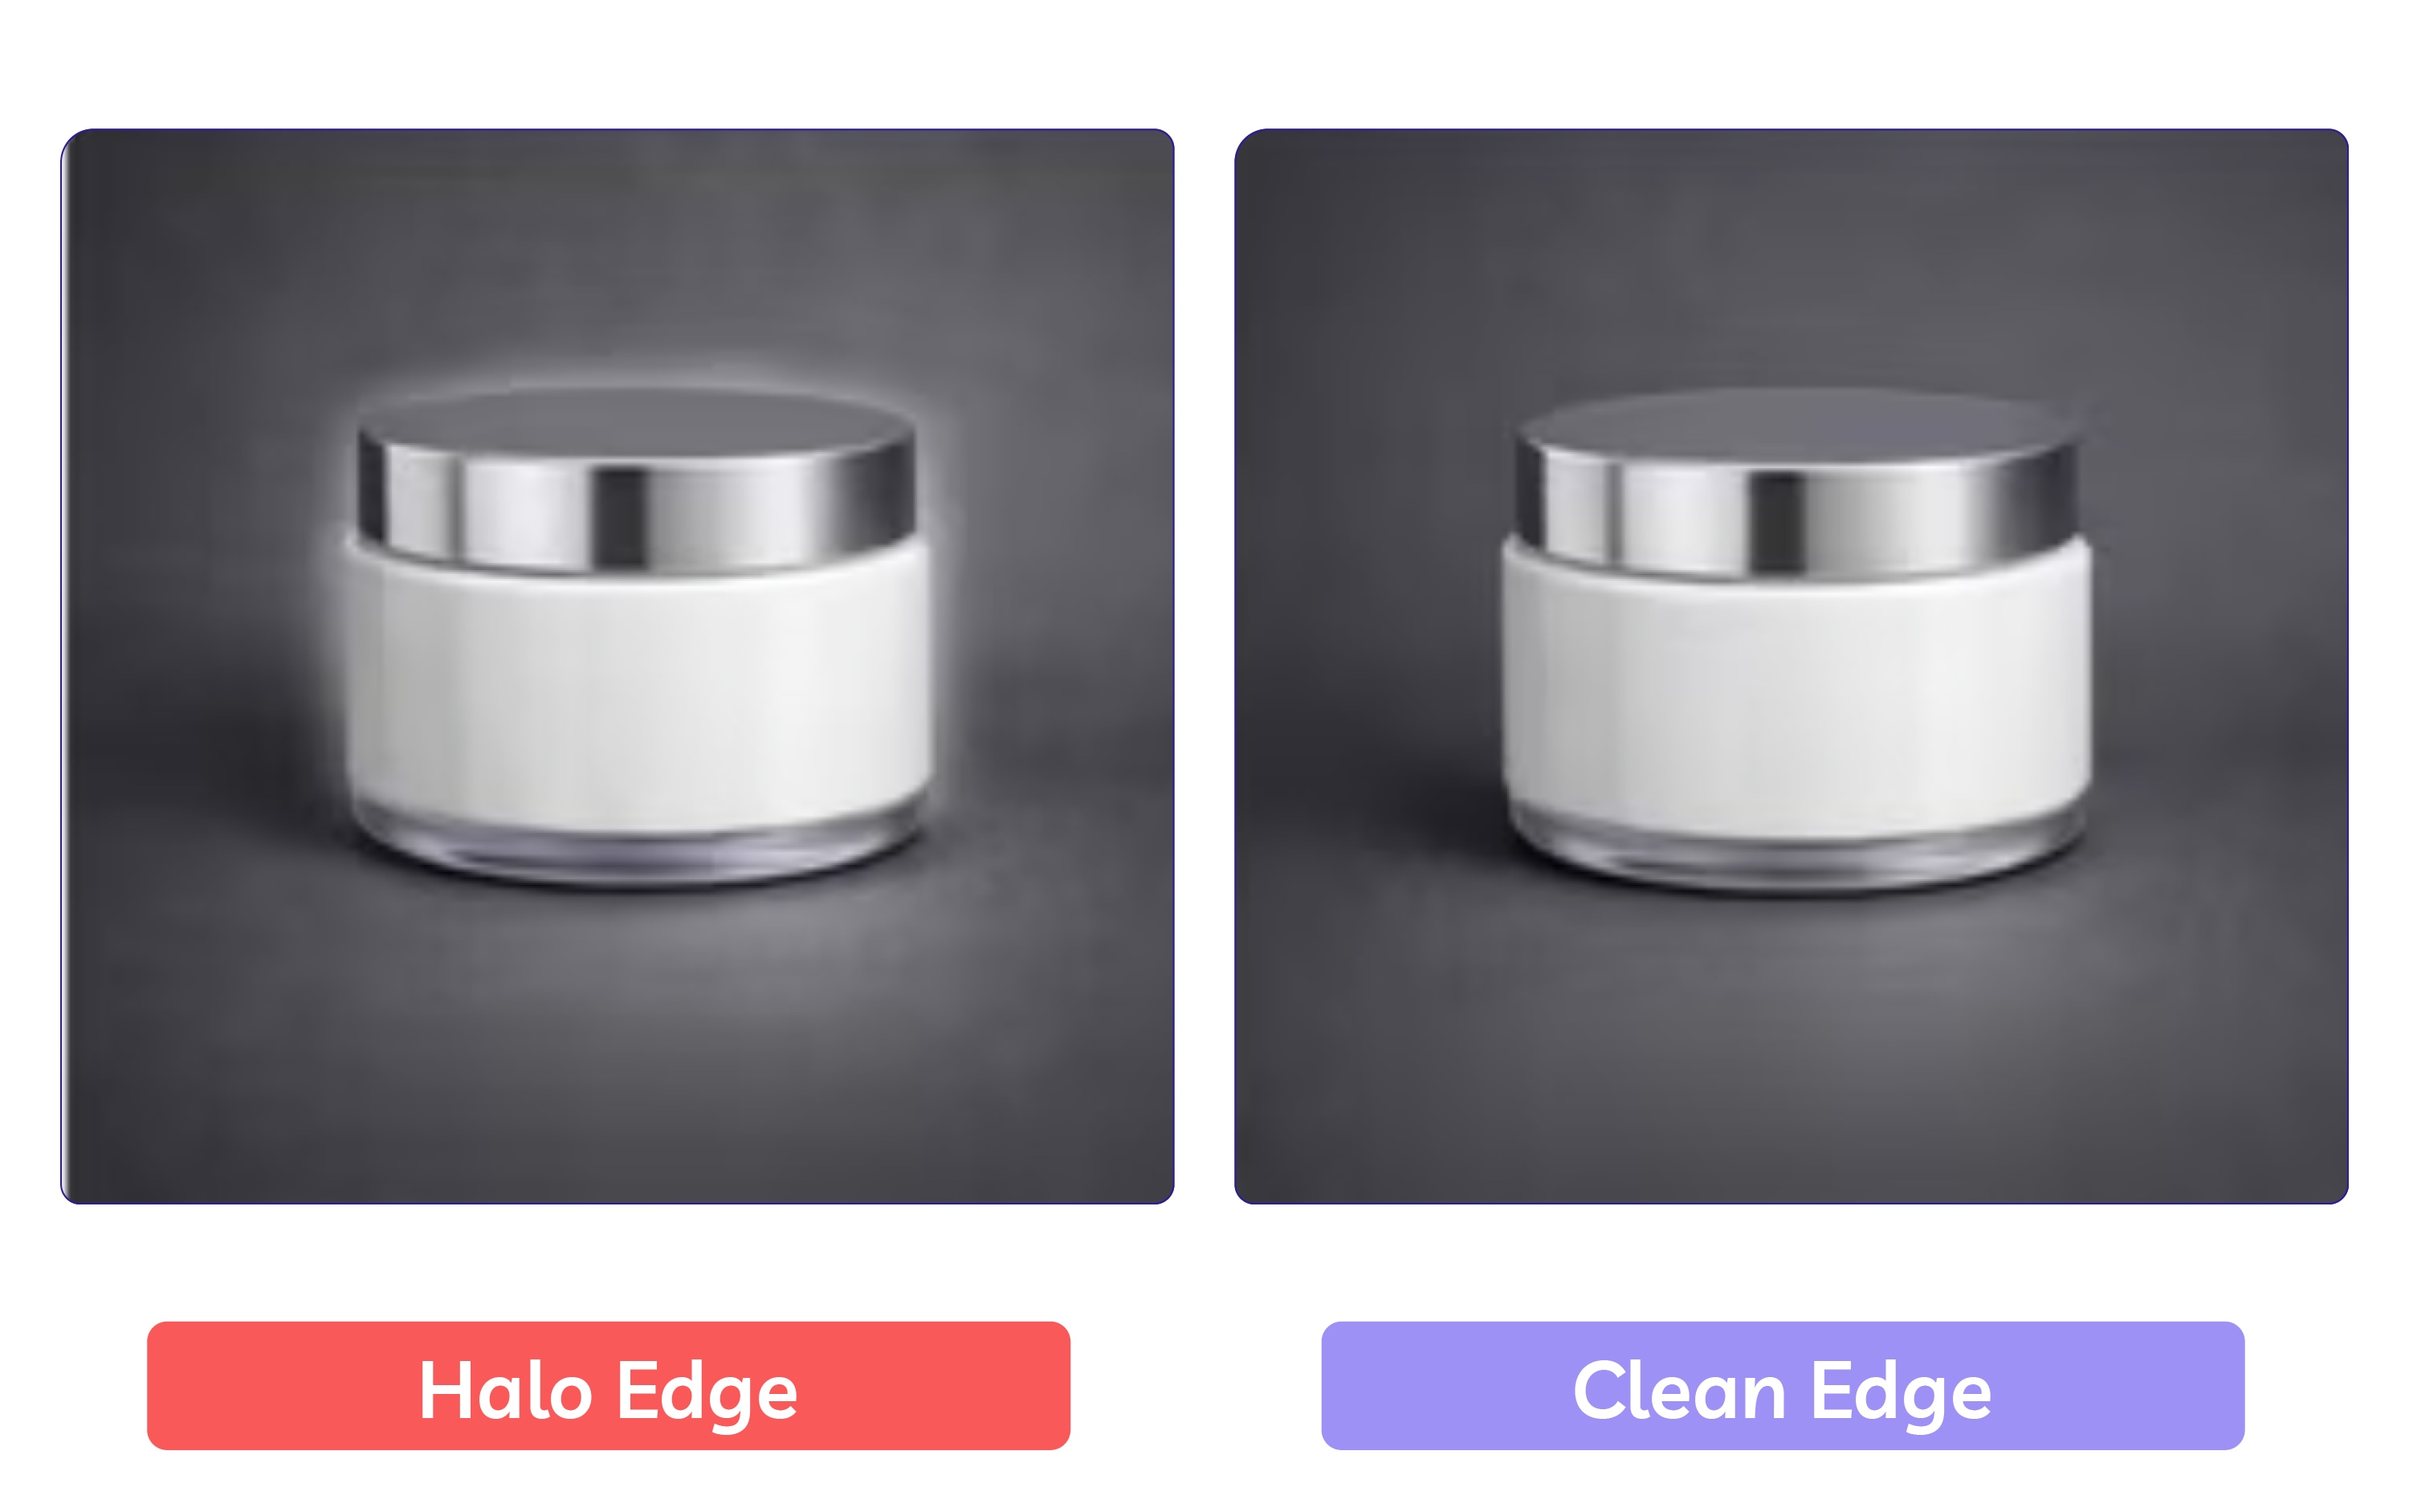
4. The “Glowing Halo” (Fringe Pixels)
The Symptom:
A thin, distracting sliver of the original background (often white or light grey) clings to the edges of the product like a glow.This is especially obvious when moving a product from a light background to a dark one (or vice versa).
The Cause:
The selection was too “loose” or the anti-aliasing pixels picked up the color of the original background. Even a one-pixel gap can leave behind “ghost” pixels from the old environment.
The Professional Fix:
- The Strategy: Professional Background Removal Services use a technique called “Contracting” or “Choking” the selection.
- The Technique: Editors move the boundary inward by 1 or 2 pixels to ensure no background remains. For colored reflections, they use Color Decontamination or a “Clipping Mask” with a soft brush to manually paint the correct color back into the edges.
- The Result: A clean, integrated edge that looks like it was shot in its new environment, not just “pasted” there.
5. Mismatched Lighting (The Tone Fail)
The Symptom:
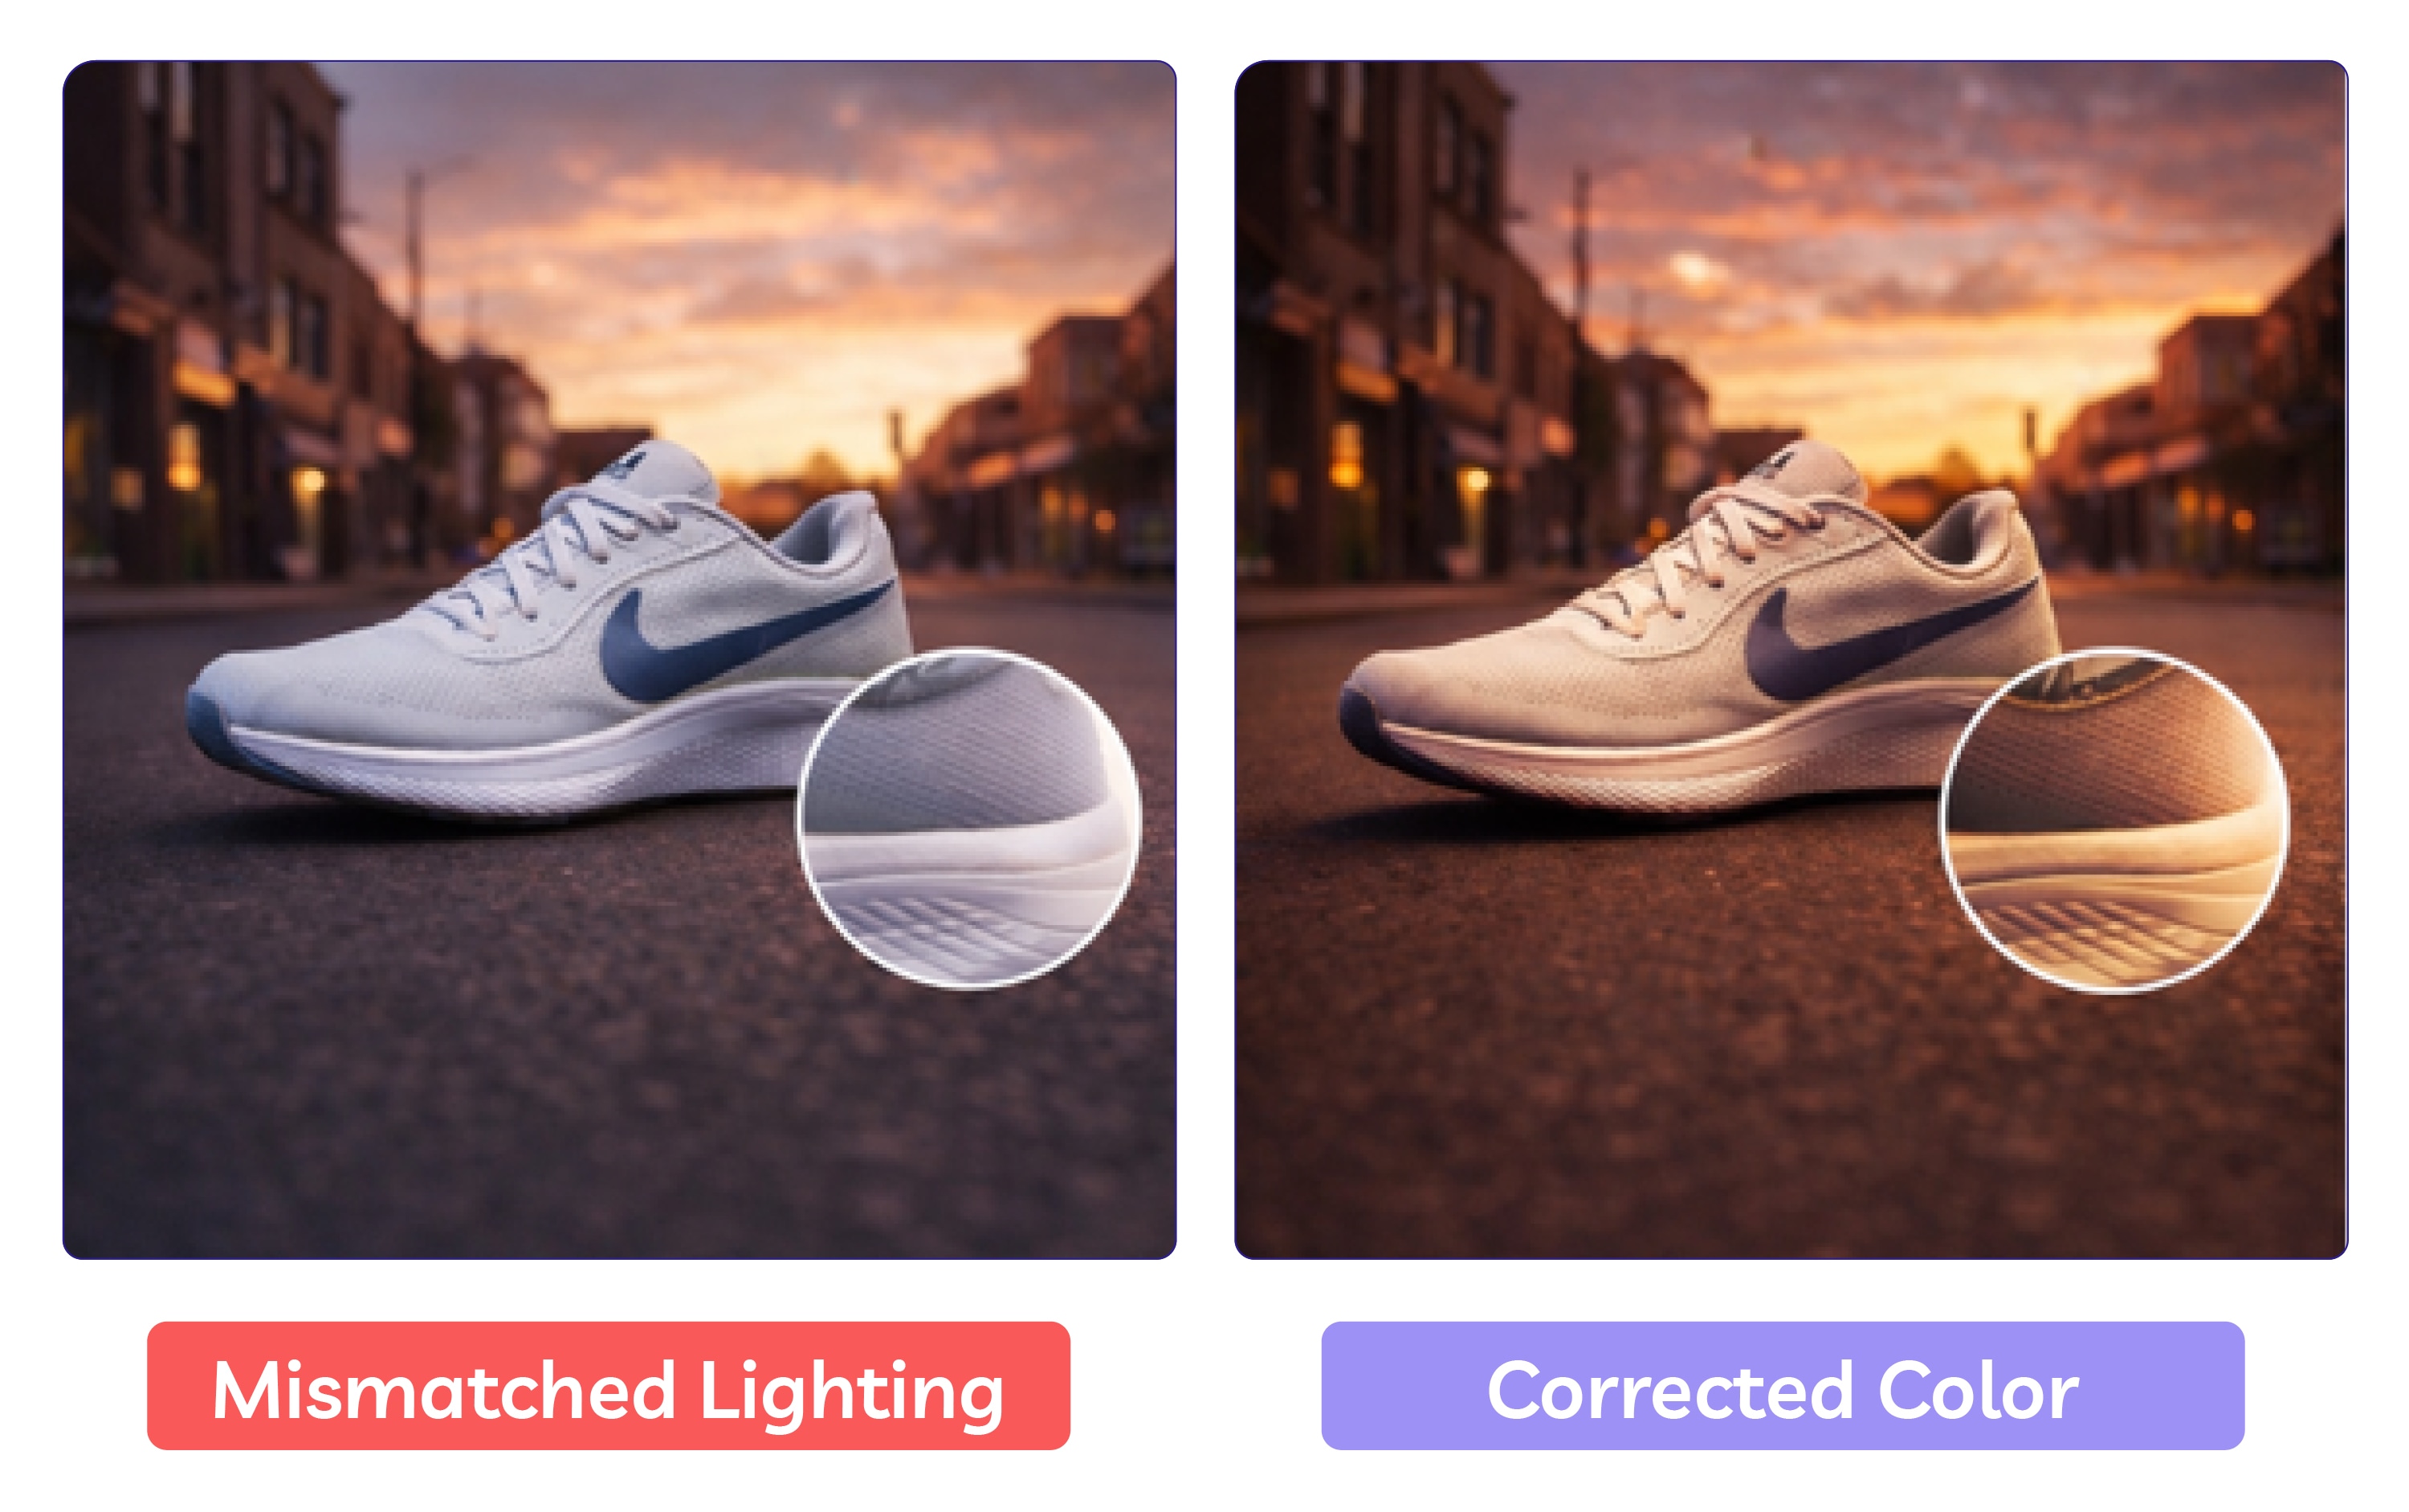
The product looks awkwardly “pasted on,” with bright, cool tones that clash against a warm, moody background. It’s missing the visual “glue” that makes it feel like the product was actually there when the photo was taken.
The Cause:
Overlooking the relationship between the product and its environment. Since the human brain processes images in just 13 milliseconds, it instantly flags lighting mismatches as a “fake” red flag.
The Professional Fix:
- The Strategy: Harmonize the product and background through advanced Photo Retouching. techniques.
- The Technique: Apply Curves and Levels adjustment layers to match the background’s color tones with the product’s highlights and shadows. This process, known as “Color Grading” or “Matching Tones,” creates a cohesive visual connection between the two layers.
- The Result: A seamless composite where the product feels naturally integrated into its new environment, significantly boosting its perceived value and trustworthiness.
Background Removal Mistakes Summarised
Using the wrong background removal techniques can seriously impact the quality of your images.

You might end up with the dreaded “Jagged Edge,” where aliasing creates rough, unnatural outlines, or “Helmet Hair,” where the edges of a product look rough and unnatural, or “Helmet Hair,” where fine details like stray hairs are completely lost.
Another common issue is the “Floating Product” effect, where the item looks like it’s awkwardly hovering in mid-air because it’s not properly grounded.
Then there’s the “Glowing Halo,” caused by fringe pixels that leave an unnatural outline around the subject, and finally, “Mismatched Lighting,” where the product and background don’t blend because their tones and lighting don’t match, making the image feel off.
These mistakes not only distract from your product but also erode trust and professionalism. Getting the details right is what sets polished, high-converting images apart from the rest.
Why the Human Eye Trumps the Algorithm
AI background removal is fast, but it doesn’t have “eyes.” It doesn’t understand the intent of a photo.
An algorithm can’t always tell where a white shoelace ends and a white studio floor begins. It can’t distinguish between a deliberate, high-end reflection on a glass bottle and a distracting glare that needs to be removed.
Mastering different background removal techniques isn’t just about deleting pixels; it’s about preserving the integrity of your brand.
If you’re struggling with “haloes,” “jagged edges,” or products that just won’t sit still, it might be time to move beyond the automated tools.
A Quick Diagnostic Checklist
Before hitting upload on your next product image, take a moment to run through this quick checklist.

If any of these items are an issue, there’s a good chance your customers’ brains will subconsciously label the image as “fake” before they even know what’s wrong.
How To Stop Your Product Images Looking Fake
Creating authentic, professional-looking product images requires attention to detail and the right techniques.
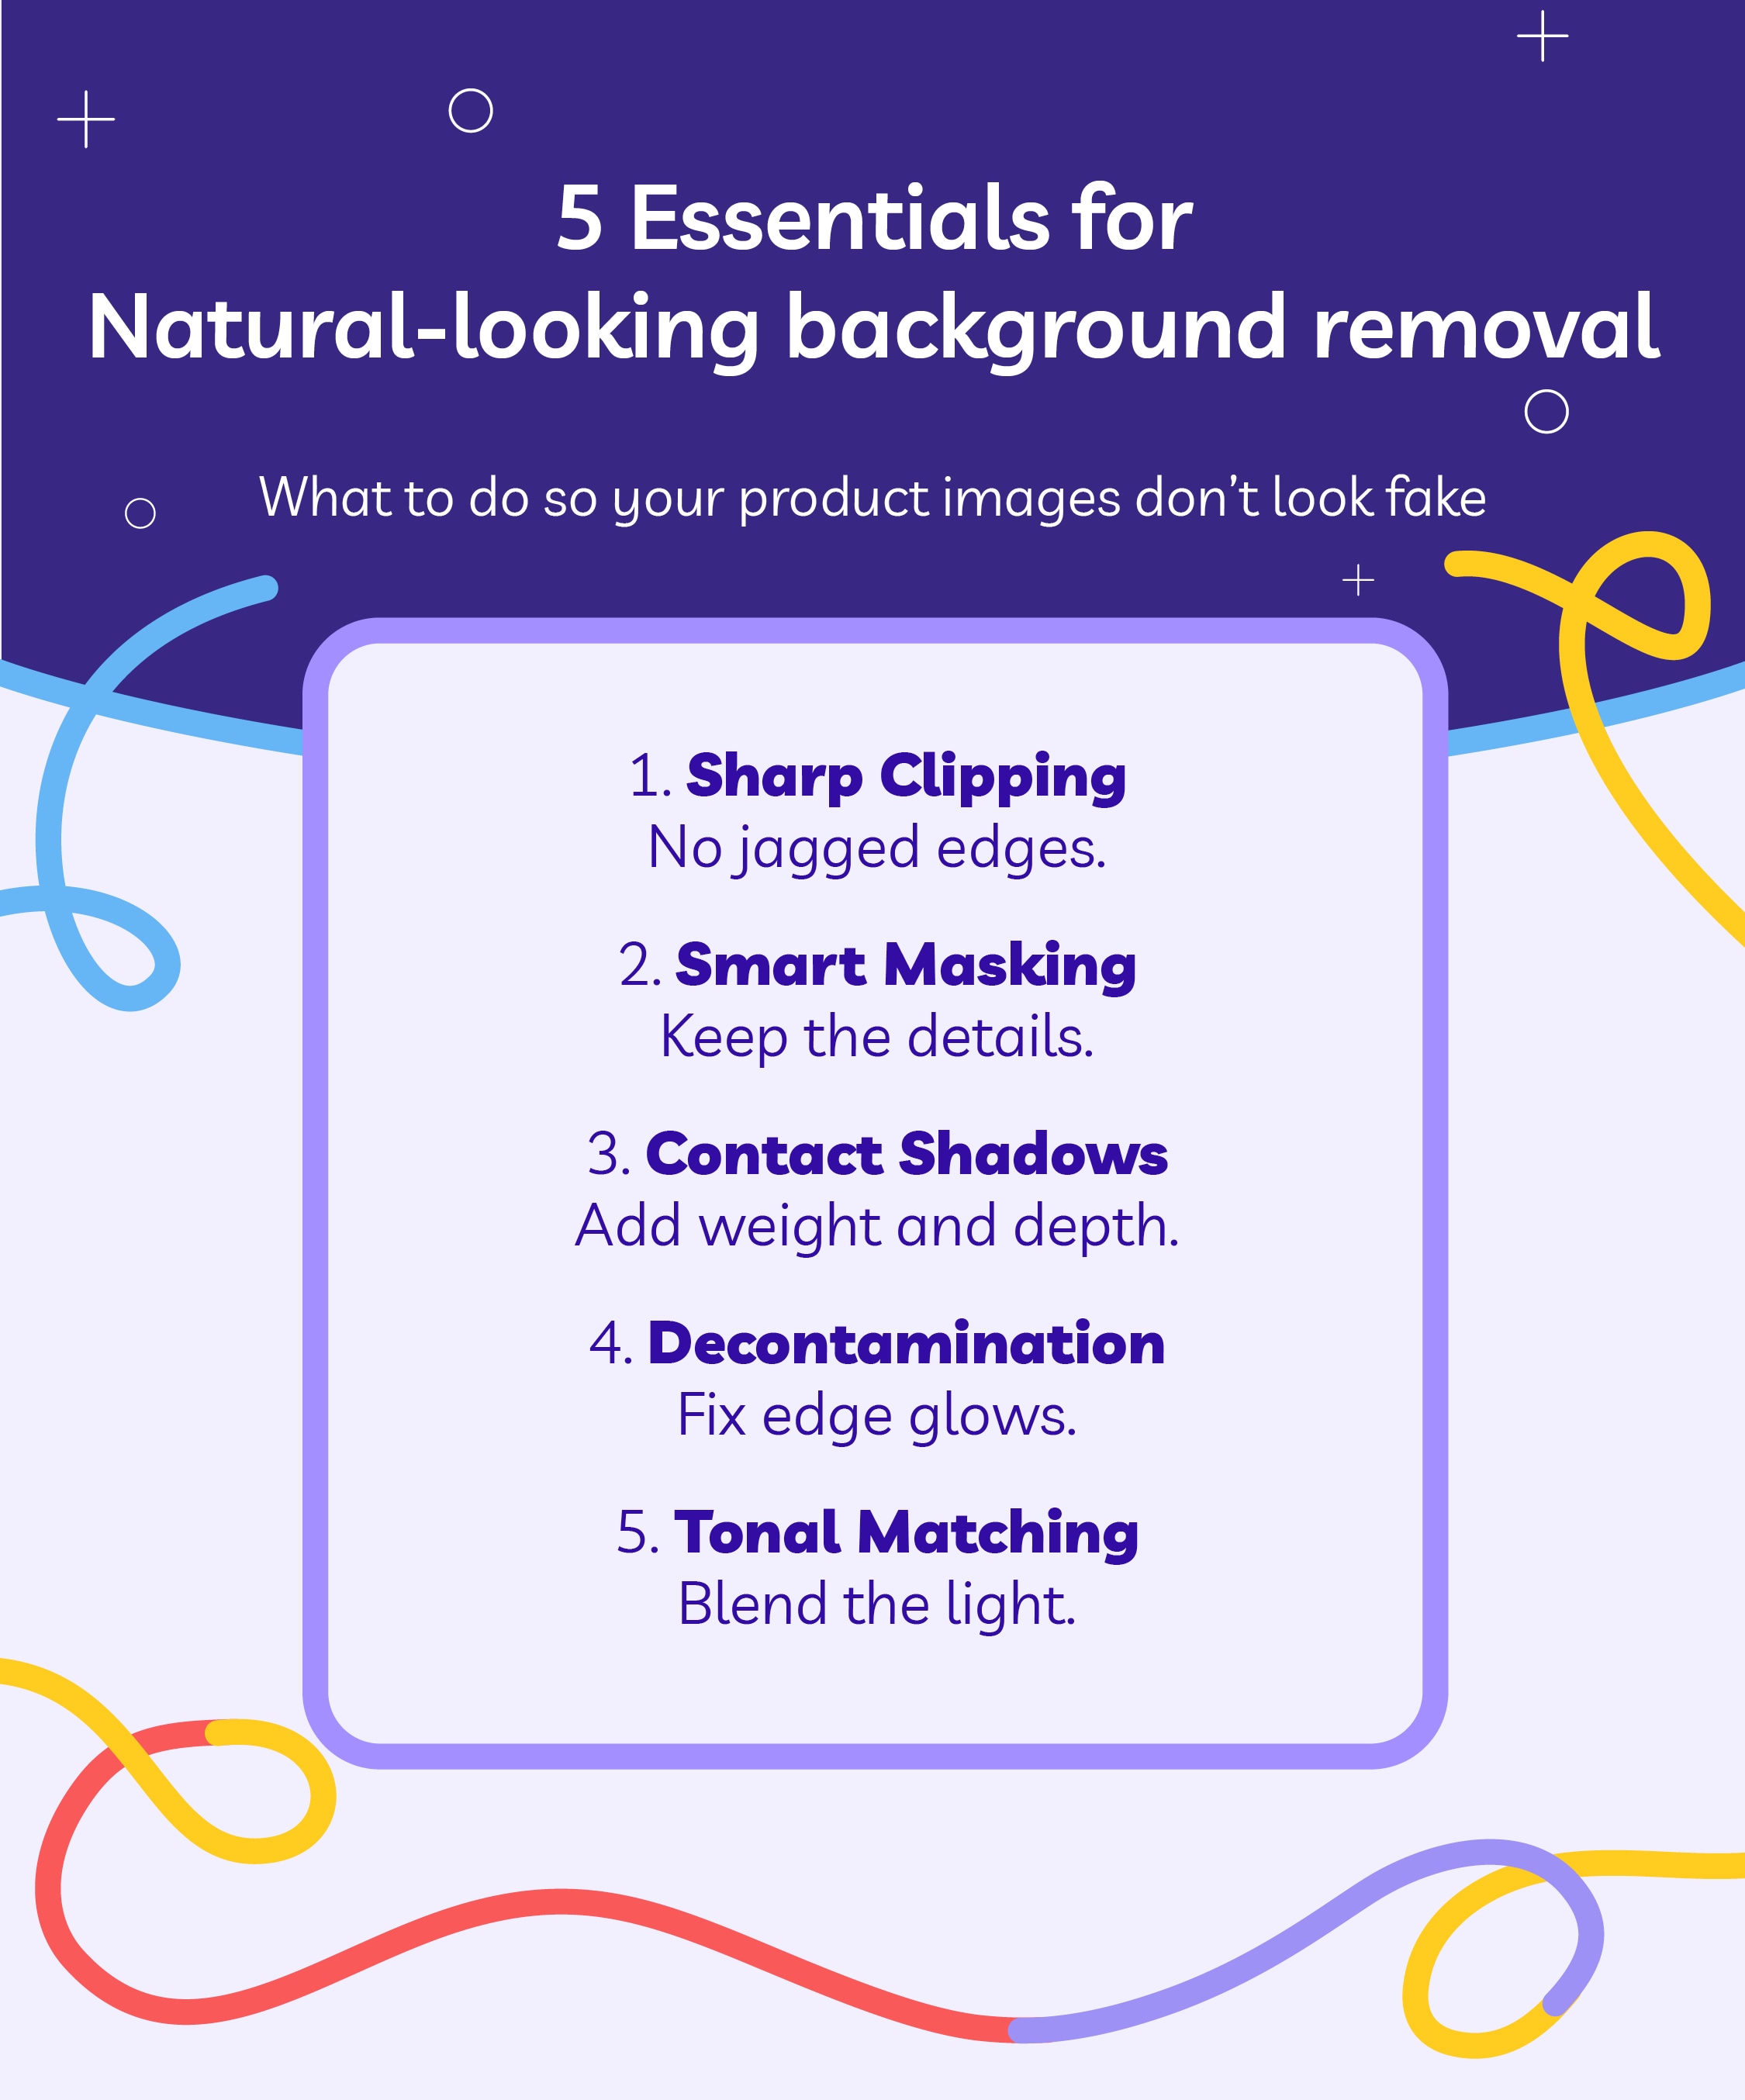
Start by avoiding common pitfalls like jagged edges, glowing halos, or mismatched lighting.
Use advanced tools like image masking to preserve fine details, and ensure the product is properly grounded to avoid the “floating” effect.
Pay close attention to lighting consistency – harmonize the tones of the product and background through techniques like color grading to make them feel naturally connected.
Finally, invest in professional retouching to refine every element, ensuring your images look polished, trustworthy, and ready to convert.
Wish you could just hand this over to a pro? Surprise, you can.