Changing the color of an object is one of those Photoshop tasks that sounds simple - until you need the result to look realistic.
Moving the Hue slider can turn a blue shirt green in seconds. But it can also change colors elsewhere in the image, leave traces of the original color around the edges or produce a result that looks unnaturally flat.
The better approach is to make the color change non-destructively, isolate it to the area you actually want to edit and then refine the result.
In this guide, we’ll show you how to change the color of an object in Photoshop using a Hue/Saturation adjustment layer and layer mask.
Adobe currently recommends this as a flexible, non-destructive method for replacing the color of a selected object because you can continue refining or removing the adjustment without permanently changing the original image.
We’ll use a product photo as our example, but you can apply the same basic process to clothing, furniture and many other objects.
What you’ll need
Before starting, open the image you want to edit in Photoshop.
For the best result, choose an image where:
- The object is clearly visible
- Its edges can be identified
- There is enough detail in the highlights and shadows
- The original image is reasonably high resolution
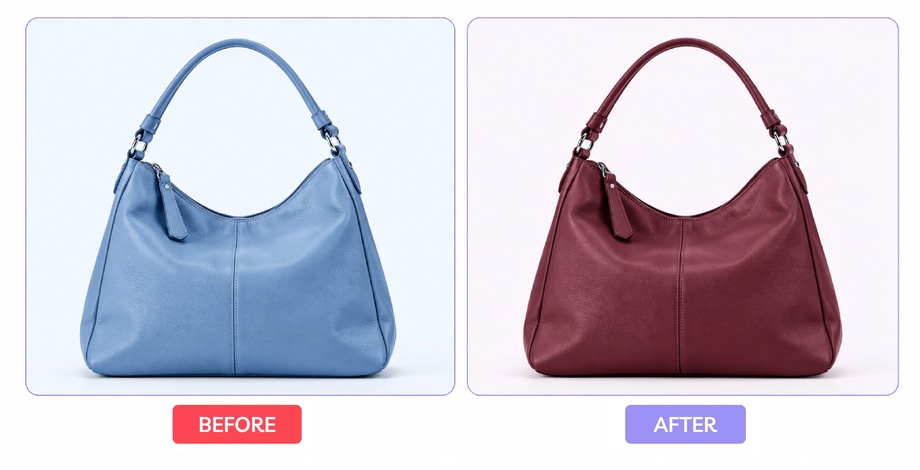
For this tutorial, let’s imagine we’re changing a blue product to burgundy.
We’ll be using:
Selection → Hue/Saturation adjustment layer → Layer mask → refinement
This keeps the original image intact while allowing us to control exactly where the new color appears.
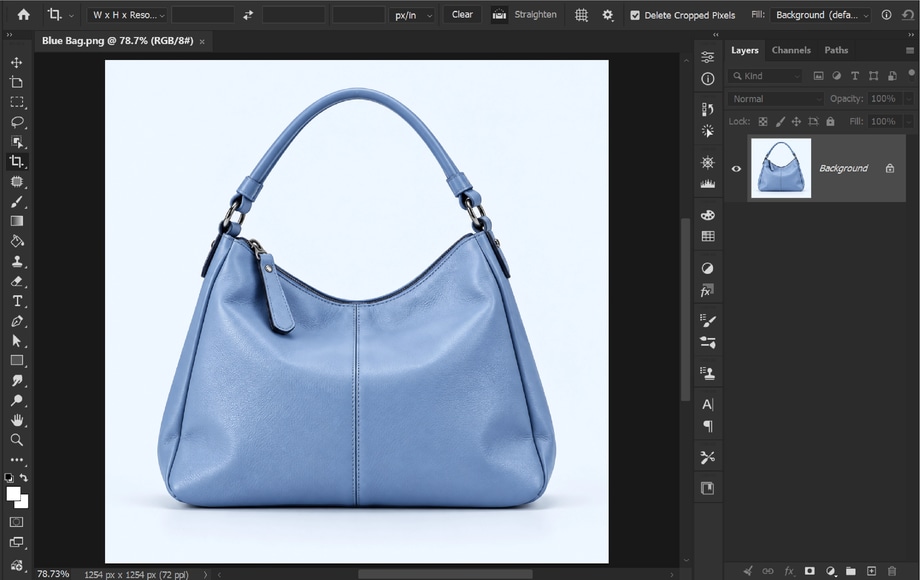
Step 1: Select the object you want to recolor
First, select the object - or part of the object - whose color you want to change.
Photoshop offers several selection tools, and the best option depends on the image.
For a clearly defined product, the Object Selection or Quick Selection tool can provide a useful starting point.
Make sure your selection includes the areas you want to recolor without unnecessarily including the background or surrounding objects.
Don’t worry if the selection isn’t absolutely perfect yet. We’ll refine it using the layer mask later.
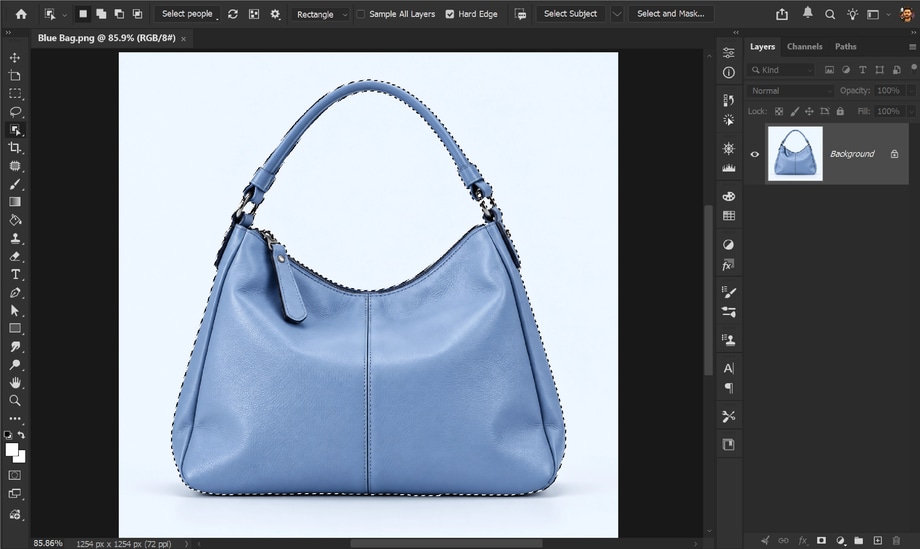
Step 2: Add a Hue/Saturation adjustment layer
With the object selected, open the Adjustments panel and choose Hue/Saturation.
Photoshop creates a new Hue/Saturation adjustment layer.
Because you made the selection first, that selection becomes the adjustment layer’s mask. This means the color adjustment is applied to the selected product rather than indiscriminately changing the whole photograph.
This is also a non-destructive edit.
Instead of permanently changing the pixels in your original photograph, Photoshop stores the color adjustment separately, allowing you to alter or remove it later.
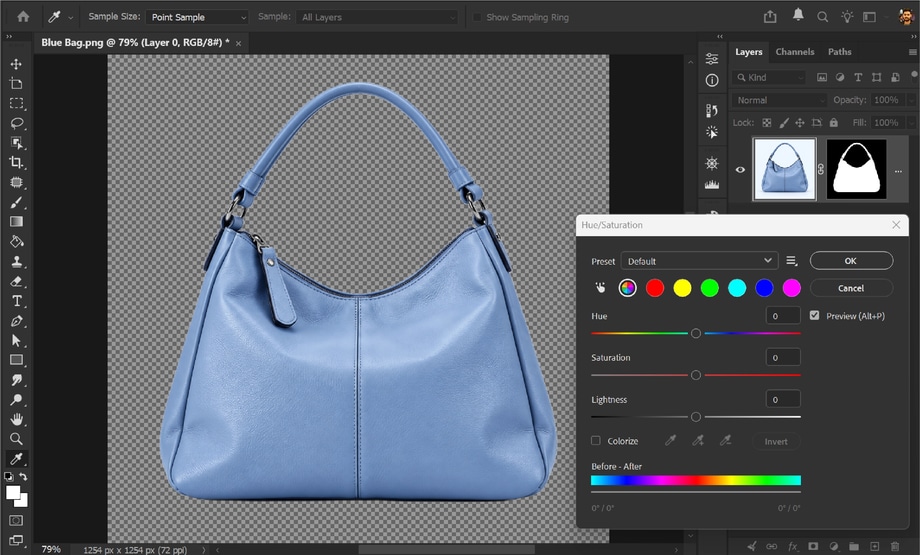
Step 3: Change the Hue
Now select the Hue/Saturation adjustment layer and look at the Properties panel.
You’ll see three main controls:
Hue changes the color itself.
Saturation controls the intensity of the color.
Lightness affects how light or dark it appears.
Move the Hue slider and watch the selected product change color.
For our example, continue moving it until the original blue starts to move towards burgundy.
Don’t worry about matching the final shade perfectly yet. At this stage, we’re establishing the basic new color.
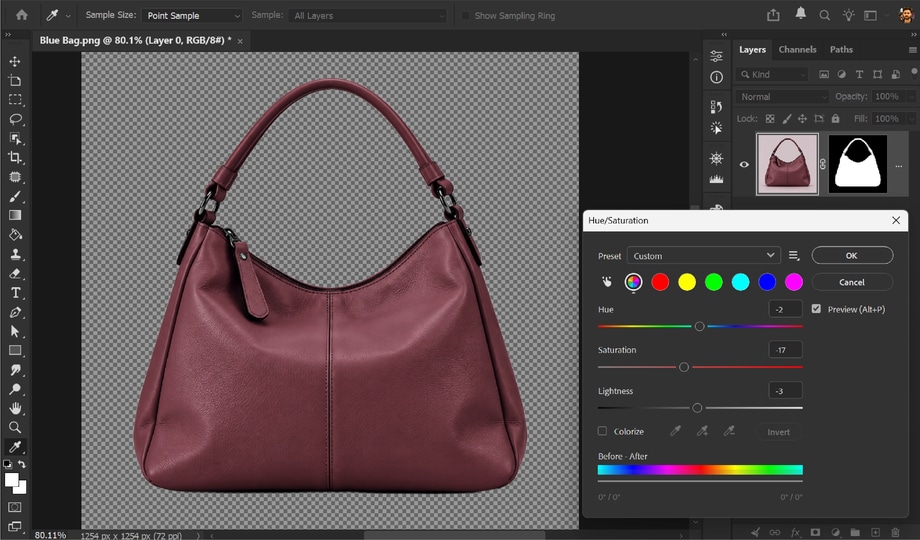
Step 4: Adjust Saturation and Lightness
Once the hue is approximately right, refine the result using Saturation and Lightness.
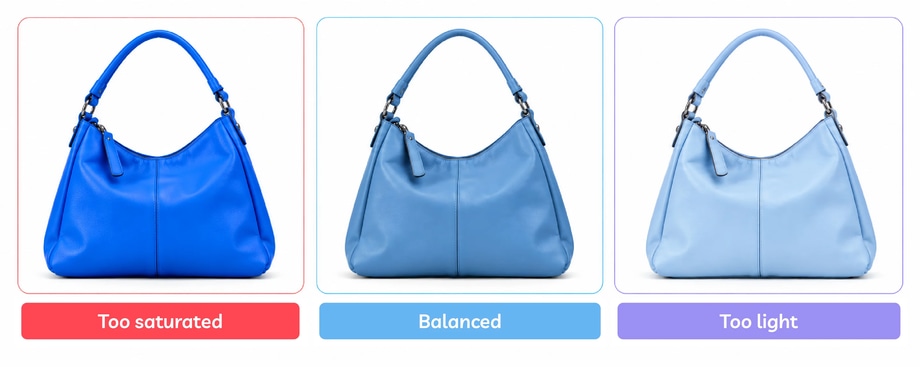
Saturation determines how intense the new color appears. Too much can make a product look unnaturally vivid; too little can leave it washed out.
Lightness affects the brightness of the color.
Be particularly careful with Lightness because changing it aggressively can alter the contrast that gives the product its three-dimensional appearance.
Adobe specifically advises keeping Lightness at zero when you want to maintain contrast during its object-color replacement workflow. Adobe also suggests using the Hue blending mode where you want to preserve both the original contrast and saturation.
For a realistic product edit, don’t judge the new color in isolation. Compare it with the original image and check that the product still has natural highlights, shadows and depth.
Step 5: Try Colorize if the original color is affecting the result
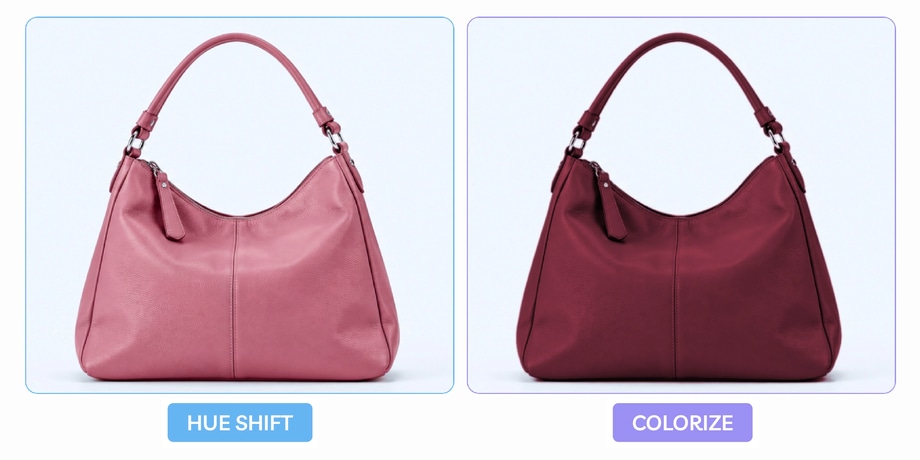
Sometimes moving the Hue slider doesn’t produce the color you want because too much of the original color remains.
In that situation, try selecting Colorize in the Hue/Saturation Properties panel.
Adobe recommends Colorize when the object’s original color continues to tint the replacement color.
Colorize applies a more uniform hue, after which you can adjust Hue, Saturation and Lightness again.
However, don’t assume Colorize will automatically give you the better result.
Compare both approaches.
The goal isn’t simply to reach the correct part of the color wheel — it’s to make the new color work naturally with the original photograph.
Step 6: Refine the layer mask
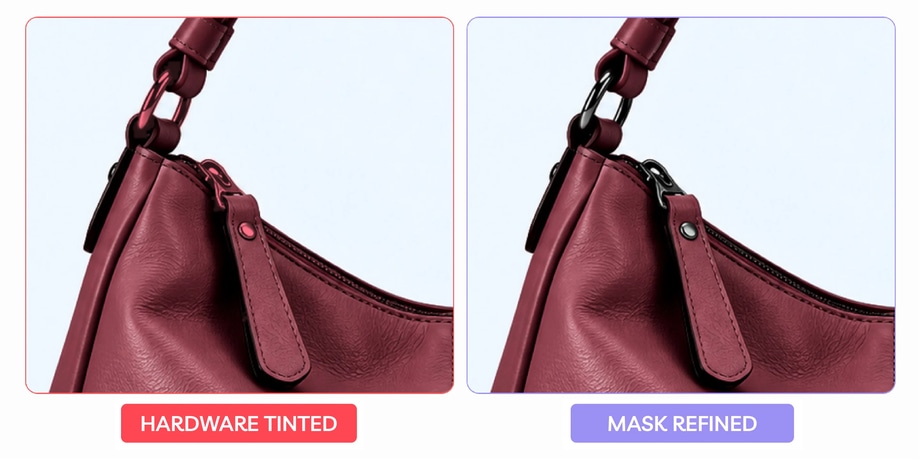
Now zoom in and inspect the edges of the product.
You may notice that the new color has affected areas it shouldn’t, or that small parts of the original color remain.
Select the layer mask thumbnail beside the Hue/Saturation adjustment layer.
With a brush:
- Paint with black to hide the color adjustment.
- Paint with white to reveal it.
- Grey can be used where a partial adjustment is required.
This lets you manually control precisely where the new color appears. Adobe describes layer masks using the same principle: white reveals the adjustment, black conceals it and grey creates partial transparency.
Pay particular attention to:
- Product edges
- Stitching
- Logos
- Metal hardware
- Zips
- Buttons
- Fine fibres
- Areas where two different materials meet
For example, if you’re recoloring a leather handbag, you probably don’t want the color adjustment changing its silver zip or metal logo.
Step 7: Refine the color range if necessary
Some products contain several similar colors or complex tonal variations.
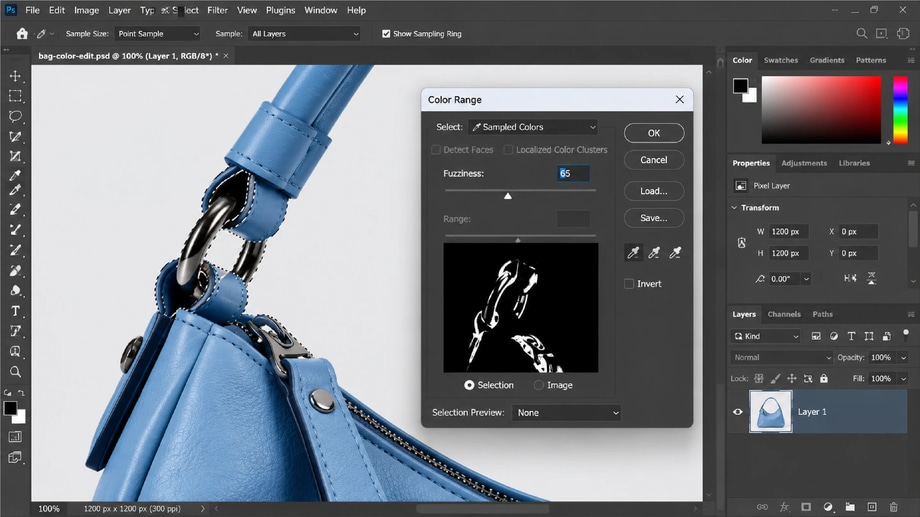
In those situations, Photoshop’s Color Range controls can help target the adjustment more precisely.
Color Range allows you to select particular colors and control how broad a range of similar colors is included.
Adobe’s current Hue/Saturation controls also provide range sliders that determine which colors are affected and create a fall-off between adjusted and unaffected colors, helping avoid an abrupt transition.
This can be useful when you need to change one dominant product color without affecting nearby tones.
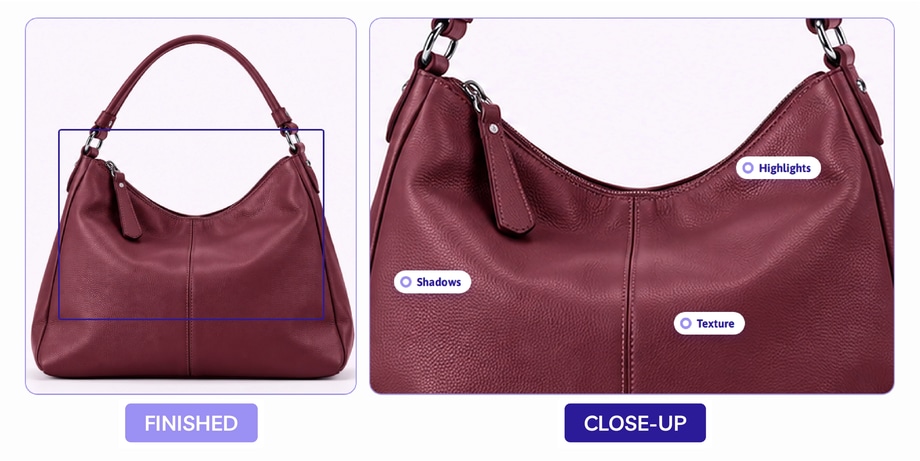
Step 8: Check the texture, highlights and shadows
At this point, stop concentrating on the Photoshop controls and look at the product itself.
Does it still look real?
The new color should follow the existing characteristics of the photograph.
If the original product has:
- a highlight → keep the highlight
- a shadow → keep the shadow
- visible fabric texture → keep the texture
- a glossy reflection → keep the reflection
A common mistake is getting the target hue approximately right while accidentally flattening everything that made the product look three-dimensional.
For product photography, the best color change isn’t necessarily the most dramatic.
It’s the one that looks as though the product was photographed in that color in the first place.
Step 9: Compare the new color with your reference
If you’re changing color for creative purposes, you can judge the result visually.
But ecommerce is different.
If the new image represents a genuine product variant, compare it with a reliable reference for the color you’re trying to reproduce.
That might be:
- The physical product
- A manufacturer-approved image
- A color reference captured during photography
- An approved product color specification
For example, don’t stop simply because you’ve successfully changed a shirt from blue to “red”.
If the actual SKU is burgundy, the finished image needs to represent that burgundy, not merely a red that looks attractive on screen.
This is why product color accuracy matters alongside the technical Photoshop process.
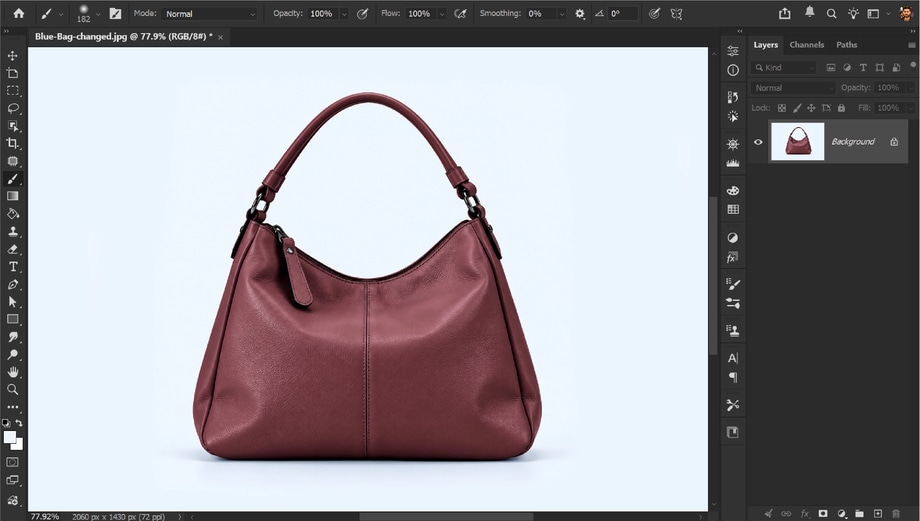
Step 10: Inspect the image at 100%
Before exporting, inspect the finished image at 100%.
Look closely for:
- Color halos around the edges
- Areas of the original color still showing
- Color bleeding onto the background
- Changed logos or hardware
- Rough mask edges
- Lost texture
- Unnatural highlights or shadows
Then zoom back out and assess the whole image. A technically perfect edge doesn’t help if the overall color still looks artificial. You need both.
Step 11: Save your editable Photoshop file
Before exporting the finished image, save a working PSD containing your adjustment layer and mask.
Because you’ve worked non-destructively, keeping the layered file means you can return later to:
- Refine the mask
- Adjust the target color
- Change saturation
- Create another color variant
- Compare different versions
That’s particularly useful when one master product photograph needs to become several ecommerce colorways.
Then export the finished image in the format and dimensions required for your website or ecommerce platform.
A quicker option: Photoshop’s Adjust Colors feature
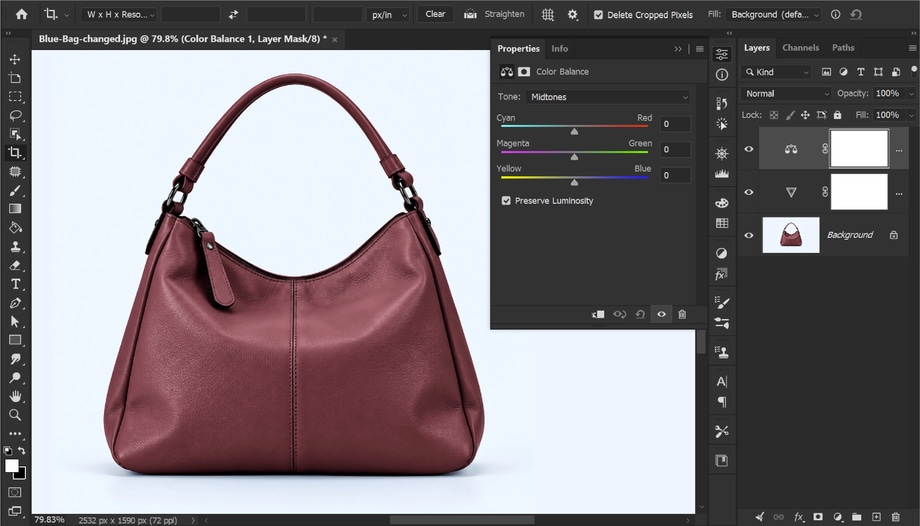
Recent versions of Photoshop also include Adjust Colors in the Contextual Task Bar.
Photoshop analyses the image and identifies prominent colors, which you can then modify using Hue, Saturation and Lightness controls directly on the canvas. An adjustment layer is created automatically, keeping the edit non-destructive.
For a straightforward image, this can be a much quicker way to get started.
However, automatic color detection doesn’t remove the need to check the result.
Adobe’s 2026 tutorial demonstrates a situation where changing the color of a dress also changed similarly colored areas around the subject’s lips, eyes and hair. The unwanted change then had to be removed using the adjustment layer’s mask.
For detailed product images, selection and masking still matter.
Why doesn’t changing color in Photoshop always work perfectly?
Some color changes are considerably harder than others.
Changing a medium blue object to green may be relatively straightforward.
Changing black to white - or white to a deep saturated color - is more challenging because you’re changing not only hue but also the tonal characteristics of the image.
Other complications include:
- Transparent or translucent materials
- Reflective surfaces
- Multiple materials within one product
- Fine hair or fibres
- Similar colors elsewhere in the image
- Heavy shadows
- Very bright highlights
- Patterns and gradients
In these cases, a Hue/Saturation adjustment alone may not be enough. Additional masks and tonal adjustments may be required to produce a convincing result.
Which Photoshop method is best for changing color?
There isn’t one method that’s perfect for every photograph.
For many straightforward object recolors, however, the combination we’ve used here provides a strong starting point:
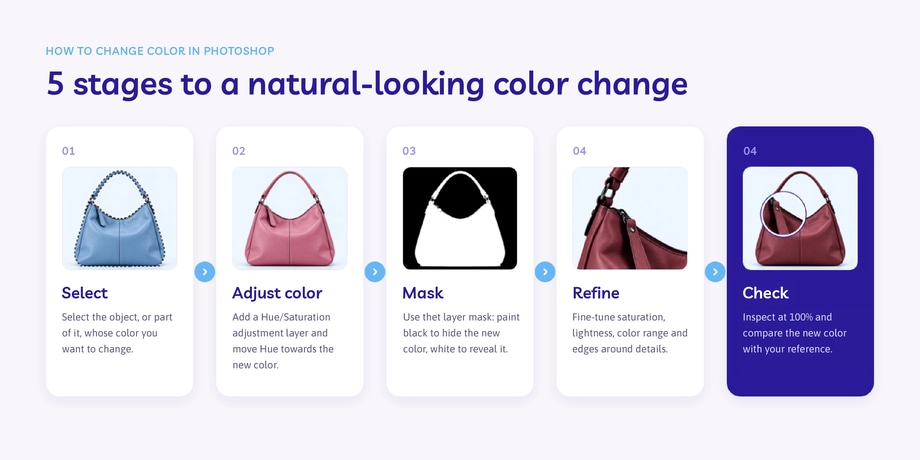
It has another major advantage: it’s non-destructive. You can keep adjusting the result without permanently altering the original photograph.
And that becomes particularly valuable when you’re creating several versions of the same product.
Changing one color or creating dozens of product variants?
Changing one product color in Photoshop can be relatively straightforward.
Doing it across hundreds or thousands of ecommerce images while keeping the colors, masks, edges, textures and lighting consistent is a different task.
If you’re experimenting or working on an individual image, the workflow above gives you plenty of control.
If you’re creating product variants at scale, Path’s professional color change services can handle the editing for you while preserving important product details such as texture, shadows and highlights.