Is your business just getting started or are you trying to trim expenses? Whether it’s a temporary or permanent solution, a workable product photography studio is doable — even on a tight budget.
We’ll go over picking the best space, what you’ll need, how to set up your studio, and more.
Choose a location for your product photo studio
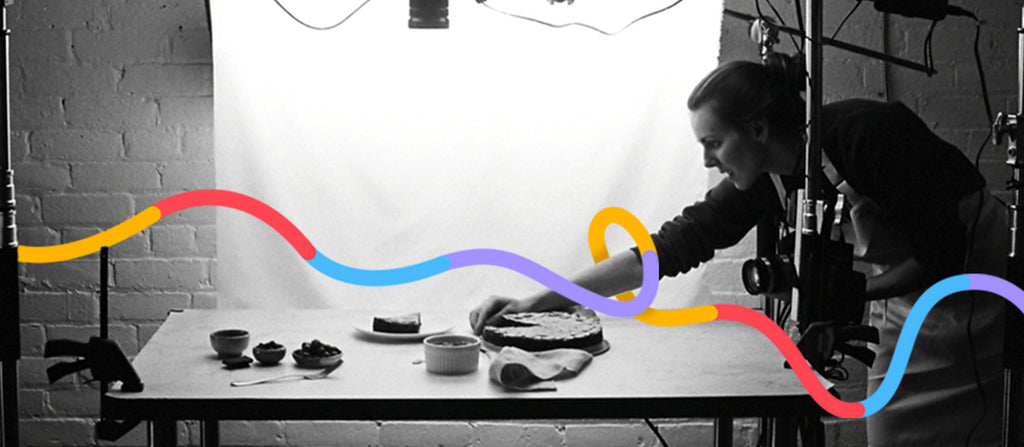
The first thing to decide is where to set up your photo studio. A spare or guest room, office space, or even a closet works perfectly for a DIY studio location. If it’s a shared or dual-purpose space, pay special attention to how the room is set up — a little rearranging might be necessary before you can get to work, and you want that to be as quick and easy as possible. And while the area doesn’t have to be huge, you want to have enough space to easily move around and work.
Here are the main things you want to pay attention to:
- Cleanliness: When it comes to tidiness, everyone has their own comfort level, but messes cause stress for most people. Clutter can also be distracting, inefficient, and a trip hazard.
- Simplicity: You’re setting up a small, quality studio just for you so there’s no need to overcomplicate it. Buy only the essentials right now. If you have your eye on expensive and high-tech equipment, save those ideas for the future when your business grows.
- Studio lighting: Product photography requires a well-lit area. Natural lighting is ideal, but with some knowledge, artificial lighting can work just as well.
- Size: Depending on your situation, you might not have a choice when it comes to the size of your studio. A spare room, generous corner or closet, basement, or shed are all doable options. As long as you’re able to move around and have room for your equipment, you’re good to go.
- Accessibility and availability: The space you use for your studio should be easy to access. If stairs are difficult for you, for example, look for a ground-floor space. If you know you’re easily distracted, make sure you can block off some alone time in your DIY studio space. If you share the space, consider creating a schedule with your roommates. (If you’re relying on natural lighting, try to reserve times that provide the best opportunity for light.)
If you’re concerned about being able to produce a workable studio in a small space or concerned about getting the right tools on a tight budget, take a look at this video for some inspiration.
Professional photographer Jeff Rojas discusses how he was able to build a professional photo studio in 60 square feet of space.
Key takeaways from the video:
- Studio space is small: 6 feet wide x 10 feet deep x 9 feet tall.
- The setup summary: background, background stands, c-stand with a boom pole, and a light meter.
- Backdrop sits adjacent to a window and runs from floor to ceiling.
- Lighting is a combination of northwest-facing window and studio lighting.
Even if square footage is limited, all it takes is some thoughtfulness and a realistic end goal.
Know what equipment you need to set up your photo studio
Now that you’ve selected a location for your photography studio, let’s get it set up.
For our purposes, we’ll focus on product photography, but you want to make sure that you’re considering your needs before making any purchases. Take into account the different styles of product photos you’re hoping to capture (lifestyle shots, flat lays, etc.)
For most of your product photography needs, you’ll only need a few tools. Let’s take a look at what you can DIY, where you can save money, and what it would make sense to splurge on (if you have any wiggle room financially).
Camera: splurge
Estimated cost: free (if you have a smartphone) to thousands
Your camera is one of the most important pieces of equipment you’ll buy. So if you have room to splurge, a high-quality camera (or lens) is worth the investment. If you’re looking to purchase a new (or new to you) camera, try to find one that has several lens options. As you take on new work, you might want to upgrade or add additional lenses to your kit.
If an expensive camera isn’t in the cards right now, don’t fret. There’s a good chance that you can shoot high-quality product photos using your smartphone. There are plenty of photographers that do this — and many even that specialize in smartphone photography.
Tripod: save or splurge
Estimated cost: $50 or more
Whether you’re working with a camera or a smartphone, you’ll want to order a tripod. A tripod helps you get consistent, steady images. They minimize camera shake, so you end up with more professional-looking shots. And you can easily find them for around $50 at photography stores or online. (If you have room to splurge here, you could consider a higher-end tripod—think $800–$1,500.)
White backdrop: save
Estimated cost: $10 or more
Backdrops will be super important for your product photography studio, but that doesn’t mean you have to spend a fortune on one. You can DIY a white backdrop with plain paper or a sheet. But if product photography is something you’re planning on doing full-time (or keeping in-house), you might want to purchase a white sweep. You can find affordable sweeps on Amazon and other photography stores.
Note: Although a backdrop and a sweep serve basically the same purpose, a backdrop generally will go floor to ceiling and a sweep is a smaller, usually curved background. The size of your space will probably dictate which works best for you.
White bounce boards: save
Estimated cost: $10 or more
Bounce boards fill in any shadows that your main light source doesn't hit. White bounce boards reflect light back into the shadows to brighten it up. You can buy bounce boards online or get (more budget-friendly) foam boards from a local office supply or craft store.
Table and props: save
Estimated cost: free or more
Most of your product shoots will probably require a table (to place the products on). If you have an old coffee table or nightstand, great. You can also check out thrift shops, Craigslist, etc. to find a used table.
To produce interesting and unique images, you’ll also need at least a few photography props. Consider foam, wood, or cement blocks — even household items can function as a photography prop.
Small toolbox: save
Estimated cost: around $30
You never know what little tools or trinkets you’ll need while working. If you have the room, keep a toolbox or small basket handy with items such as tape, clips, fishing line, scissors, glue dots and clothespins. That way, when an idea strikes, you’ll have everything you need to execute.
Lighting or natural light: save or splurge
Estimated cost: $50 or more
If your room has plenty of natural light, you should be able to work with a backdrop, bounce boards, and reflectors. Note: Silver reflectors cool natural light and gold reflectors warm natural light.
For darker rooms, you’ll have to purchase lighting. A studio speedlight will be smaller and more budget-friendly. If you have a little more space or money, a studio strobe light might be a better option.
Remember: There’s no need to spend a lot of money on high-tech equipment, especially when there’s a much more affordable option.
How to set up your product photography studio
One of the pros of having a smaller studio space is a simple set up. Your table will probably stay in the same place and you’ll quickly figure out the best way to light your studio.
Arrange tabletop and props
Before you start setting up, clean your space (if it’s not already). Wipe down your table and props so you don’t see dust in the images.
Next, get your background set up, and make sure it’s secure. The last thing you need is for your background to fall down mid shoot.
Now the fun part: props. Photographer Brooke Lark suggests picking a loose theme. Select props that are roughly the same size, shape, and hue. As you get more comfortable with using props for product photography, your eye will develop enough to know when you can get away with odd shapes, clashing colors, or different sizes.
After you arrange your product and props, you want to set up and check the lighting.
Set up your lightsource: natural vs. artificial
If your studio has natural light, you have it a little easier. But you still want to make sure it’s a soft light.
Whether you’re working with natural or artificial light, you may need a diffuser. They soften the light source, thus reducing harsh shadows.
The video below shows a super simple and affordable lighting setup for product photography. All you really need is a lamp with a fluorescent bulb.
At minimum, you should have a main light source, a bounce board (to lift shadows), and a light diffuser. Eventually, you may decide to invest in reflectors, a light meter, and a white balance card.
Stabilize camera and test camera settings
Are your product and props arranged? Is your lighting set up? If you answered yes to both, it’s time for a test shoot.
Once your camera or smartphone is secured on a tripod, start taking photos.
- How do the props look?
- What about the lighting arrangement?
- Are your camera settings correct?
Test shots are a crucial step, but this phase shouldn’t take a ton of time — especially once you get more accustomed to working in your space.
Ideally you’ll test, make a few adjustments, and then move on to the bulk of the photography work for the day.
Something to note: For brand new photographers a test shoot might be used to produce portfolio images or improve skills. And photographers of all skill levels often set up test shoots to try new equipment. Test shoots are not free client work.
Consider post-processing
For professionals that focus on product photography, the work isn’t done after the photoshoot. There’s the ever important edits. But photo-editing software can be pricey. If you’re on a budget, outsourcing post-production edits to a photo-editing studio like Path makes professional imagery possible — and affordable.
FAQs about setting up your product photo studio
How do you make a cheap backdrop?
You can make a cheap backdrop with common and affordable items such as poster board, sheets, canvas cloth, paper rolls, wood boards, and even walls. Hang, prop up, or drape your material to create a cheap backdrop.
How do I create a photography studio for my budget?
You can create a photography studio for your budget by following the steps in this post:
- Choose a location
- Get your equipment
- Arrange your space
- Set up your lighting
- Stabilize and test your camera
How do you photograph products on a budget?
You can photograph products on a budget by doing it yourself in your own studio or space and then outsourcing time-consuming edits to a photo-editing studio like Path. This post shows you how to set up your own product photography studio on a budget.
How do I set up my own studio?
You can set up your own studio by finding a space, setting up your lighting, getting your equipment, organizing a backdrop and props, and conducting test shots to make sure everything is set up right. You can follow the advice in this post.

