

Wrinkled fabric can ruin a good product photo. While it’s always a good idea to iron or steam clothing and fabrics before your photo shoot, you’ll often still notice some unseemly wrinkles when you go to edit your photos. Luckily, there are a variety of retouching techniques you can use in Photoshop to smooth those wrinkles in your fabric and clothing photos.
The process of smoothing wrinkles on fabric and clothing in Photoshop requires subtlety and skill to prevent your final photo from looking flat and overtouched. Therefore, you should always retouch wrinkles by hand rather than relying on AI to do it for you. However, when you’re working with many photos a day, you need to have methods you can use quickly.
This Photoshop tutorial covers three different methods for smoothing wrinkles on fabric and clothing: the healing brush tool, the patch tool, and the frequency separation method. The best method depends on the photo and your needs.
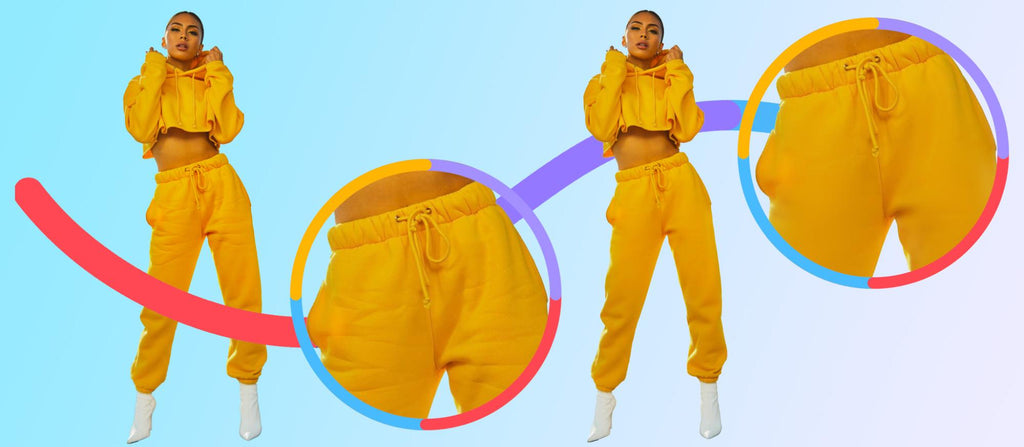
We’ll use the following product photo—the wrinkles on the model’s pants are distracting. We’ll use Photoshop to smooth out these wrinkles. You can click the image below to open it in a new tab and save it to your computer if you want to follow along.

Method 1: Healing Brush Tool
The Healing Brush method is the least automated method for removing wrinkles, meaning it might take the longest but it typically leads to the best results. If you only have a few wrinkles on a solid color to remove, the Healing Brush tool can do the job quickly.
Step 1: Select the Healing Brush Tool
Select the Healing Brush Tool from the Toolbar on the left column of the application window. If you don’t see it, the Healing Brush Tool might be hiding behind the Spot Healing Brush Tool or the Patch Tool.

Step 2: Set your brush size
In the Options bar at the top of your application window, set your brush size to about twice the size of the deepest wrinkle you want to remove. Set Hardness to 0% and Spacing to about 20%. Make sure the Source is set to Sampled and the Sample is set to Current Layer.

Step 3: Sample smooth fabric
Take your Healing Brush tool and “sample” an area of the fabric where it’s not wrinkled by hovering the mouse over that area, typing the ALT key (OPTION on a Mac) and clicking the left mouse button. Then, “paint” over the wrinkle as if you were using the brush tool. You’ll see a plus sign symbol (+) over the area of the image you’re sampling from, and a circle over the area you’re fixing with that sample.

Continuously grab new samples as you work so the smoothed fabric looks natural and not flat. In the photo below, we smoothed one leg but not the other so you can see the difference.

If you’re only smoothing one or two wrinkles, the Healing Brush Tool can be a great option. But if you have a lot of wrinkles you need to remove, this tool can become very time-consuming. If that’s the case, you should consider using the Patch Tool.
Method 2: Patch Tool
The Patch Tool takes whole “patches” of pixels from one area of your image and merges them with another portion of your image. Use the Patch Tool when you have many wrinkles over a large area to fix, especially if the wrinkles are crisp and defined.
Step 1: Open the Patch Tool
To begin, grab your Patch Tool from the Toolbar. It might be hiding behind the Healing Brush Tool or the Spot Healing Brush Tool.
Step 2: Adjust your Patch Tool settings
Once you’ve selected the Patch Tool, you’ll see some settings for it in the Options bar at the top of the application window.

For this exercise, set the Patch to Normal and also select Destination (instead of Source). The Diffusion option gives you the ability to determine how much the edges of your patch will blur with the original pixels. You can play with this setting to see what works best for the image you’re editing.
Step 3: Select smooth fabric
With the Patch Tool, draw a selection around an area of your garment where it’s not wrinkled. Then, holding down the mouse button, move that selection over an area you want to smooth.

The patch of smooth material will replace the patch of wrinkled material in your image.
The patch tool does something similar to the Clone Stamp Tool, but in larger areas. It’s a very simple tool to use. Knowing how much of an area to select, and how much diffusion to apply, comes with practice and can change from fabric to fabric.
Step 4: Finalize with the Healing Brush Tool
Once you’ve “patched” your wrinkles, you can use the Healing Brush Tool to blend in the edges of the patch if necessary.
In the image below, you can see how a combination of the Patch Tool and Healing Brush Tool can help patch the wrinkles in the model’s pant leg. The whole process took just a few minutes.

Method 3: Frequency Separation
The Frequency Separation method requires more setup than the other two wrinkle smoothing methods described in this tutorial. But once you set up your document for frequency separation, you’ll find this is a very quick and easy process.
The Frequency Separation method is good to use when you need to smooth wrinkles throughout the entire garment. With this method, you separate the color from the texture of the clothing, allowing you to smooth wrinkles quickly without losing the fabric’s texture and shading.
Step 1: Set up Layers
To begin, duplicate your Background layer three times. You duplicate a layer by choosing Duplicate Layer from the Layer panel’s dropdown menu—this looks like four tiny horizontal lines—in the upper right corner of the panel.

If you like using Photoshop shortcuts on your keyboard, you can type CTRL + J (COMMAND + J on a Mac) to duplicate a layer.
Name your new layers Color and Edges, respectively.

Step 2: Blur color Layer
Make the Edges layer invisible by clicking the eye icon next to the layer.
With the Color layer selected, choose Filter > Blur > Gaussian Blur from the dropdown menu at the top of the application window.

In the dialog box that appears, move the slider to the right until most of the wrinkles in your image are blurred out.

Click OK.
Step 3: Prepare Edges Layer
Next, choose your Edges layer and toggle on the eye icon to make that layer visible again.
Go to Image > Apply Image from the dropdown menu at the top of the application window.

In the dialog box that appears, choose your Color layer from the Layer: dropdown menu. Set your Blending Mode to Subtract, set Scale to 2, and Offset to 128. Click OK.

Now, back in your Layers panel, set your Blending Mode for your Edges layer to Linear Light.

If you’re not sure how to change your Layer blending mode, it’s the dropdown menu just to the left of your Opacity setting at the top of your Layers panel.
Once these layers are set up correctly, you’re ready to begin actually smoothing the wrinkles in your image’s clothing or fabric.
Step 4: Smooth wrinkles
To begin smoothing, make sure you’re in your Edges layer. Choose the Lasso Tool from the Toolbar. If you don’t see the Lasso Tool, it might be hiding behind the Polygonal Lasso Tool or the Magnetic Lasso Tool.
In the Options bar at the top of the screen, adjust the selection Feather to a number between 20 and 40—you can play with this number to see what works best for you depending on the image you’re working with. Select a wrinkle or an area of wrinkles you want to smooth out using the Lasso Tool.

Next, choose Filter > Blur > Gaussian Blur from the dropdown menu at the top of the application window.

Note: You may see “Gaussian Blur” as the top option in the Filter dropdown menu. Do not select that, as its settings will be the same as the last time you used it. Be sure you select “Gaussian Blur…” from the Blur sub-menu.
A dialog box will appear. Move the Blur slider until the wrinkles dissipate.

Repeat the process as necessary until you’ve obtained the smooth, wrinkle-free look you’re after.

Smooth wrinkles, smooth sales
Smoothing wrinkles in clothing or fabric is a subtle art that really must be done by hand in order to get a realistic result. Once you master the tools and techniques outlined above, you’ll be able to smooth wrinkles in your product images in a matter of minutes.
Not enough time to master these techniques yourself? You don’t have to. We can take care of your trickiest or simplest wrinkles, be it apparel, furniture, or any other product. No AI or shortcuts here—every edit is carefully done by hand.

Polish up your product shots with pro retouching from 79¢ per image
Learn more
")


")

")


