
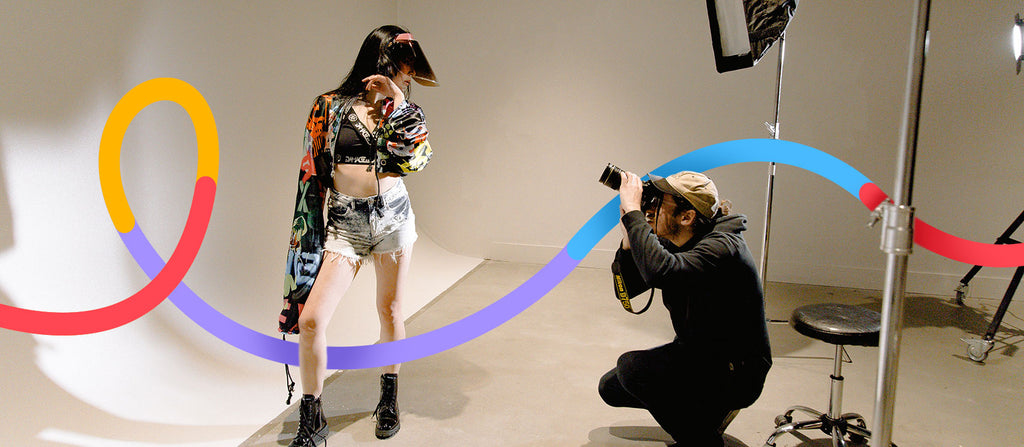
You’ve invested in product photos for your clothing line, so how do you edit them to make sure they drive sales? You don’t want what would be simple fixes to hurt your bottom line. Maybe it’s dull garment colors on the screen, even though the clothing looked great during the shoot. Or perhaps you’ve noticed a bunch of fabric wrinkles you didn’t see before.
With the right approach to photo editing, you can enhance your apparel shots to look their best. Whether you edit the images yourself or outsource them to professional editors, we’ll show you what to look for so your clothing shots are ecommerce-ready.
Why is editing important for clothing photography?
Post-processing is essential even with perfectly styled garments and the right lighting. Photos fresh from the camera rarely do the products justice.
Small editing tweaks can make a big difference for online shoppers. Seeing a realistic depiction of the clothing they’re buying means they can find items that look great and fit well.
Some common edits brands need to make to apparel photos include:
- Color correction so the red dress or blue shirt you’re selling shows the same tone in the image as it does in real life
- Making sure the photo is clear and bright enough so both desktop and mobile shoppers can see the product and zoom in to inspect the garment and its details
- Getting rid of distracting wrinkles you couldn’t get rid of on-set because of the model’s movement
- Removing a stain that happened on shoot day
It all comes down to making your clothing products appealing and professional with crisp, clean photos that fit your brand.
1. Cut out the background
For ecommerce sellers, pure white backdrops are a must-have, with top ecommerce sites like Amazon and eBay requiring white backgrounds for product photos. But even beyond seller requirements, a clean white backdrop helps garments pop like in the example below, whether you’ve shot a model photo or the garment alone.

Removing the background also opens up creative options, allowing you to repurpose product images in different ways. For example, you can add a transparent, colorful, branded, or lifestyle background.
Once you’ve cut out the background, you can leave it on a white background or create another copy with a transparent background. Clothing with transparent backgrounds will work on websites with a custom color scheme, so your product shots can match it.
Alternatively, you can choose a slightly darker shade of white, like the sustainable fashion brand People Tree. By doing this, individual listings stand out against the background of a white online store.

2. Add shadows for depth
Do your cut-out clothing photos look a little lifeless on a plain white background? Adding a subtle shadow can create a more appealing and natural look that’s still fit for ecommerce marketplace requirements, like the example below.

Adding a shadow in post-production lets you control its direction, regardless of the lighting conditions during the shoot. That way, you can fully focus on ensuring the garment is composed and lit correctly during the shoot and add a shadow later during post-production.
3. Smooth wrinkles
If there’s one thing that makes a clothing photo look unprofessional, it’s wrinkled garments. No matter how much steaming or ironing you’ve done, there’s almost always an inevitable wrinkle or crease. Make sure your photos are wrinkle-free before uploading them to your online store.

You can fix fabric wrinkles during post-processing in Photoshop using a couple simple methods:
- Zoom in closer to the wrinkles and select Spot Healing Brush. Using the tool, paint over wrinkles so that the software can replace them with pixels from nearby areas, removing wrinkles.
- Use the Clone Stamp tool to cover wrinkles. First, select a wrinkle-free area of the garment that matches the color and lighting of the wrinkled spot. Hold down the ALT key (OPTION on Mac) to copy it and “paint” it directly over the wrinkles.
4. Remove stains and other imperfections
Stains, dust, hair, and other imperfections on clothing aren’t always avoidable. For example, sweat and liquid drops may add realism to some photos, but the result may not be appealing for customers.
Below, the unedited photo on the left shows stains in authentic context. To enhance the t-shirt's look for ecommerce, we edited the version on the right, removing damp marks while maintaining the outdoorsy feel.

Fixes like these are straightforward in most cases. As mentioned above, you can use Spot Healing Brush or Clone Stamp, depending on the size and type of imperfection you need to remove.
You can also try the Patch Tool, like in this YouTube tutorial. Using this method works well for fixing larger imperfections and for more control over the resulting texture or pattern of your garment.
5. Color correct
Natural light can make your studio setup and clothing appear different in the images than when you shot them. The camera picks up colors you might not even notice with your naked eye. As an example, the photo might end up with a light cast from other sources around your studio, a more blue hue if you shot during daylight, or a warm yellow hue if you shot at golden hour.

All of these factors will contribute to showing an inaccurate garment color.
To fix it, head into Adobe Lightroom. First, make sure your photo is bright enough using the Exposure slider to select a suitable brightness. Then, adjust the color temperature and tint to a neutral result. You can do it using the following methods:
- Pre-built White Balance presets: Select one of the White Balance profiles based on your shooting conditions. For example, if you shot using natural light, select Daylight, Cloudy, or Shade. Lightroom will automatically adjust temperature and tint.
- White Balance Selector: Select the pipette icon, then click on a neutral-color area of your image (white, gray, or black). It will adjust the temperature and tint based on your selection to make it as natural as possible. Try it again if the software didn’t get it right the first time.
- Temperature and tint sliders: Manually move both sliders to match the clothing’s true colors.
6. Create a lifestyle composite
Adding some lifestyle context to your product images can spice them up. You can hire models and locations for a photoshoot, but this can be expensive if you only want a few lifestyle shots. The answer? Lifestyle composites.
Lifestyle composites involve photographing a product or a subject—or using a product shot you already have—and removing the background. Then, you can either pick a stock photo as the new background or shoot one yourself. The goal is to create a faster, more affordable lifestyle photo using post-processing instead of organizing and budgeting for a photoshoot.
Editing these photos typically requires more advanced skills, but you can outsource it. To get started, prepare a simple product photo, for example, a model wearing one of the garments. In the next step, you or the editor will remove the background—if it hasn’t been done already—and add a stock photo of a suitable location as the new backdrop.
Many product photography studios, like POW Product Photography, offer this advanced service.

When you blend the images together, ensure the product has natural shadows, is cut out and sized correctly to fit your background image, and seamlessly blends in.
For a natural result, you may need to adjust colors on either image so they fit together because lighting setup will be different for both. Doing so will help avoid your composite looking like an artificial cut-out.
The best part about composites is you can repurpose the same product shot with different backgrounds as many times as you need.
7. Add or remove brand tags
Clothing labels and tags that stick out can be distracting. Alternatively, you may want to add or alter the existing brand tag on a clothing item you have already photographed.
Remove a tag
An image like the one on the left might work well on social media when you share it to increase brand awareness. However, if you wish to use the photo as an online store listing, you might want to remove the background and the brand tag. As a result, customers can pay attention to the color and texture of the garment’s fabric rather than be distracted by the brand’s label.

You can remove the tag using a mixture of the methods we mentioned for removing wrinkles and spots. The goal is to replace the label area with a realistic-looking part of the garment.
Add or replace a tag or label
To add a label, photograph it first. Then you can cut it out, copy it onto the product photo, and resize and transform its perspective to match the garment in the photo. If you’re adding your brand logo directly to the garment, follow this blend effect tutorial for a natural result.
If you’ve already shot a garment with a tag, you can just add the brand logo to it. In this example, we used a t-shirt with a plain label tag and added our logo. Don’t forget to match the perspective by skewing the logo if the tag isn’t facing the camera head-on.

8. Remove hangers
Don’t worry if you don’t have the right setup to hang your clothing items during the shoot. You can photograph the pieces while holding them, and remove any hangers and arms afterwards, like in the example below. It works similarly to removing imperfections.

In this case, work with larger parts of the image first to remove the hanger and any hands. To remove any remaining hanger parts around the garment, such as around the neckline of a jacket, you’ll need to zoom in for precision and use the same tools for removing blemishes and wrinkles.
9. Create a ghost mannequin shot
You might want to consider creating a ghost mannequin shot if simply removing the hanger isn’t enough and makes garments look too flat. With this technique, the clothing appears to float on an invisible model or mannequin while maintaining its shape.

As the clothes appear worn by someone, it looks more realistic and appealing than a photo of clothing on a hanger. You’ll need to re-shoot your garments for this, but you only need a few photos, and anyone who fits your garments can model them.
Generally speaking, though, invisible mannequin shots are planned, as they require shots both with a mannequin or person and without. Keep this in mind as you’re shooting your apparel photos.
Follow this ghost mannequin photo guide to find out how to use ghost mannequin images for your brand. You can also outsource your ghost mannequin edits to our professional editors and get your images back in as little as six hours. We also offer perks for bulk orders.
10. Change clothing color variants
You may worry about reshooting your collection from scratch when you have a new color piece in stock. But, if you’ve photographed the garment, you can change the color in post-production to match what’s in stock. This will save you time organizing your shoot and give you the flexibility to adjust shop listings whenever a new color becomes available.

11. Align images for an appealing online store
It’s difficult to get every model photo to look exactly the same, especially if you shoot with diverse talent. But a simple way to create an attractive ecommerce store with a coherent look is aligning or cropping all of your main listing photos. This way, when customers visit your shop, they’ll see items of similar type presented the same way.
One outdoor gear brand dedicated to sustainability, Cotopaxi, puts this idea into practice with its online storefront. All models are central in the main product listing photo, leaving similar spacing between the top of the photo and the model’s head.

This approach allows for flexibility in model posing while still keeping overall uniformity across the photos. Not every model will have the same body type or proportions, so making sure there’s even spacing at the top of the image and the model is central still creates a unified look.
Similarly, Cotopaxi applies this method to displaying bottoms. Rather than including a full body shot, every listing leaves a similar distance between the model’s feet and the bottom of the picture, allowing just enough to see a small part of the model’s top.

12. Crop shots to fill the frame
In addition to your main listing photos, customers may want to see your garments up close. When you’re shooting, plan to take full-body and close-up shots so you have a variety of images to choose from. For maximum impact, you’ll likely still crop the close-ups during post-production.
Zoomed-in crops let customers inspect the finer details of your garments, such as the stitching, fabric quality, buttons and zippers. It’s like shopping in person. If you try on a jacket, for example, you’ll probably notice its pockets, lining, and cuff in addition to its overall fit and look.
Rapanui, a sustainable, organic cotton clothing brand, uses crop shots to highlight fine details on its garments. Combined with full-length white background shots, shoppers have enough visual information to decide whether to purchase the item.

A few simple edits to elevate your ecommerce shots
Eye-catching and professional clothing photos are key to hooking customers. Imagine shopping for clothing online without full garment views or close-up details—you’d likely click away. But creating compelling images doesn’t require a large studio or team.
Thoughtful editing can make the difference between losing shoppers and convincing them your clothing is a must-have. Still unsure about spending too much time editing photos yourself? Our team of experts can help with your photo editing needs.

Let us look after your image edits, so you can get back to the fun stuff. Try Path free.
Learn more
