

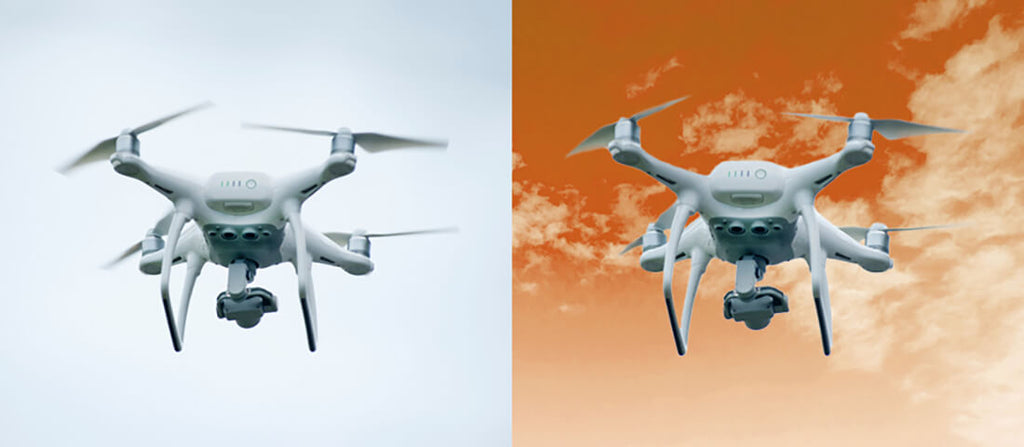
Achieving a bright blue sky in the background of your product photos is sometimes easier said than done. You can’t control the weather, and waiting for the ideal conditions for shooting isn’t always feasible — especially when you have an entire crew’s worth of schedules to consider.
Receive free ecommerce & product photography tips
But just because there are gray skies on shoot day, that doesn’t mean that you can’t have the blue sky you’re aiming for. You can learn how to change the sky color in Photoshop with this tutorial. We’ll show you how in eight easy steps, plus how to make the sky red, in Photoshop CC18.
How to Change the Sky Background in Photoshop CC18
- Open your product photo in Photoshop CC18
- Begin masking
- Select the subject or product that you want to preserve
- Touch up the edges
- Create a new layer
- Open your sky background image in Photoshop CC18
- Layer your images
- Fine tune your finished image
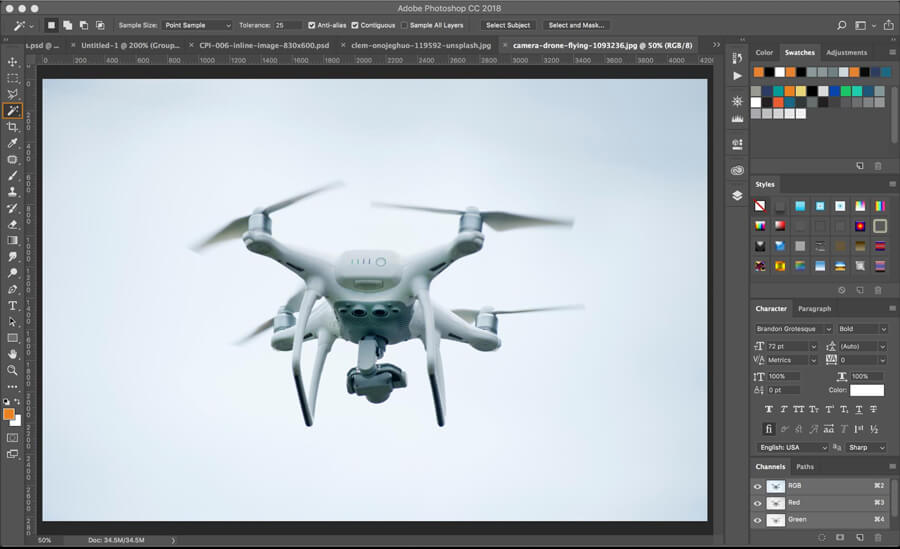
1. Open your product photo in Photoshop CC18
First thing’s first: Open your original product photo in Photoshop.
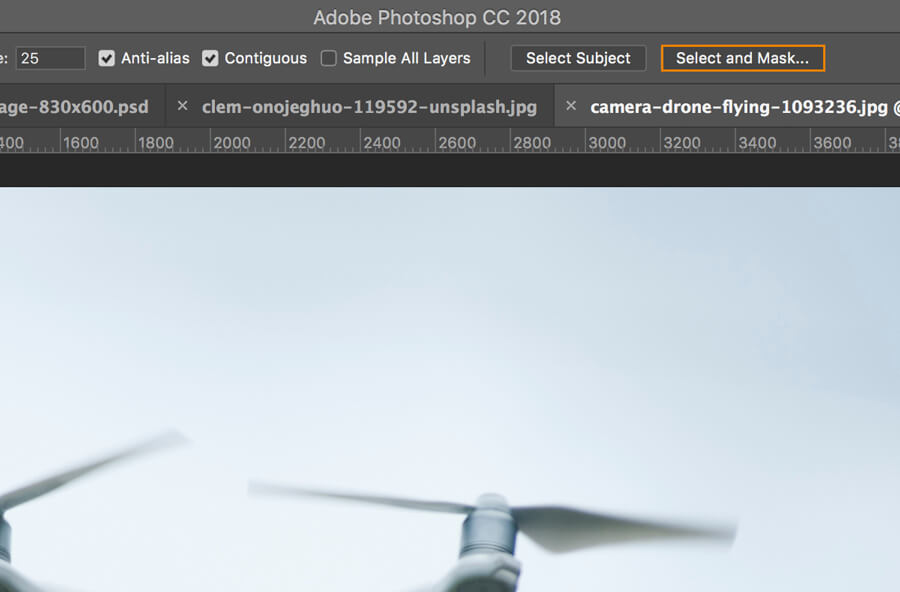
2. Begin masking
With your product photo open in Photoshop CC18, click on the Magic Wand tool so the toolbar shows up.
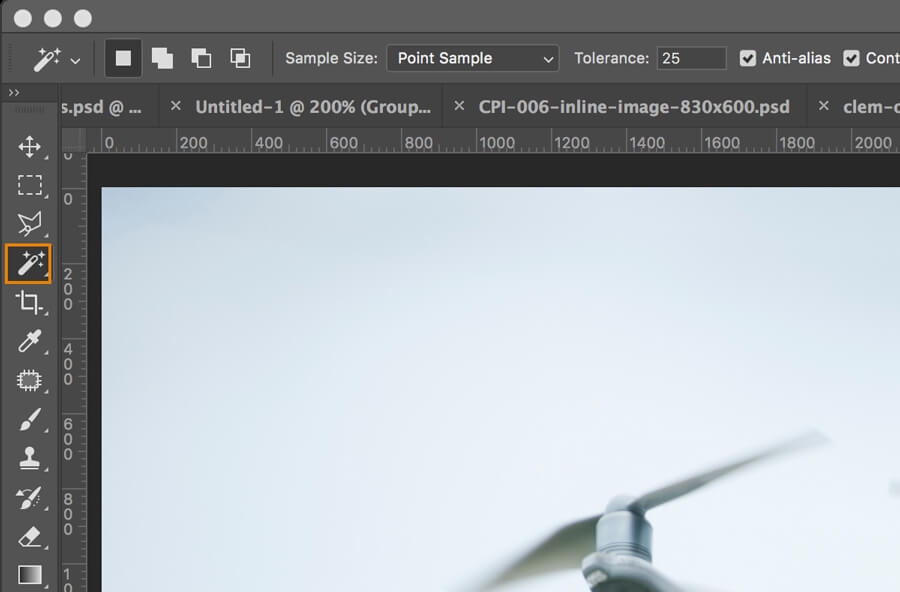
Then click Select and Mask... in the Magic Wand toolbar.
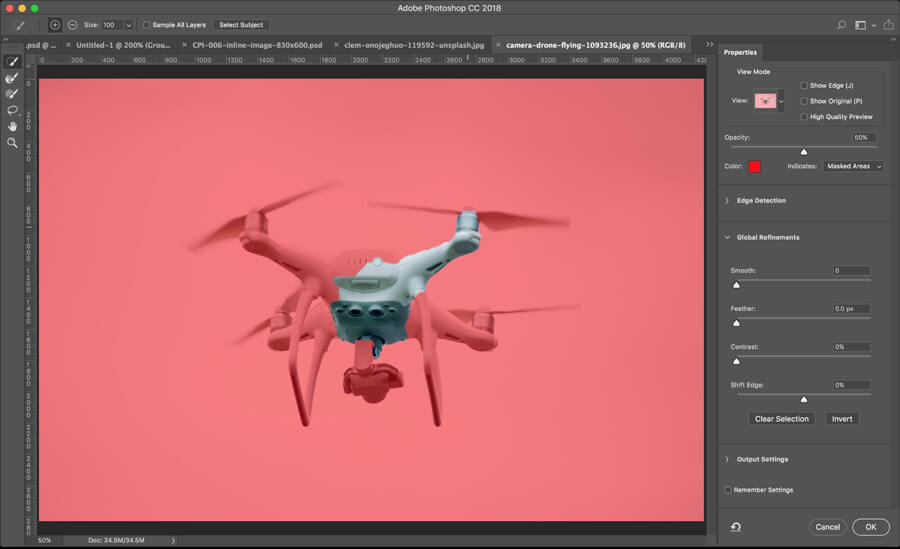
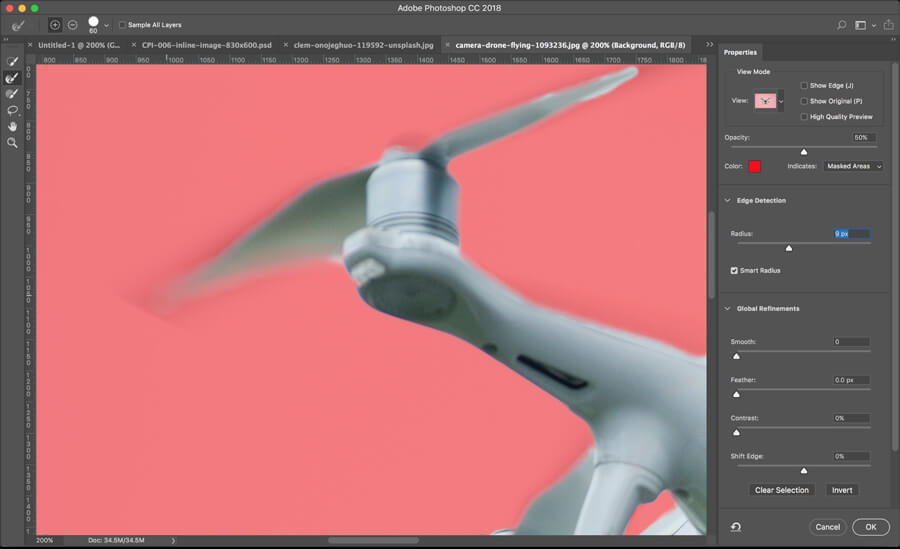
3. Select the subject or product that you want to preserve
In the top left corner, find and select the Quick Selection Tool. This will allow you to select the areas of the image that you want to preserve. In this example, we want to preserve the drone (the product).
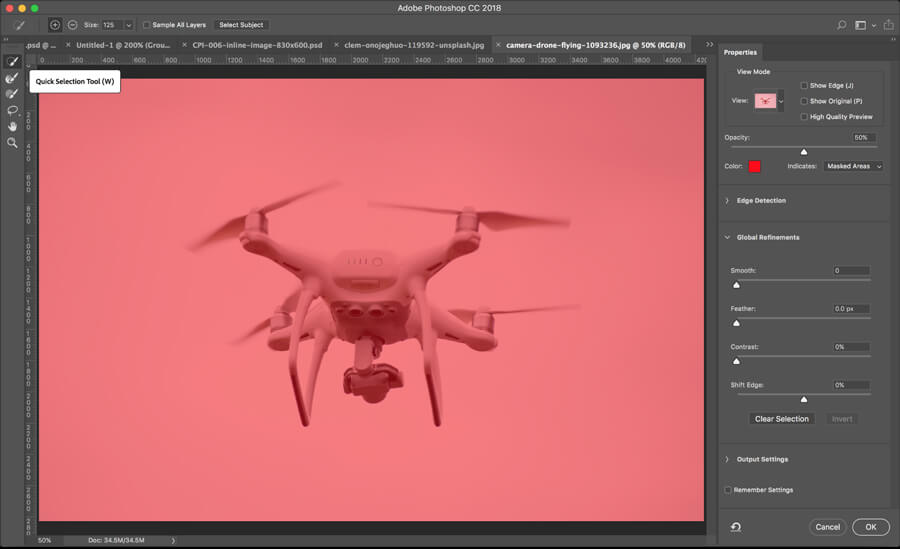
Before you begin: Set the edge detection radius. To do this, look for the section called Edge Detection in your Properties panel. On the scaling slider, you can adjust the Radius. Go higher (to the right) if the product and original background are very different in color, and go lower (to the left) if the product and original background are similar in color. You can play around with this to find your sweet spot. Also make sure the Smart Radius box is checked; this will automatically help with edge detection and improve the accuracy of your edges.
Once your edge detection settings have been set, hover over your product (the subject of your photo) and click inside the product. Photoshop will unmask the image for you automatically.
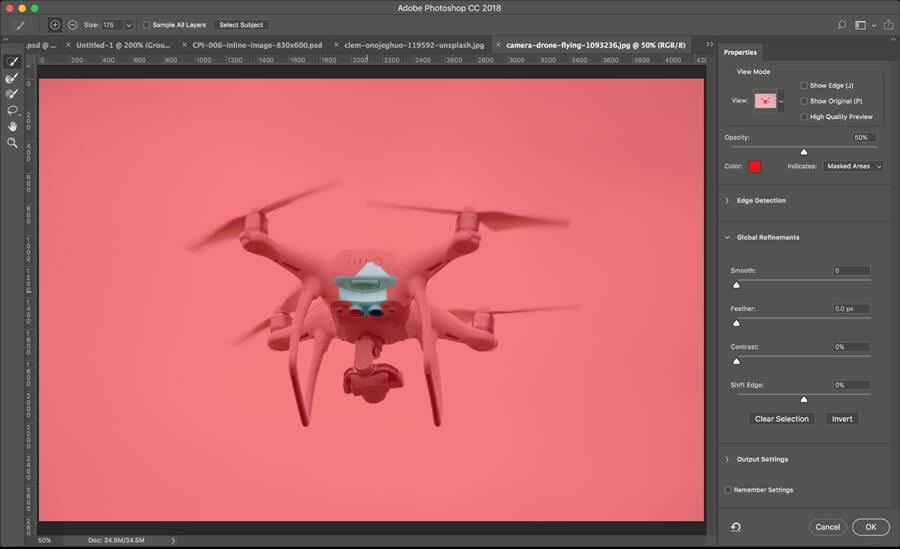
Then keep clicking throughout the product until you’ve successfully unmasked the entire product.
Quick tip: You can increase the brush size to tackle more area at a time. For the smaller and more detailed parts of the product, resize to a smaller brush.
If your brush is too big, you may notice that the background and product begin to bleed. It just requires some trial and error to see which brush size will work for the particular product and image you’re working on. If you do mess up, you can easily fix your mistake by keeping the Quick Selection Tool selected and holding down OPTION.
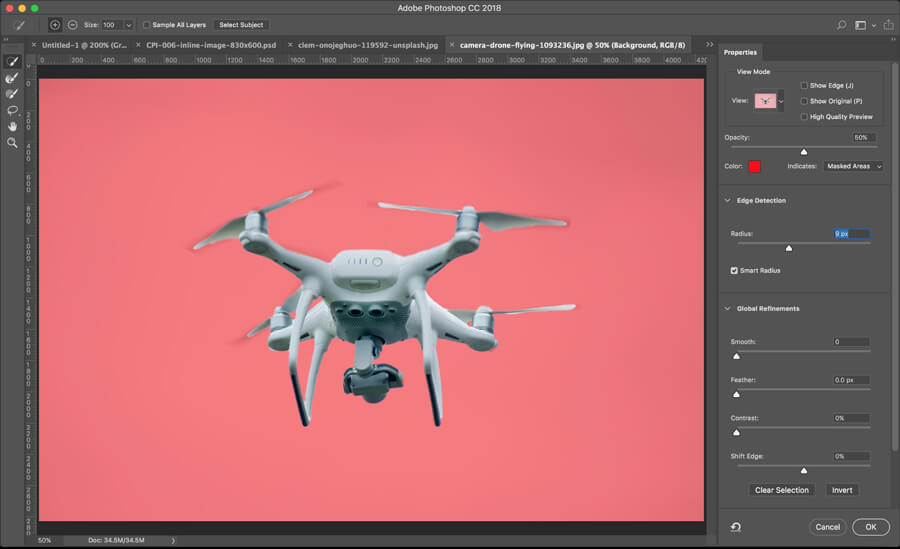
4. Touch up the edges
Once the bulk of your product has been taken care of, it’s time to clean up the edges. Zoom in so you can get a closer look and stay detail-oriented, as this will create the most natural-looking end result.

Use the Refine Edge tool again, especially to touch up blurry edges like fur or hair.
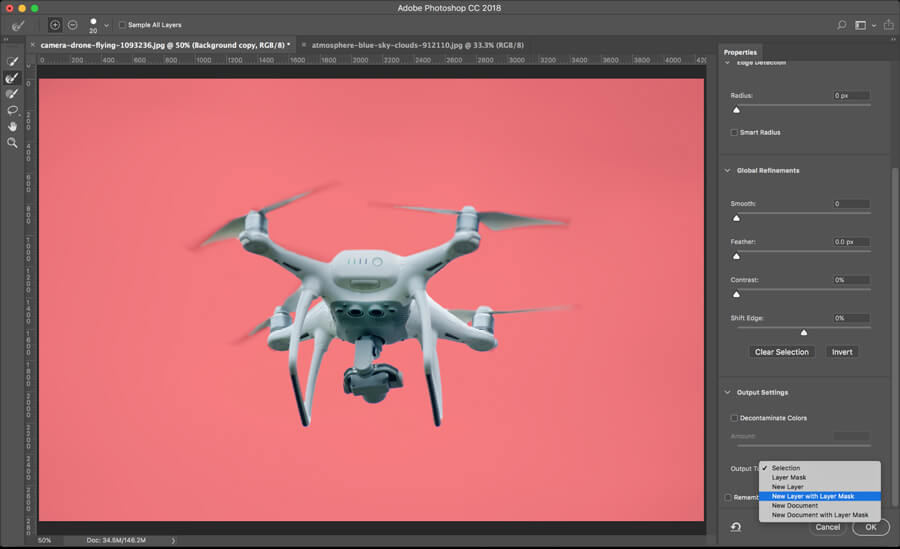
5. Create a new layer
Once you’re satisfied with your image masking, move to the Output Settings in the lower right corner. In the Output To: dropdown menu, select New Layer with Layer Mask. This is the least destructive way to mask an image, because you preserve your original this way. Then click OK.
You should see your product with the background removed.
6. Open your sky background image in Photoshop CC18
Open your sky background image in Photoshop CC18.
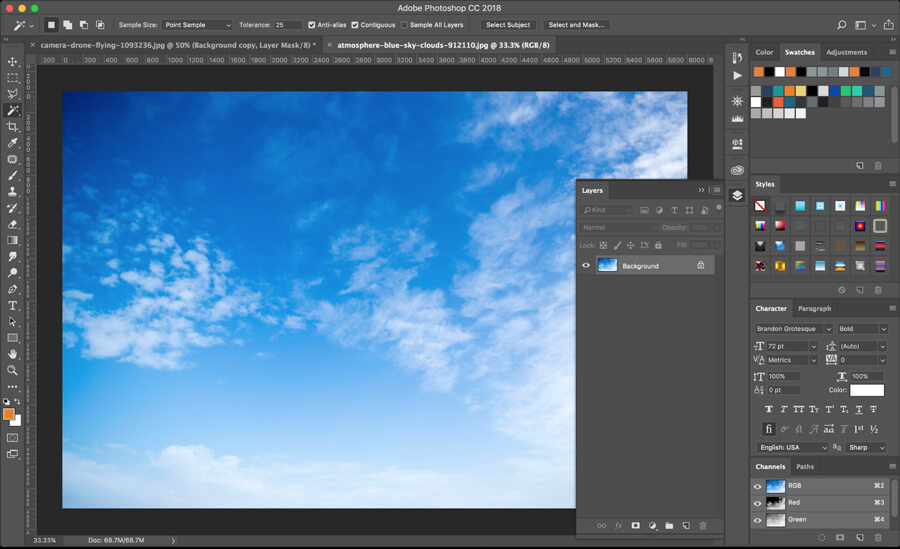
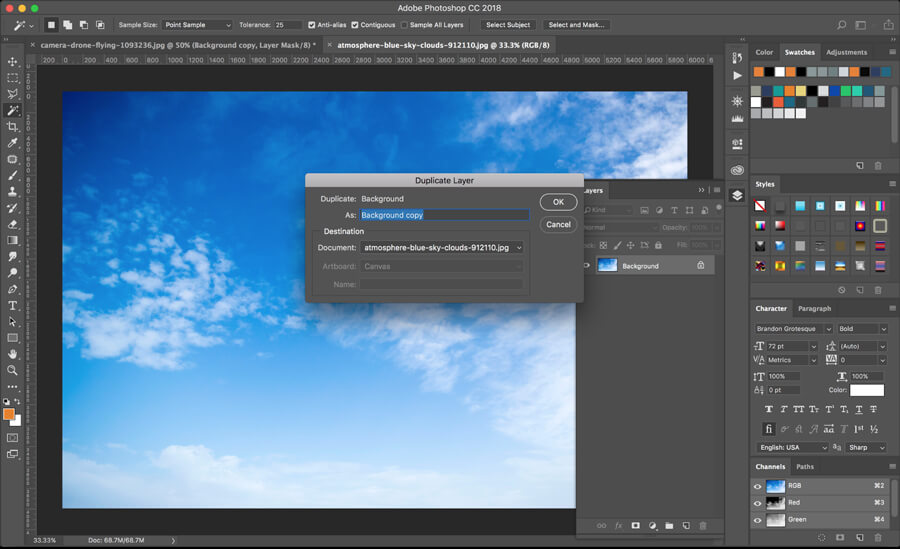
7. Layer your images
Click the right corner upper hand of your Layer palette and choose Duplicate Layer…
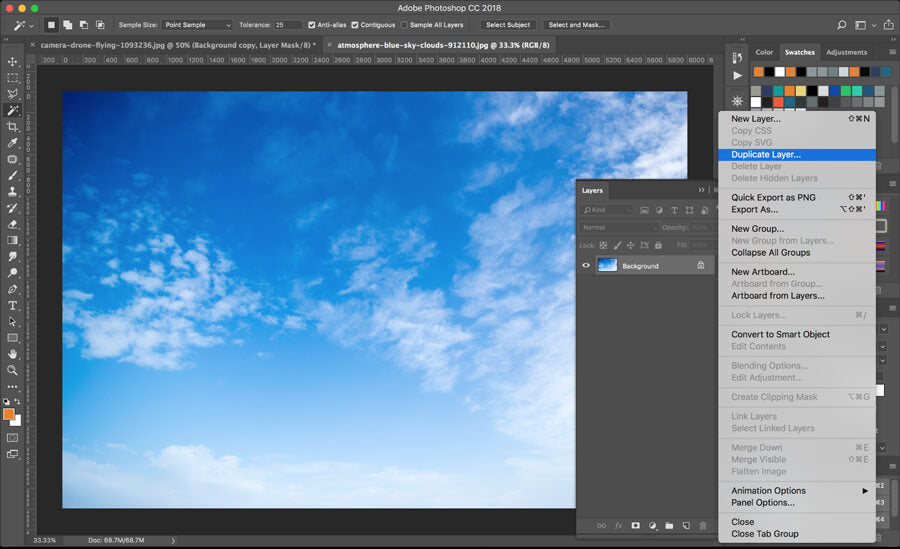
The Duplicate Layer dialog box will pop up. In Document, click the file name to expand your selection options. Choose the image of your product with the background removed. Then click OK.
Now, you want to move your product image layer so that it’s on top of your sky layer.
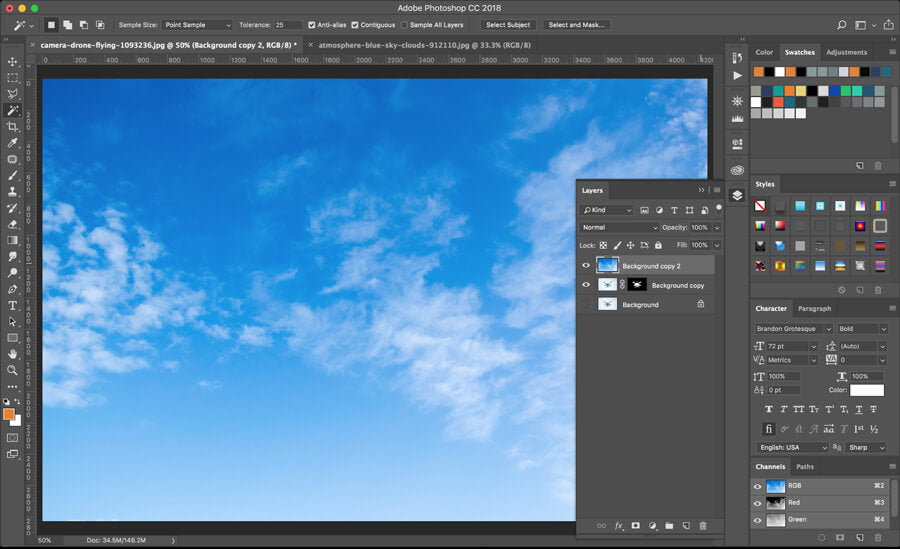
Pro tip: For a handy keyboard shortcut, hold CONTROL (or COMMAND on Mac) + the right bracket to move the sky layer down one so that it’s beneath your product layer.
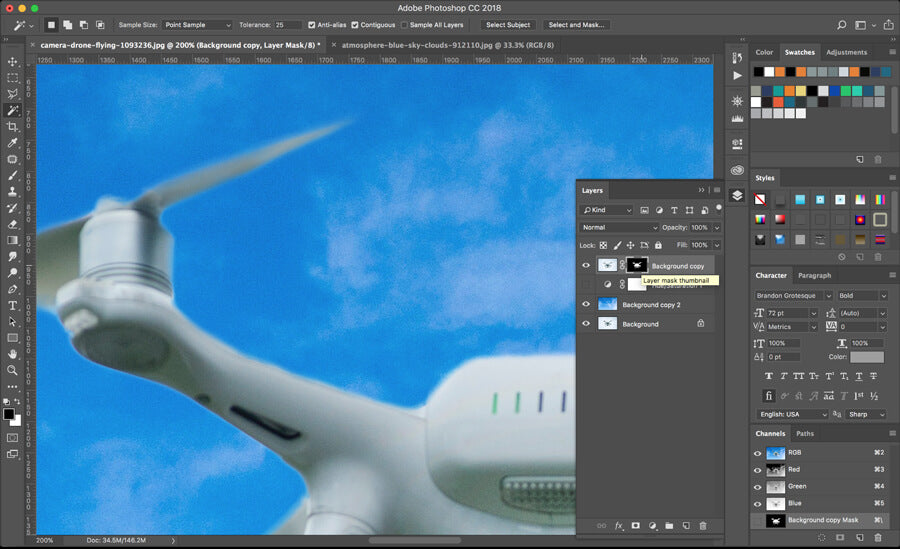
8. Fine tune your finished image
Your work’s not finished yet. Notice how the edges look a little unnatural? Now you can zoom in again and use the Brush tool to get rid of unwanted halo effects or blur that happen frequently on the edges. Use a Soft Round Brush to achieve a more natural effect.
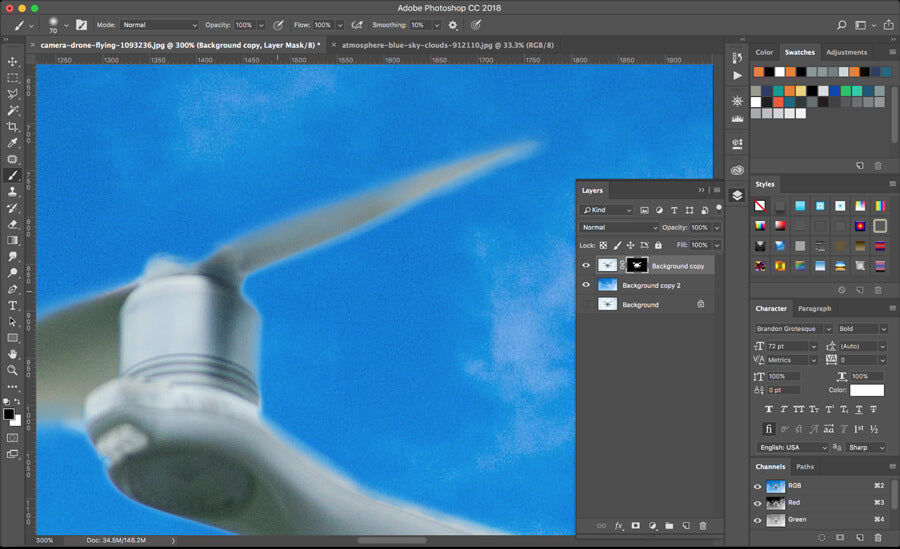
Remember: Make sure you’ve selected the mask thumbnail in your Layers dialog box and not the image, so that you preserve all your hard work.
How to Change the Sky Color in Photoshop CC18
Repurposing your product photos is one way to maximize your investment. If you want to create different images with various sky colors or brighten the blue of your sky (or even achieve a different hue of blue), you can learn how to change the sky color in Photoshop CC18.
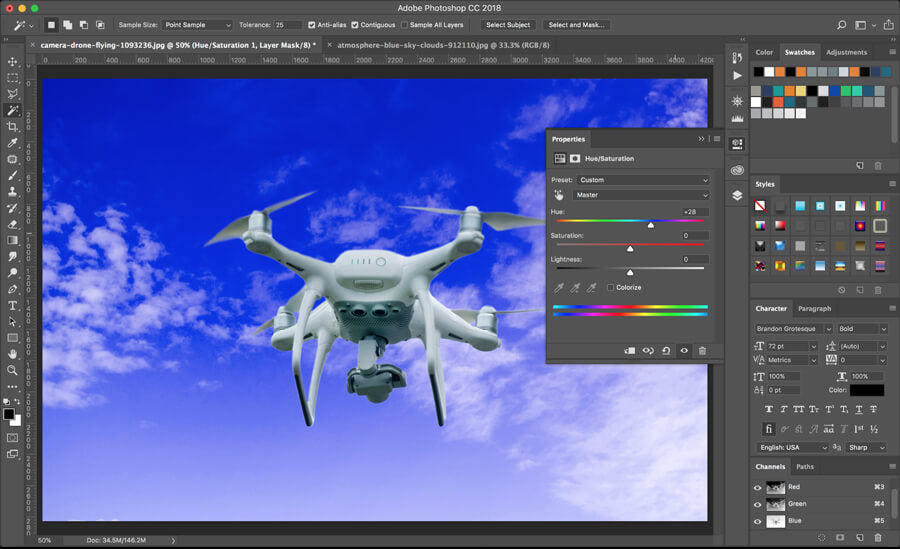
First, select the sky layer in your Layers dialog box. Then go to the Adjustment palette. Select Hue/Saturation…
Now, you’ll see the Properties panel. Change the Hue to the color you want. Increase the Saturation if you want rich, deep blue, and reduce it if you want a lighter, more grayed-out blue with less contrast.
How to Make the Sky Red in Photoshop CC18
You can also learn how to make the sky red in Photoshop CC18 — or other colors too. The steps are basically the same, regardless of which color you want your sky to be.
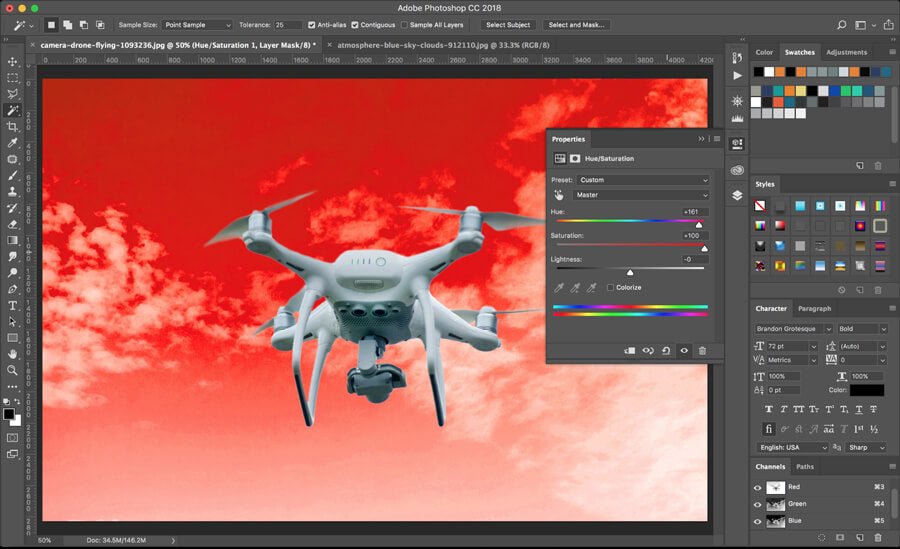
To make the sky red in Photoshop CC18, you’ll want to put the Hue slider all the way to the left or right — both have red hues, it just depends on which one you want. Then play with the Saturation; again, max it out for a deep and rich red sky or move the slider to the left for a subdued, grayer look.


![How to Remove the Background from Hair in Photoshop: A Tutorial [Updated 2024]](http://pathedits.com/cdn/shop/articles/1_How_remove_background_from_hair_in_photoshop.jpg?v=1626120888 "How to Remove the Background from Hair in Photoshop: A Tutorial [Updated 2024]")


