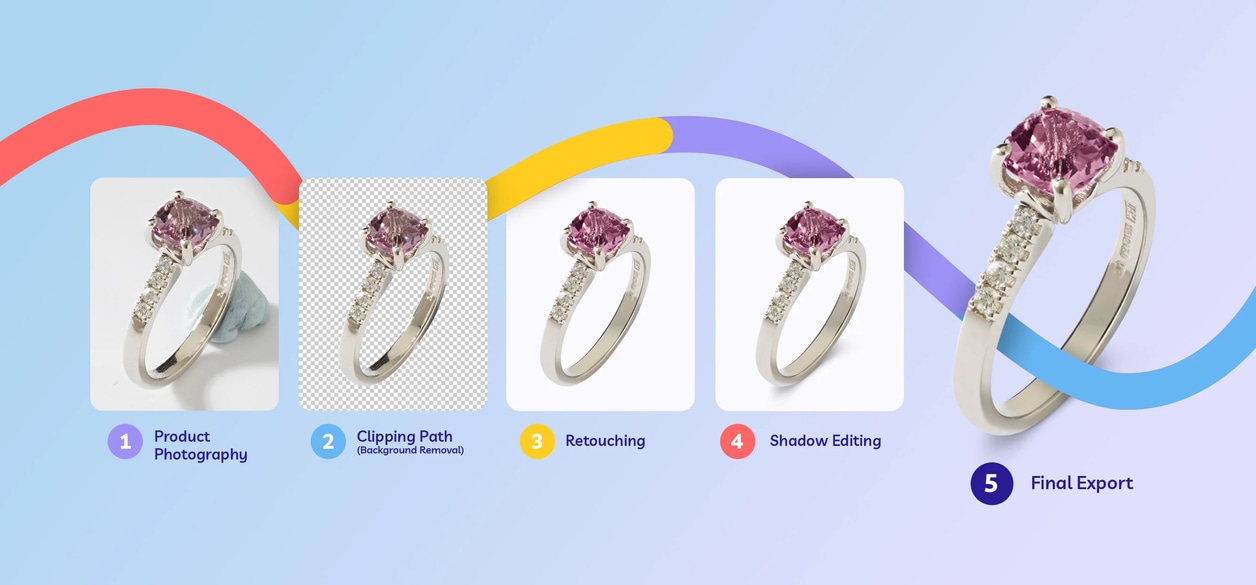
Creating professional product images isn’t just about using the right editing techniques – it’s about using them in the right order.
Many ecommerce businesses spend unnecessary time reworking images because their editing process isn’t structured. Backgrounds are removed after shadows are added, retouching happens too late or files are exported before quality checks are complete.
A clear editing workflow not only produces better-looking product images but also improves consistency, speeds up production and makes it easier to scale your catalogue as your business grows.
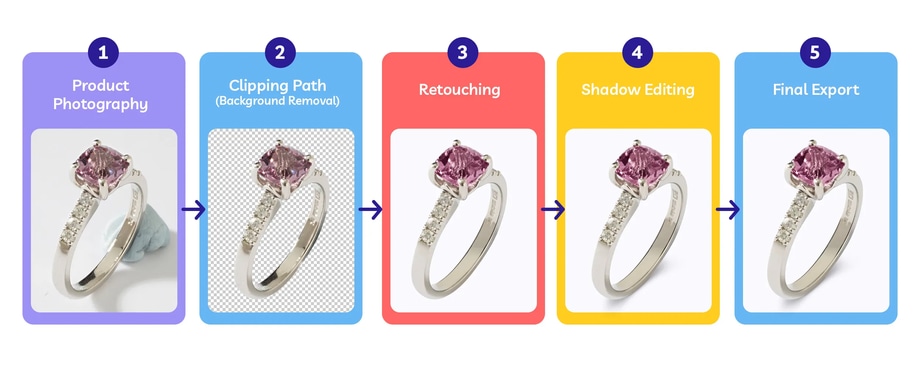
Alt text: Five-step ecommerce product photo editing workflow showing product photography, clipping path, retouching, shadow editing and final export.
In this guide, we’ll explain the five-step workflow professional editors use to create polished ecommerce product images, including when to remove the background and add a shadow for the best results.
Step 1: Start With High-Quality Product Photography
No amount of editing can completely fix poor photography.
Sharp focus, consistent lighting and accurate exposure provide the foundation for every successful product editing workflow.
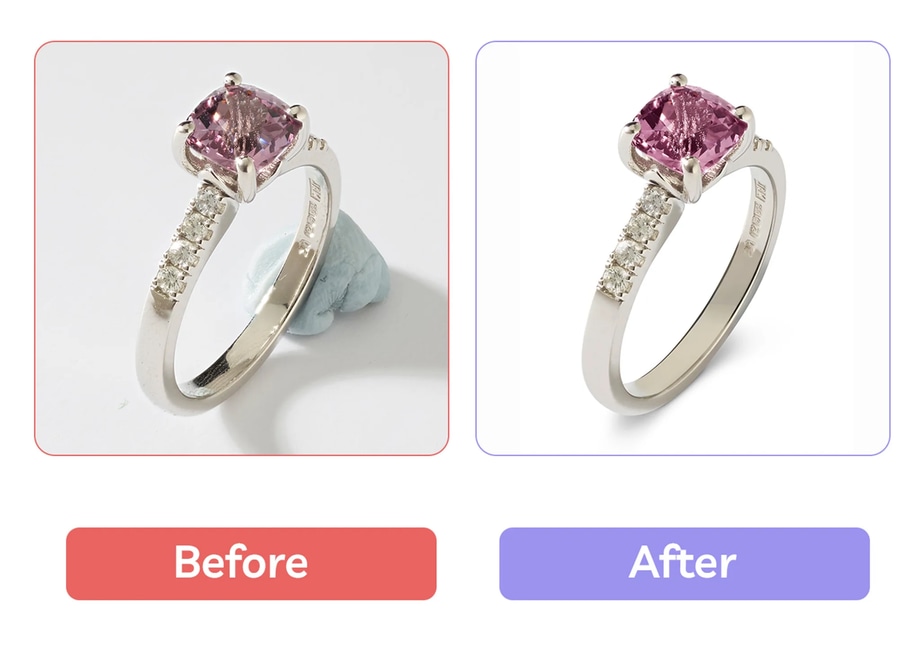
The more consistent your original images are, the easier it becomes to edit hundreds or thousands of products while maintaining the same professional standard.
Good photography reduces editing time and delivers more consistent results throughout the entire workflow.
Step 2: Remove the Background Using a Clipping Path
The next stage is creating a clean product cut-out.
A clipping path workflow removes distracting backgrounds while producing a precise outline around the product. This creates a clean foundation for every editing step that follows.
Removing the background first makes it much easier to apply realistic shadows, adjust colours and prepare images for different ecommerce marketplaces.
Starting with a clean clipping path also prevents unnecessary rework later in the process.
Step 3: Retouch and Perfect the Product
Once the background has been removed, the product itself should be refined.
This stage typically includes editing such as removing dust, scratches and fingerprints, correcting colour and exposure, improving contrast, cleaning up small imperfections, and straightening or aligning products where necessary.
The goal is to show the product at its best while keeping the final image accurate and believable.
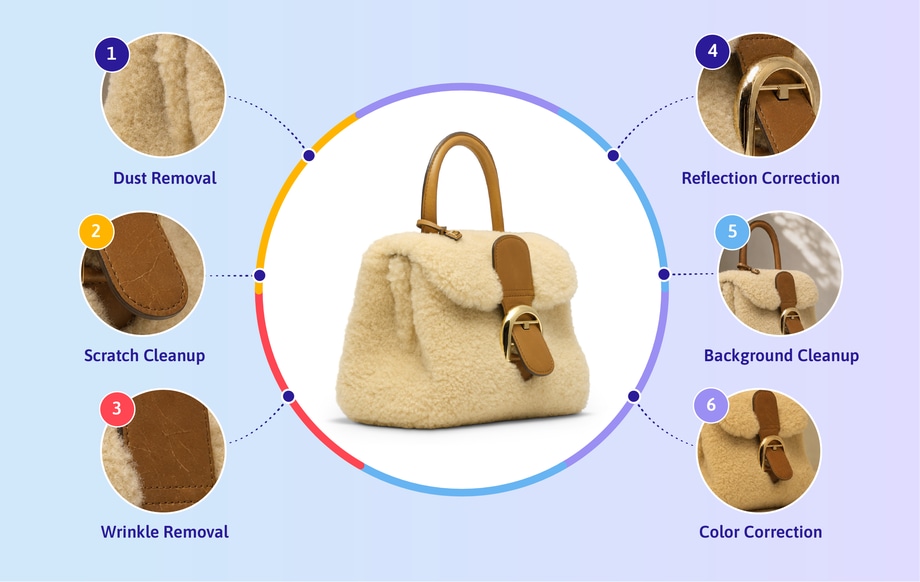
Completing these adjustments before shadow creation ensures the final image looks polished without affecting the realism of the finished shadow.
Step 4: Add Realistic Product Shadows
This is the stage where many people ask the same question: Should you remove the background or add the shadow first? The answer is simple. Always remove the background before adding a shadow.
Once the product has been accurately isolated and retouched, realistic shadows can be created to match the lighting, perspective and shape of the product.

Whether you’re using natural shadows, drop shadows or reflection shadows, creating them at this stage produces a cleaner, more consistent result than trying to edit around an existing background.
Professional editors almost always follow this remove background and add shadow workflow because it creates the most realistic finished image.
Step 5: Review and Export
Before publishing product images, carry out a final quality check.
Before exporting, check that every image has consistent shadow direction, accurate colours, clean product edges, correct image dimensions, marketplace-specific requirements, and onsistent file naming.
This final review helps ensure every product image meets the same professional standard before it goes live.

Common Product Editing Workflow Mistakes
Even experienced editors can waste time by completing tasks in the wrong order. Some of the most common mistakes include:
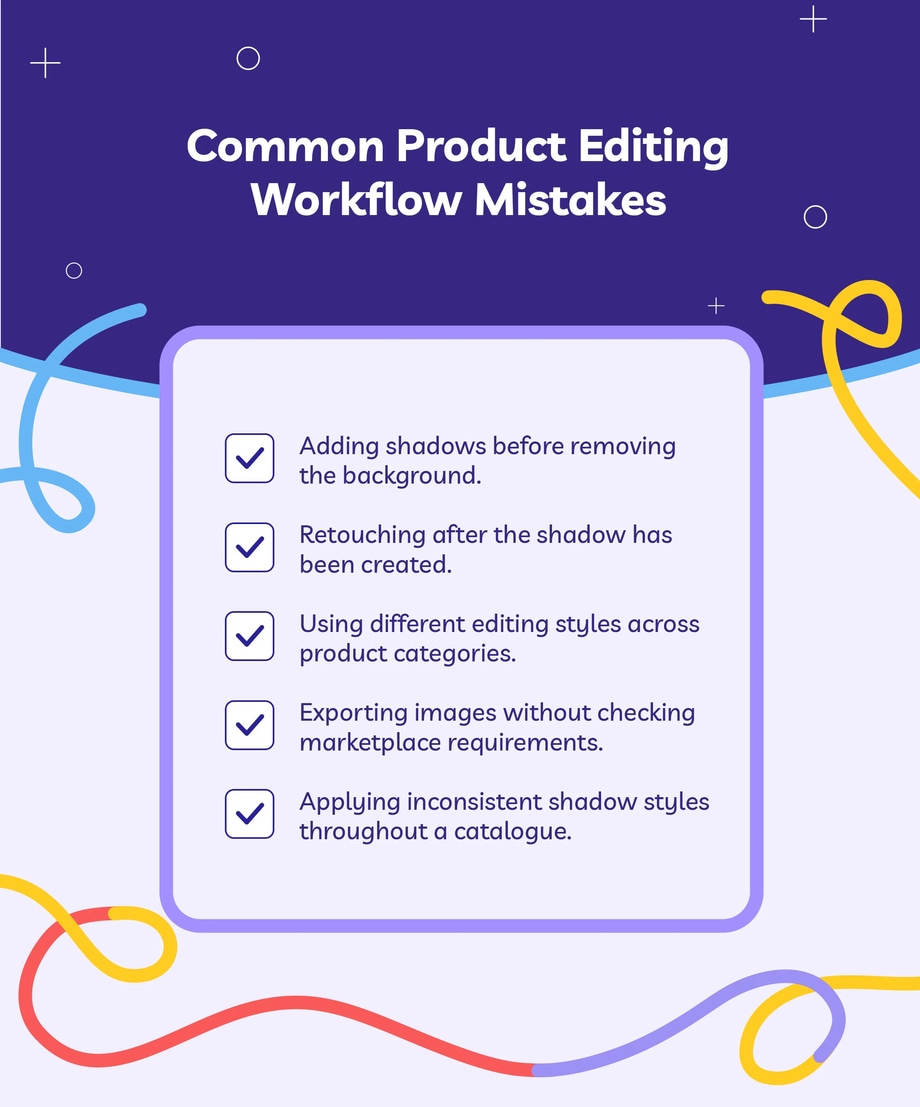
Avoiding these mistakes leads to cleaner images and a far more efficient editing process.
Why Following the Right Editing Workflow Matters
A structured editing workflow is about much more than saving time. It helps ecommerce businesses produce more consistent product images, reduce editing errors, maintain brand standards and scale their catalogues more efficiently as they grow.
Professional product photography isn’t created by one editing technique alone. It’s the result of a well-planned workflow where each stage builds on the one before it. By following a consistent clipping path workflow, removing the background before adding realistic shadows and carrying out final quality checks, you can create cleaner, more professional product images with greater speed and consistency.
Whether you edit product images in-house or work with a professional editing service, following the same workflow every time is one of the simplest ways to improve image quality, streamline production and create a more consistent shopping experience for your customers.